Access Ramp
Abstract
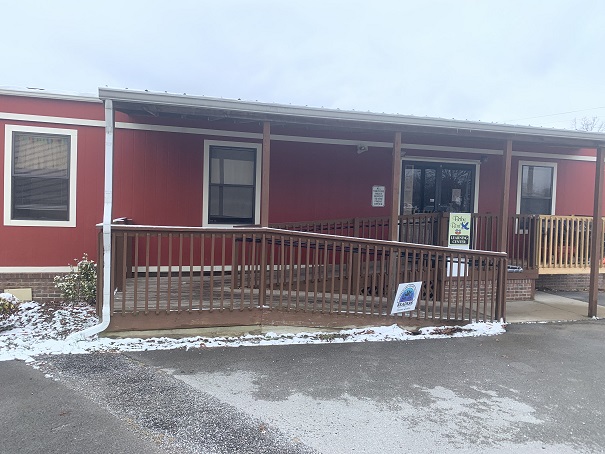
The purpose of this ramp is so students with disabilities will have easier access to the playground at the school. The current ramp forces them to walk into the parking lot as opposed to going straight to the playground. They would also like there to be stairs beside the ramp so that students are able to practice walking up and down stairs for practice.
Team members

- From left to right:
- Brady HuYoung, John Olin, Samuel Hester, Gabriel Alfaro
Problem Statement/overview of the need
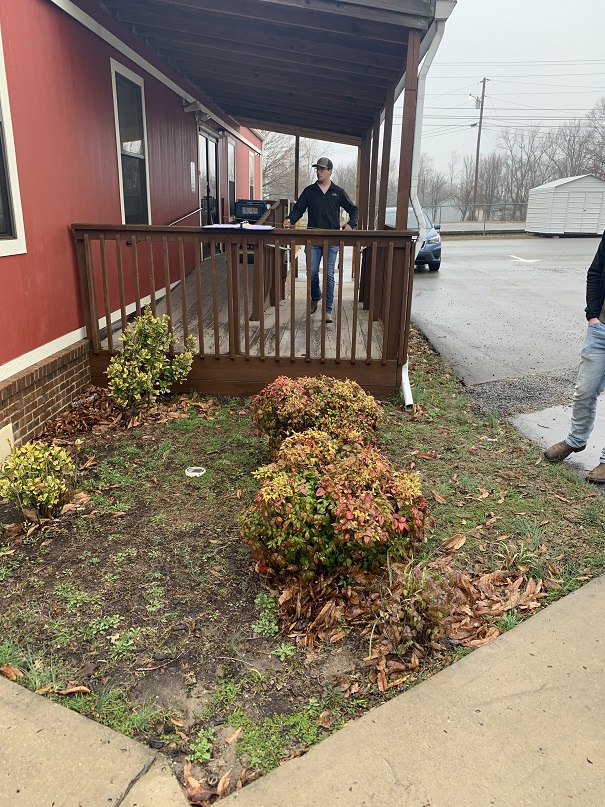
The design of the stairs and ramp are intended for younger children so we will cater the stair sizes to them. The ramp and stairs must abide by the codes of the building. The school itself must also present the design of the ramp to a board of the school that only meets once a month. Therefore, we must front load the design portion and evaluate the best fit for them early on in this process so they can present to the board as quickly as possible and we have enough time to build. Another problem we have considered is a septic drainage pipe in the center area where the ramp and stairs are to be built that we must avoid.
Design Specifications
- The design must have handrails on both sides of stairs
- The design must avoid a 5’x5’ septic clean out in the center of the area we are working with
- The design of the steps must be suitable for younger ages so we will be using a minimal amount of drop on each step
- The design will include concrete but we must dig below the top surface so we have enough working depth for our stairs and ramp.
Background research
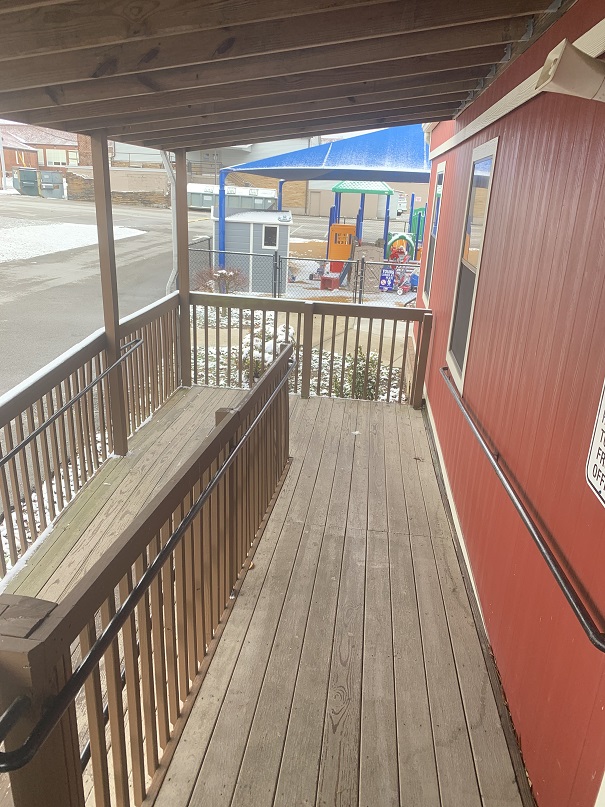
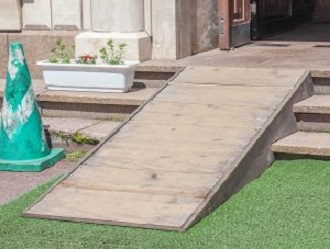
There is already an existing ramp at the school but it has a turn that forces the children to walk into the parking lot. We will be building an addition onto the existing ramp that eliminates the turn and will take them directly to the playground. There are multiple proposed solutions when it comes to a combination of ramps and stairs. The primary material we will use for both the ramp and stairs will be pressure treated wood. This gives us the best combination of durability and affordability. The most simple approach would be a simple ramp next to a set of stairs. However there were solutions that integrated building a ramp into steps. The constraints that prevent us from pursuing some of these approaches includes time, money, and simplicity for the sake of being able to easily use the ramp and stairs.
Conceptual Design
Our criteria for our conceptual design relied primarily on ease of use and meeting the school's predetermined expectations of what they wanted. Our initial idea was what the school had in mind which was the ramp built alongside the stairs. After further research we found other creative ways to reach the same outcome which include the approach that embeds the ramp within the stairs.
Design Concept 1
Stairs on the Left with Ramp on the right
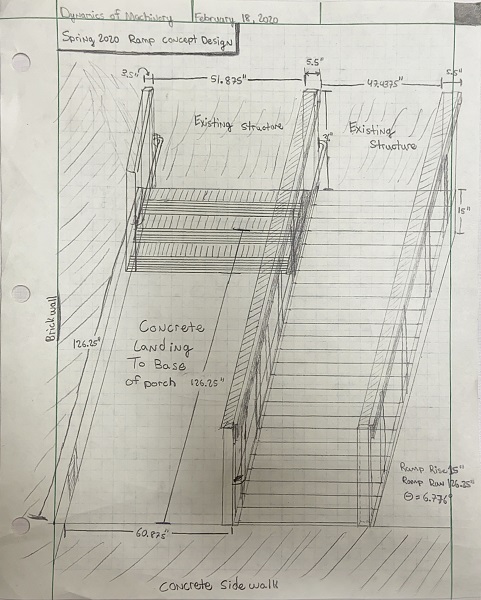
- Description
The school already has an existing landing at the top of the stairs. We are planning to take down the old ramp, and instead build a ramp and stairs combination that is better suited for that space.
Design Concept 2
Stairs span all concrete landing with hinged ramp
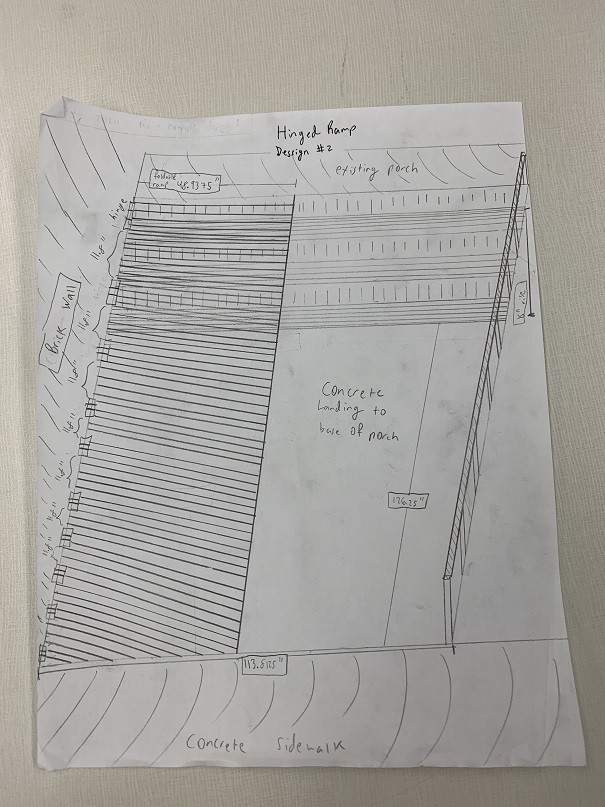
- Description
The school already has an existing landing at the top of the stairs. We want the stairs to span from the building to the parking lot edge. We also want to attach hinges to the side of the building and to a ramp that can be folded on top of the stairs. That way ramp can be folded down or stored vertically against the building.
Design Concept 3
Stairs span all concrete landing with movable ramp
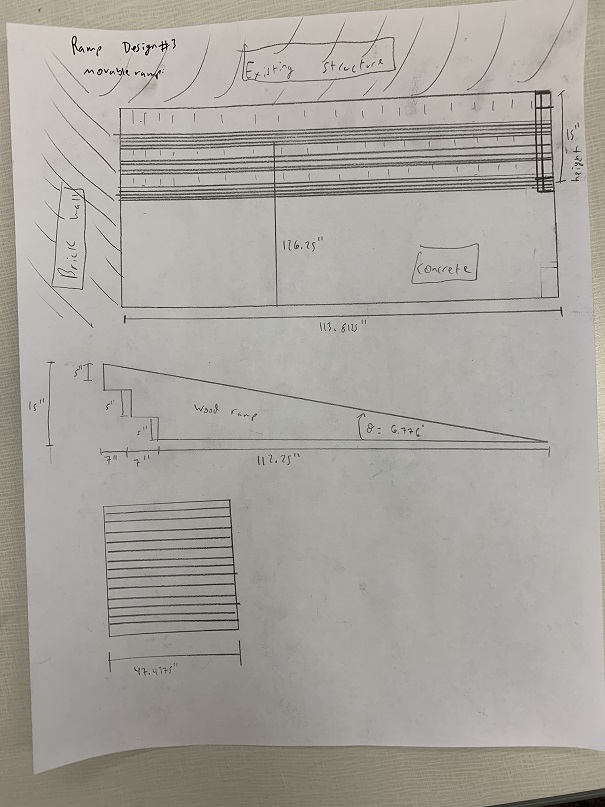
- Description
The school already has an existing landing at the top of the stairs. We want the stairs to span from the building to the parking lot edge. We also want to build a movable ramp that can be placed on top of the stairs.
Evaluate concepts/select candidate
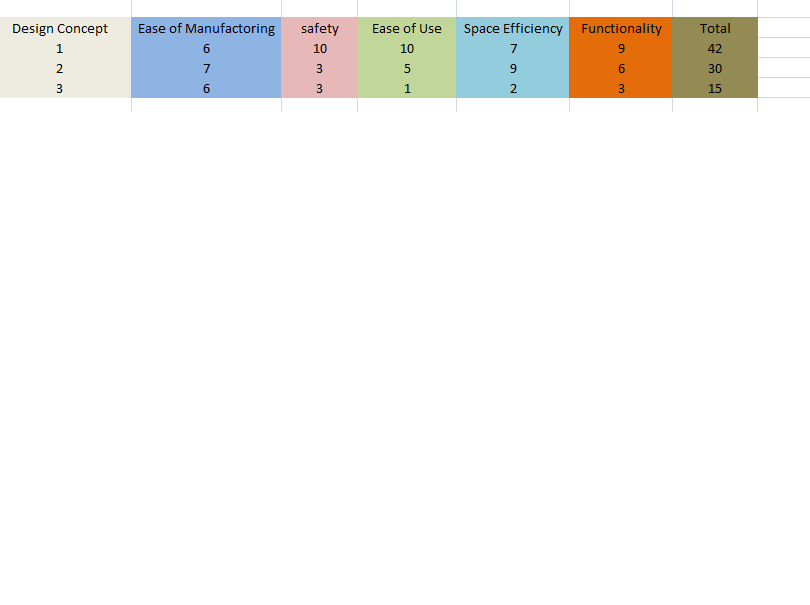
- Description
After looking at the results, we decided to go for our design concept 1.
Detailed Design
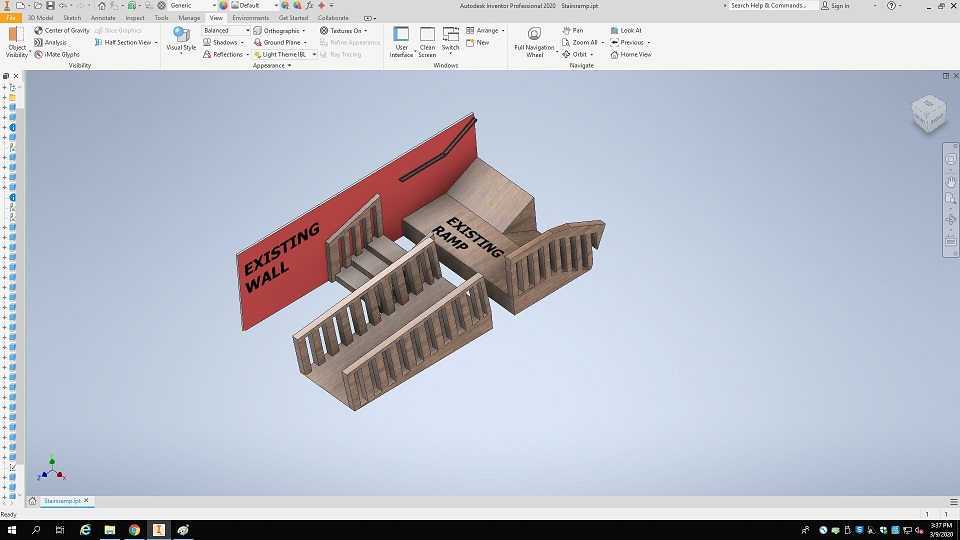
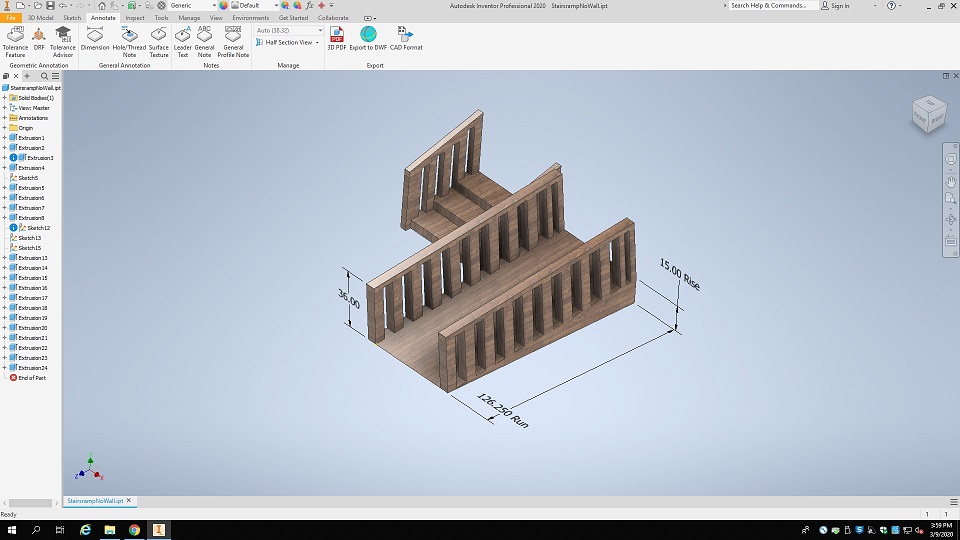
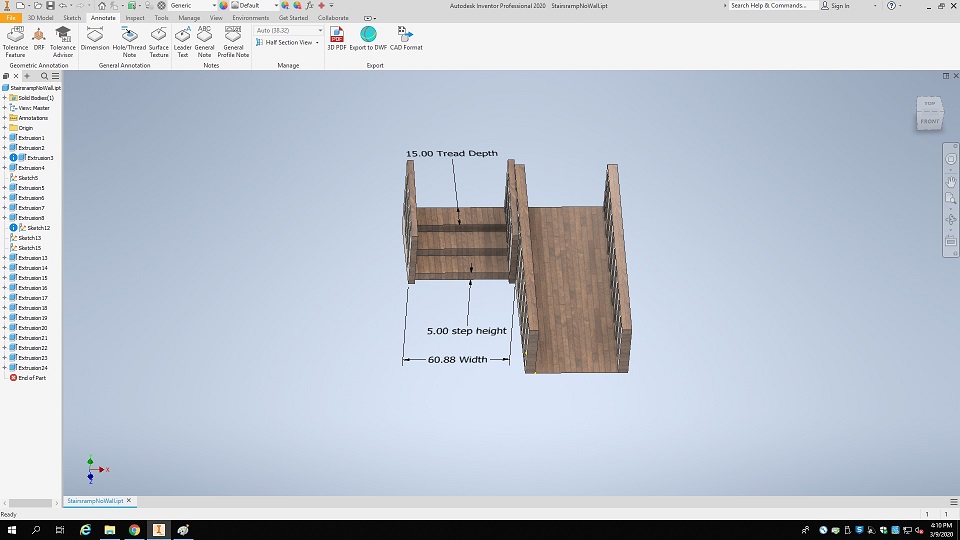
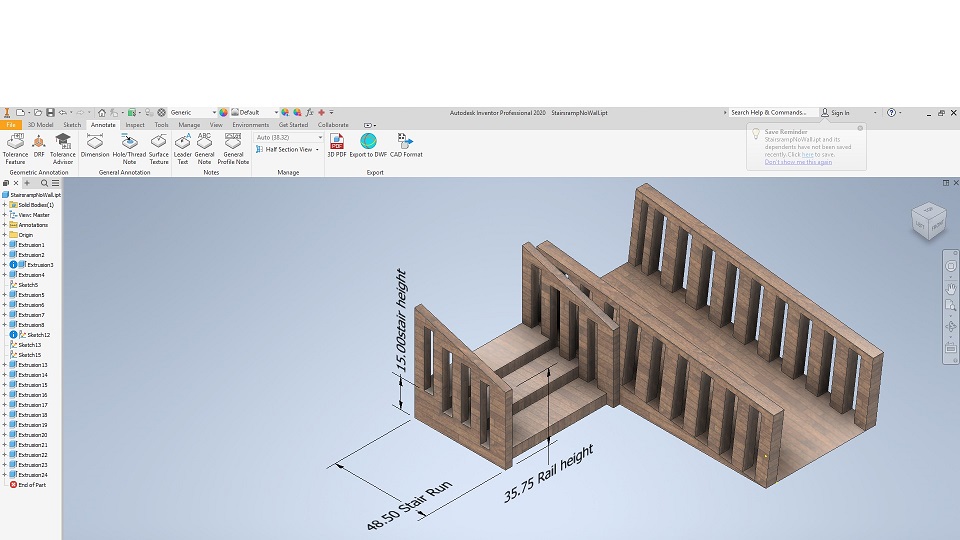
For this design, we chose to put the stairs on the side next to the building with three steps due to the limited depth we have and not wanting to go over the water septic clean out. We believed this design would give the school the most ease of use out of all of the designs. Alongside the stairs will be a ramp that extends to the concrete pad with a rise and run that abides by the building code.
Description of selected design
The ramp, stairs, and handrails will be made out of pressure treated wood. This will be durable and allow extended use but also be cost efficient. Considering the stairs are 60.875 inches wide we decided to put a support in the middle of the stairs so it will be more strong structurally. There will also be handrails on both sides of the stairs.
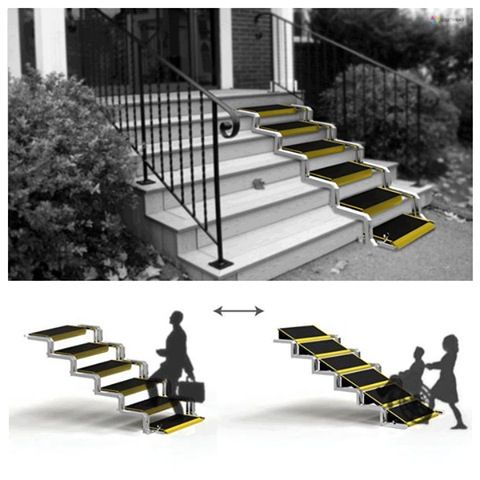
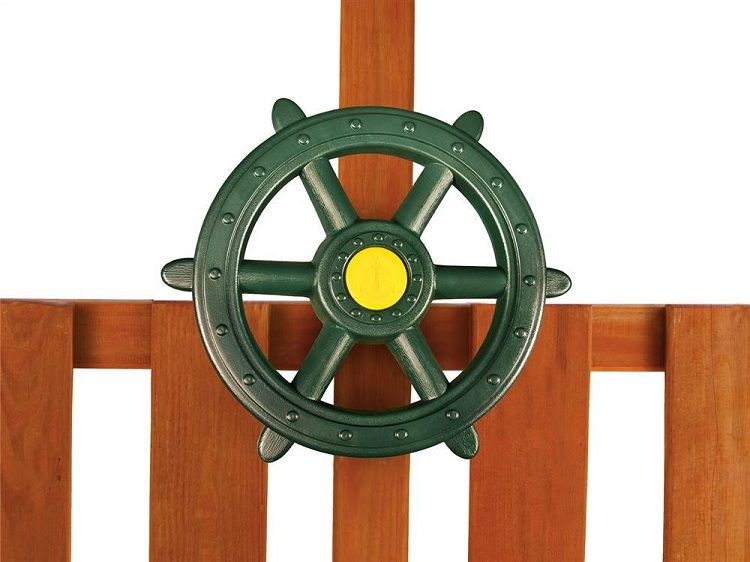
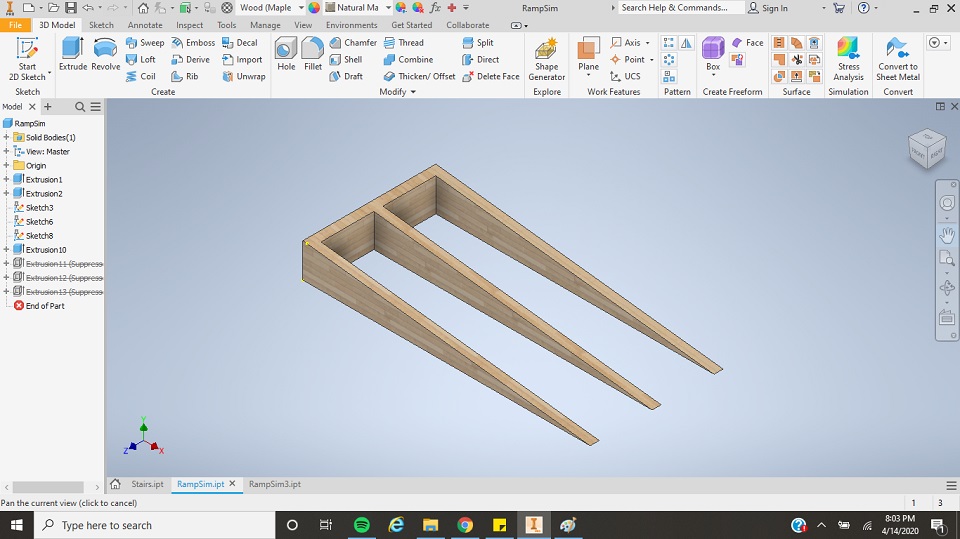
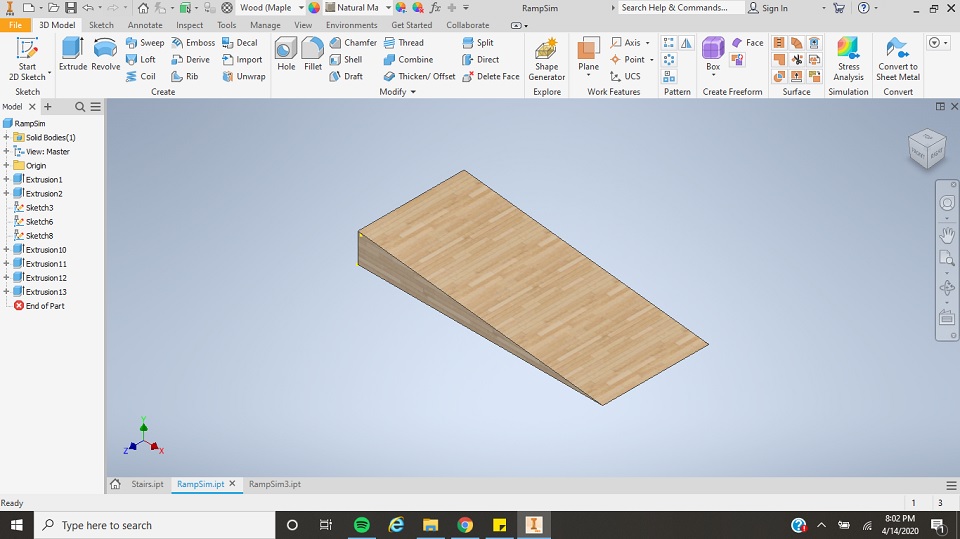
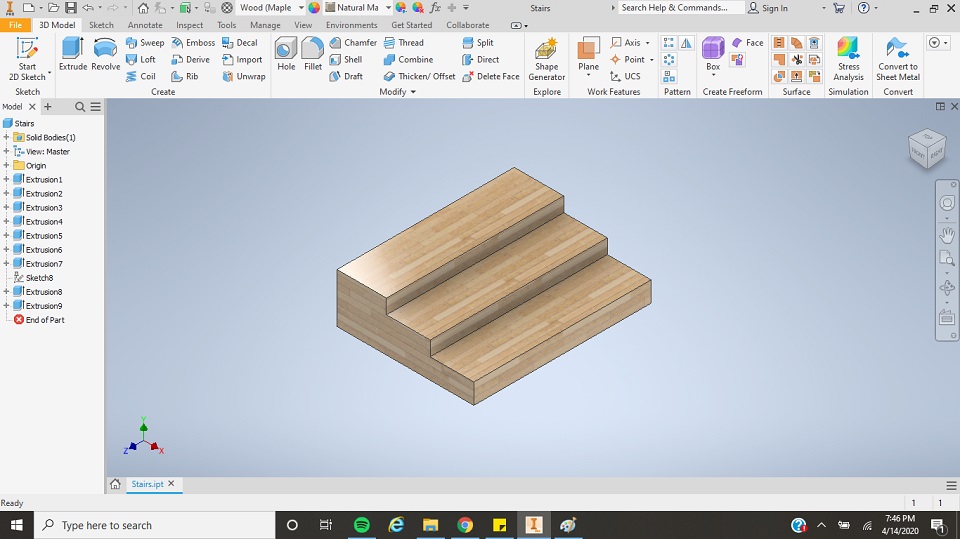
We are also wanting to make the ramp and stair set up interactive. We have been researching some design ideas and these are some pictures of the ideas we might use in our ramp design.


Detailed description of selected design
Analysis
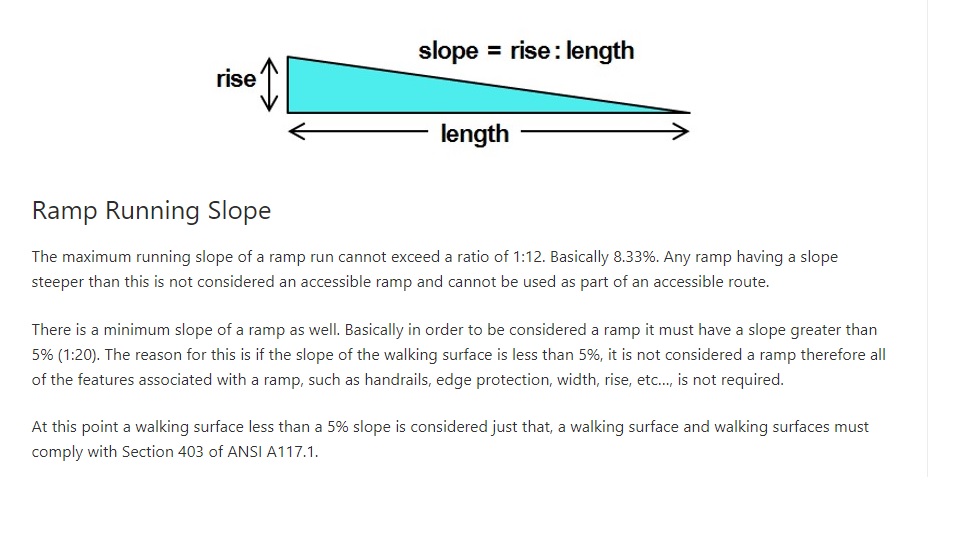
We chose to analyze our design by safety/liability. We have been reading building codes and deciding on the the safest way to build this ramp. We do not have any spacial or building problems with the stairs. Though our ramp is being built in a small "run" area for it. Since we have a limited building space we have decided to use the same the slope of the pre-existing ramp. Our goal is to have a mirror image of the pre-existing ramp to make it safe for anybody tat will be going up and down the ramp.
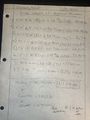
Engineering analysis 1
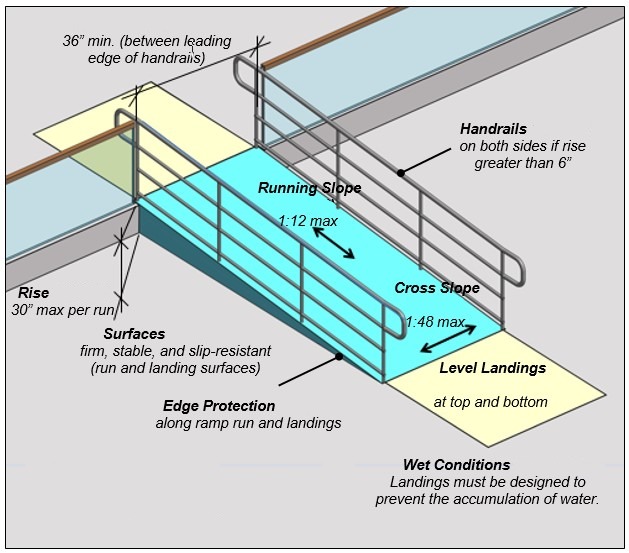
The way we ensured we had the most safety and liability was to follow the basic codes and guidelines for building ramps and stairs. We even took further measures on the stairs that was not required for stairs but we felt was necessary by placing a support in the middle/underneath of the stairs so it will have overall better strength. The codes we chose to follow are pictured below and were taken from the International Buildings Code.
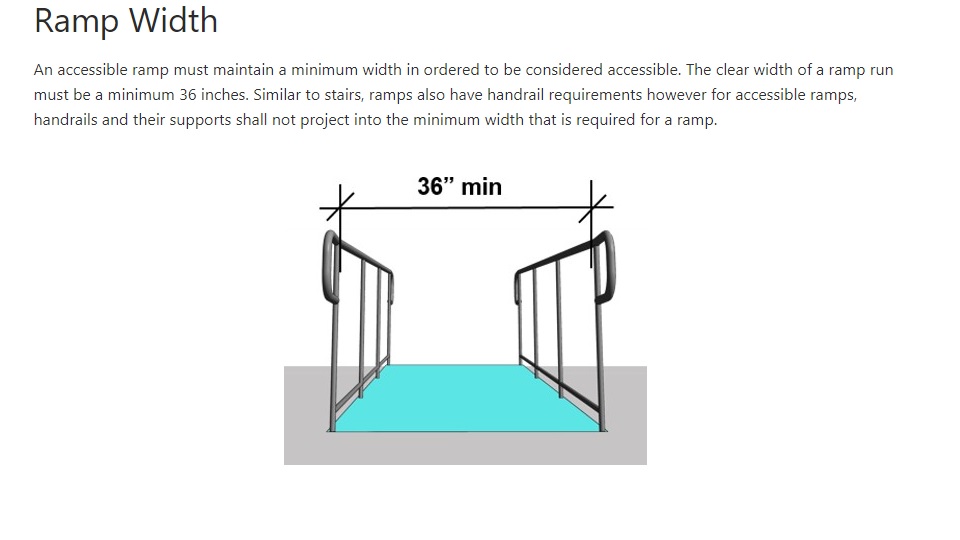
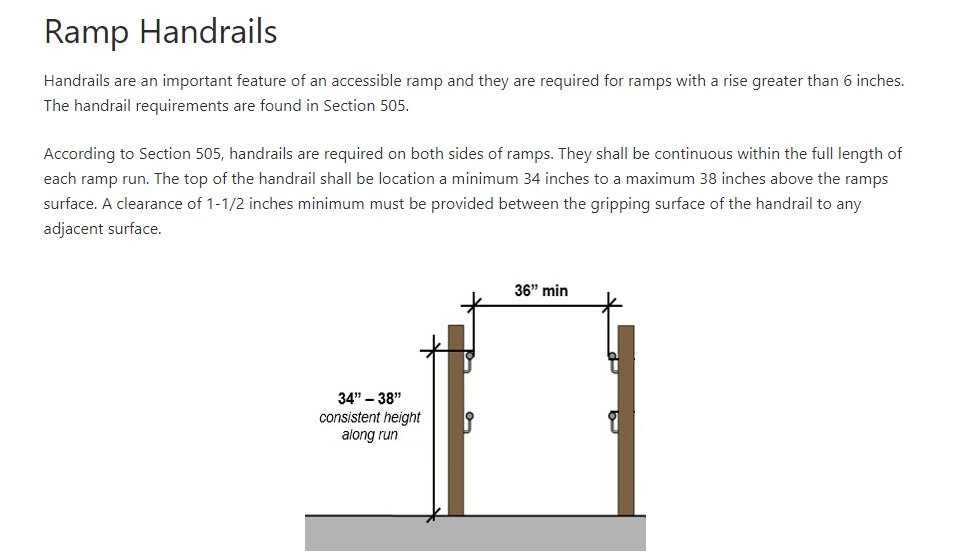
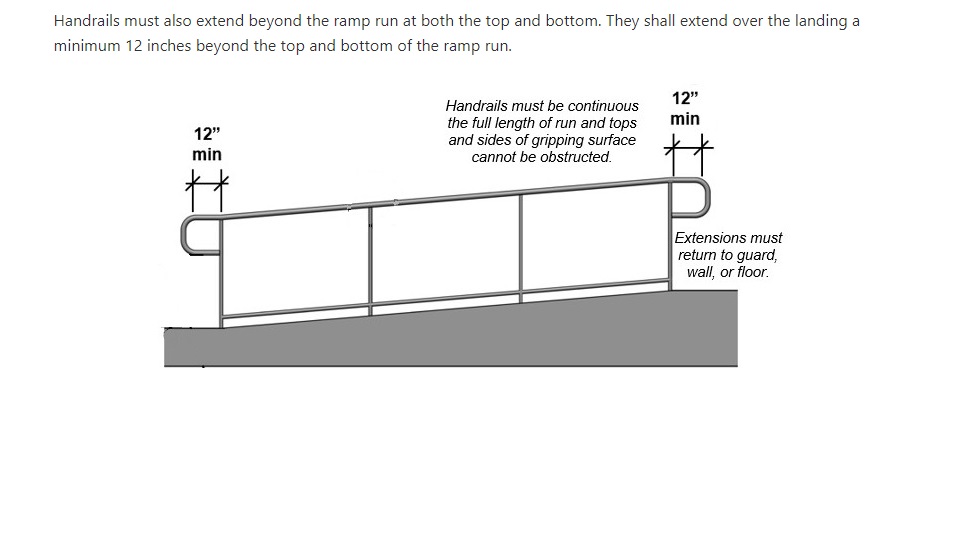
- According to https://buildingcodetrainer.com/accessible-ramp-code-requirements-explained/
- Ramp Building Codes:
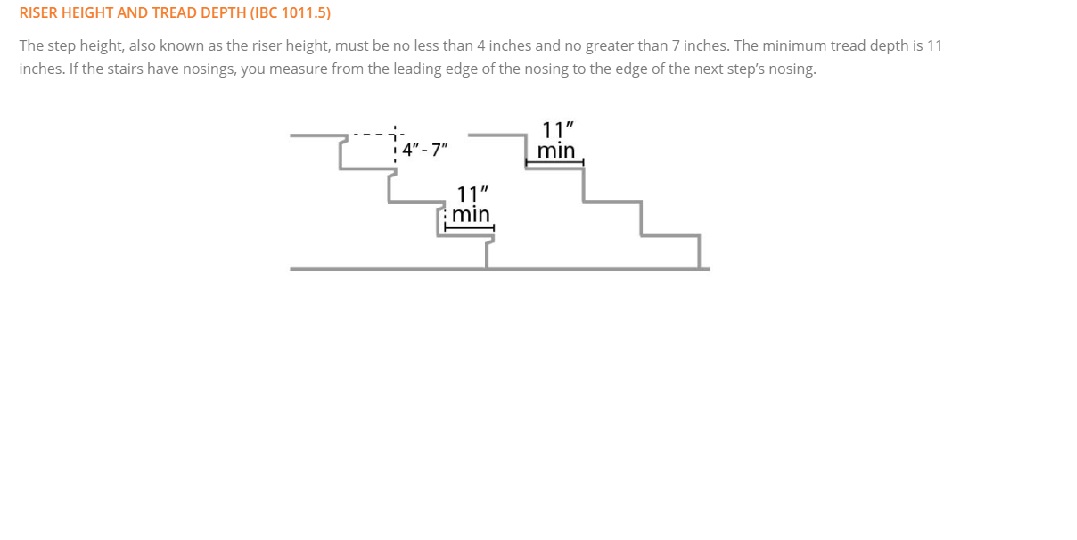
- According to https://upsideinnovations.com/ibc-stairs-code/
- Stairs Building Codes:
Engineering analysis 2
Loading Analysis of Wood
Gross Weight Analysis
Engineering analysis 3

Technical Testing of Trex Boards

Part 2
CAD Drawings

Bill of Materials

Assembly Instructions
Ramp Fabrication: We first have to bury and pour concrete around the support posts. These are located at the side of the ramp. Once these are in place we set the side and center stringer. 2x4 are placed perpendicular to the stringers to create the ramp surface. Then a material with high coefficient of friction is placed to avoid any sliding on surface.
Stairs Fabrication: first we bury some support post for the stairs. We have 3 stringers for our steps. Two running around the side and one down the center. We then place 2x4s perpendicular to the stringers to create the surface for the stairs. These are then coated with a material with high coefficient of friction.

Fabrication Process
Insert pictures of fabrication process
Testing and implementation
Describe testing, delivery, how used/received by the family
Photos of Completed design
Insert pictures of the final product
Instructions for safe use
Provide a clear summary of safe use for the family. Do not use the device unless supervised by an adult that has been fully understood the safe use of this product.
Project Summary, Reflection
FUTURE DOM STUDENTS Because of the COVID-19 Pandemic we were not able to build the ramp and stairs. Moving forward with this project, our group recommends that the next group that takes on this project understands that the school requires a design of the ramp and stairs early in order to get it approved by a board. The board only meats once a month and its typically at the end of the month. To have your designs approved we highly recommend to complete the preliminary designs and final CAD drawing as early as possible. This will allow the team extra time to build. It will also be the third time the school has worked with a group so they are due for a finished product. We also recommend to take full measurements of the existing ramp and ramp parts like landings, hand rails and width. Also measure height and run of existing ramp to determine the slope. Another tip is to fully measure the surrounding areas around the ramp. We highly suggest to read through and fully understand building codes for this area before drawings and designing your preliminary and final designs. We ran with some code issues and had to talk to our professor and also discuss them in our group. We realized we did not have the rise to run 1:20 ratio, so we decided to match the slope of the pre-existing ramp. This would make it easier to walk up and down the stairs. We also discussed how the school wants to place a fence between the parking lot and building area, this would mean that our ramp would not be an access ramp. Thus because of this we do not have to follow codes. At the end we decided to match the pre-existing slope since some kids have disabilities and it would make it harder on them if the two ramps were of different slopes. We also took into account the fact that the building has a septic clean out and crawl space. Because of this we had to place our ramp on the right side and stairs next to the building. If we placed the ramp next to the building wall it would cover booth the septic clean out and crawl space. If you run into any design problems read the codes, and if you cannot meet the requirements discuss it as a group and present the ideas to your instructor to decide the best solution to a building problem.