Adapted Y-bike
Abstract
A young child suffering from scoliosis and low muscle tone uses a y-bike to help with mobility and building strength but has outgrown the device.
Team members
Screaming Eagles:
From left to right: Blake Yancey, Cole Stovall, Cole Hogan, Nick Roth, Tanner Burke
Problem Statement/overview of the need
- The child depends on the y-bike to assist with mobility but is outgrowing the device. Other products have been reviewed but are a too large, bulky, and intimidating. Our goal is to build a device that assists in mobility while still being kid friendly.
Design Specifications
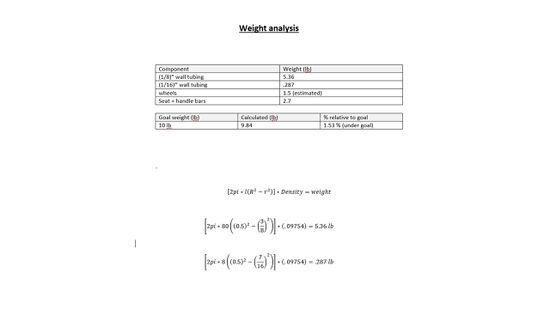
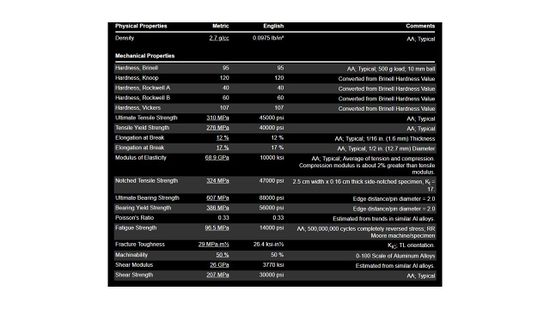
- Weight: we need to remain as light as possible
- Extending: would be good if the device could “grow” as the child grows
- Does not need to be collapsible, device will be small enough for travel
- Low to Mid back Support is needed for child’s stability
- Padded/cushioned seat
- Attachable push/pull bar for parent to have control when needed
- Interchangeable Wheels (indoor/outdoor use)
Background research
-
- Wheel chair- big, clunky, intimidating to other children
- Gate Trainer- Isolates child, appears intimidating to other children
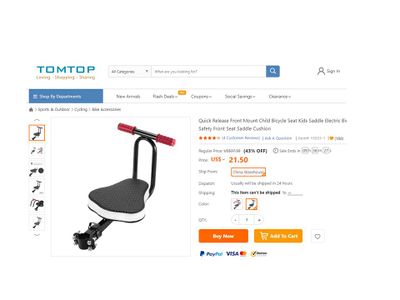
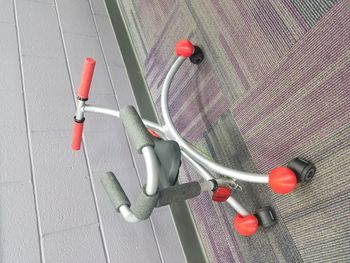
- Y-Bike- there are no sizes available for a child of this size
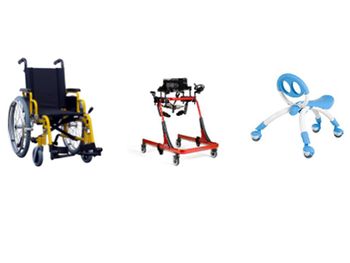
- These products are readily available for purchase with the Y-Bike being the most popular
- The parents of the child want her to use her legs to propel herself and the Y-Bike is the best option of the above three for that. It is also the most pleasing aesthetically. However, the parents would like the new bike to be even more kid friendly with aesthetics so that friends of the child are not intimidated by the adapted bike, which is a major issue with the gate trainer.
Conceptual Design
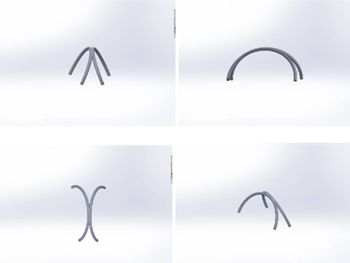
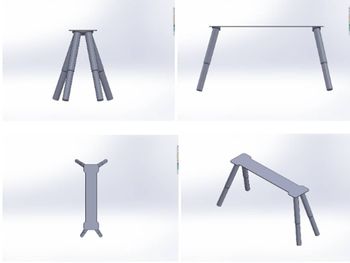
Design 1: Semicircle Design
- Two pieces of tubing bent into half circles are attached together at an angle to provide the legs and frame of the device. The wheels and seat are attached to the tubes.
- Pros: Simple build, no extra pieces, looks child friendly, strong joints improve durability
- Cons: Requires adjustable seat height to adapt to child's changing size
Design 2: Attachable legs at the Frame
- A simple frame is built and the legs are made to be attachable at the base of the frame.
- Pros: Can be taken apart, easily adaptable, adapting mechanism reduces overall weight
- Cons: There will be multiple pieces, legs will possibly have more complicated bends
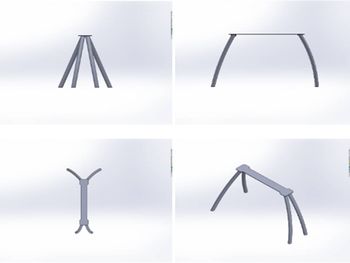
Design 3: Extending Legs
- All legs have a telescoping portion to allow them to extend. The tubing has no bends in it.
- Pros: Extends for child's growth, simple geometry allows for simpler construction.
- Cons: Does not look as child friendly, extending legs adds to overall weight, telescoping legs allow for undesired degrees of motion.
Evaluate concepts/select candidate
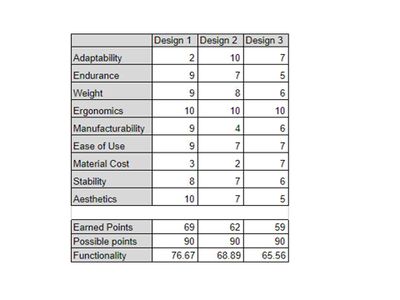
- We concluded Design 1 is the best option
Detailed Design
Description of selected design
- Two pieces of tubing bent into half circles are attached together at an angle to provide the legs and frame of the device. The wheels and seat are attached to the tubes.
Detailed description of selected design
- The semicircle design is elegant and simple. Though the semicircle design has complex aspects (small surface connection at top of frame, twisted leg geometry, etc.) it will be the most robust and more importantly, the safest design. Similar to the originally purchased y-bike, our design has very few sharp edges or corners to harm a child. A critical component of this project is the aesthetic. It is necessary that the device look friendly and approachable so our client can most easily interact with other children. The semicircle design looks the least like typical medical equipment, is the lightest, and contains the fewest parts. As these are our most critical design features, the "semi-circle" bike is clearly the best solution to the proposed problem.
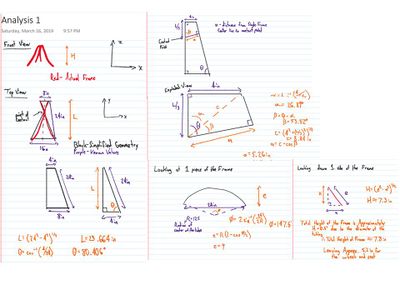
Analysis
Engineering analysis 1
Engineering analysis 2
Engineering analysis 3

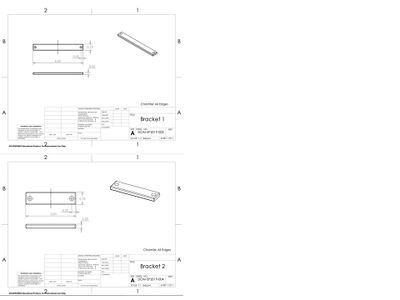
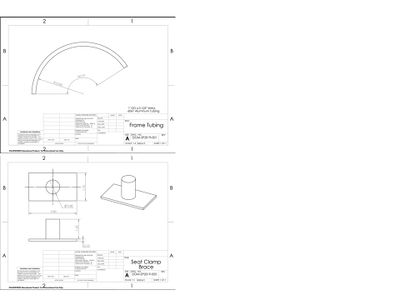
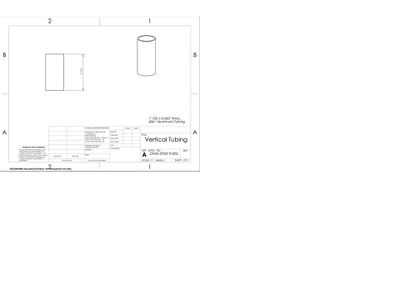
CAD Drawings
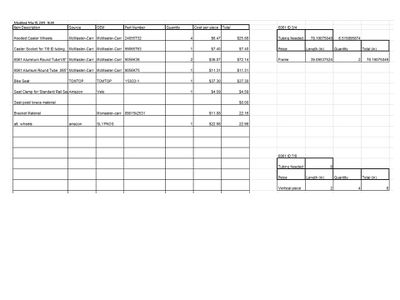
Bill of Materials
Assembly Instructions
No initial assembly is required. A spare wheel cap is included and is a simple press fit construction. The seat height is adjusted by a T-pin.
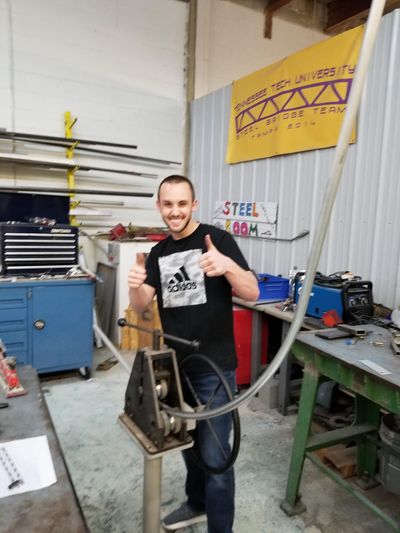
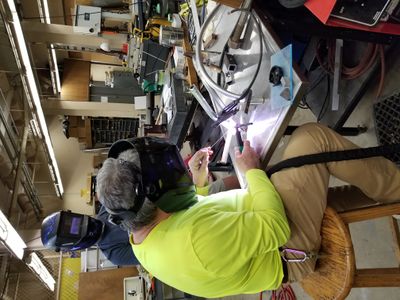
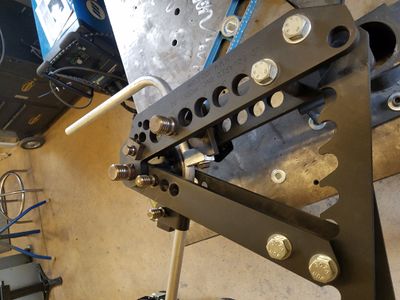
Fabrication Process
Testing and implementation
Describe testing, delivery, how used/received by the family
Photos of Completed design
Instructions for safe use
Safe use of this custom Y-Bike does not differ from the original Y-Bike instructions. No special instructions are needed for safe operation of the Y-Bike. Do not use the device unless supervised by an adult that has been fully understood the safe use of this product.
Project Summary, Reflection
Designing and manufacturing this Y-Bike has been challenging and rewarding. This has been the first meaningful project we have been a part of in our degree program. We learned that bending aluminum is an art, powder coating kills tolerances, and it doesn't hurt to know a good welder on campus.