Adapted scooter S15
Abstract
Design or adapt a motorized electric scooter to assist with mobility for a girl with special needs
Team members

- Matt Light
- Andrew Gordy
- Zachary Rose
- Seth Singleton
- Fahad Alnakaza
Problem Statement/overview of need
An 8th grade girl at a local school experiences fatigue during her daily routine due to issues within her nervous system. During a normal day she finds it difficult to keep up with her peers from class to class or during any prolonged physical activity. Because of this her parents feel she could make use of a motorized scooter to help her get around. We would need to build something that she could use throughout her high school career and beyond.
Design Specifications
- Lightweight (Light enough to be operated by our client)
- Able to be transported in a an average vehicle
- Compact for use in busy school hallway
- Stable base for maximum balance with little input
- Outdoor usability
Background research
Existing Scooters/Availabilty
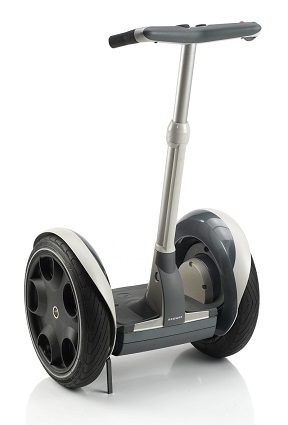
There are many mobility scooters available today. Customers today can choose from the very popular Segway scooter.
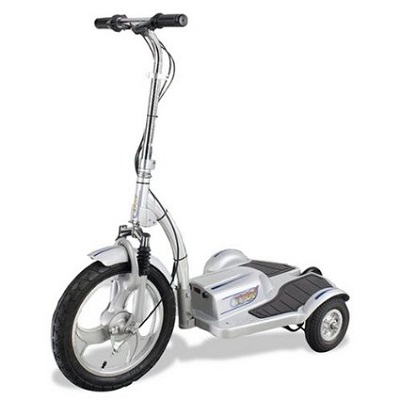
To the very simple Zappy 3 wheel electric scooter.
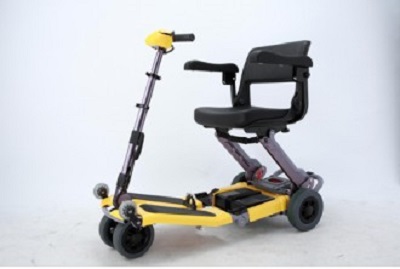
There are also collapsible lightweight options out there such as the Luggie Travel Scooter
Issues with available scooters
- Heavy weight designs
- Not compact or portable
- Little to no storage compartment
- Unable to handle outdoor terrain
- High in cost
- Concerns with stability
Conceptual Design
Summarize your conceptual design process. Develop at least three concepts.
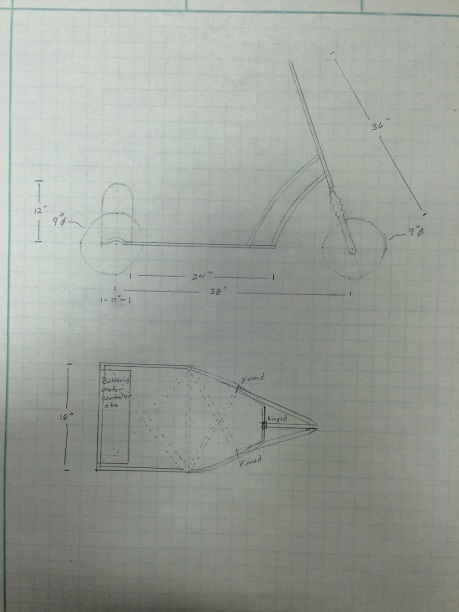
Design Concept 1
- Three wheeled electric scooter
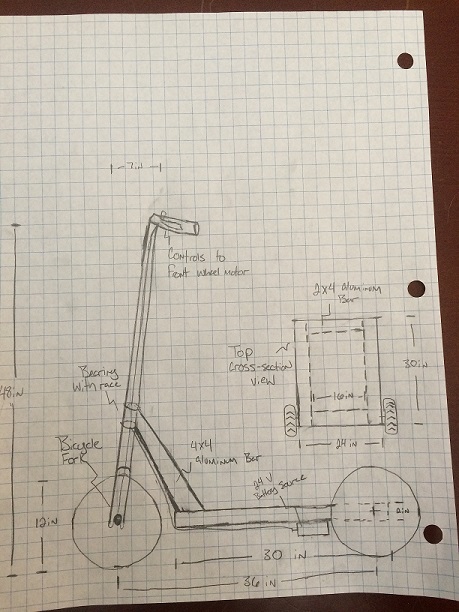
- All aluminum design
- Front wheel powered motor
- Wide flat base for stability
Design Concept 2
- Three wheeled, rear wheel powered scooter
- Compact Aluminum Frame
- Collapsible/Folding handle bar
- Detachable seat
Design Concept 3
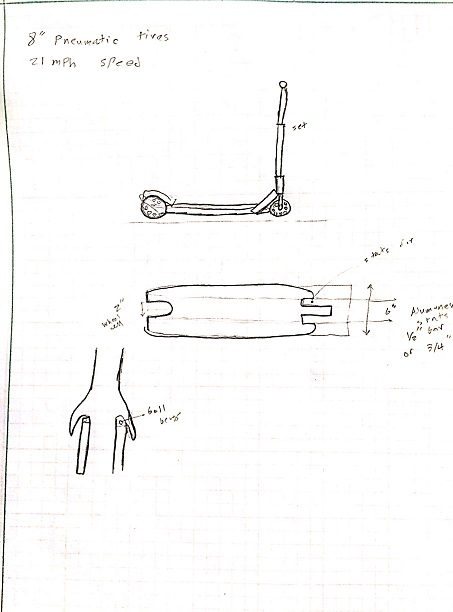
- three 8" pneumatic tires
- hand operated rear brake
- all steel frame and fork
Design Concept 4
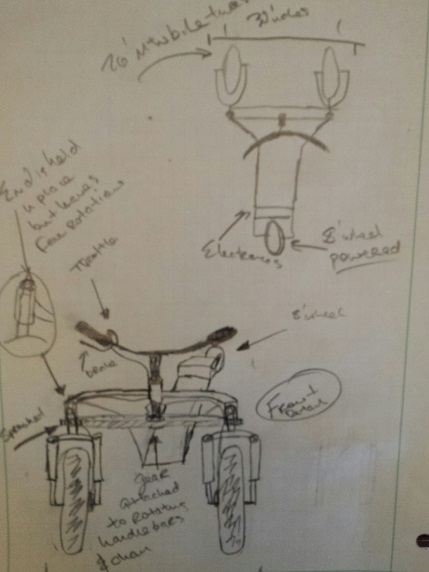
- Front end comprised of two mountain bike forks (with shocks) with two 26' mountain bike tires
- 8 inch rear tire is driven by electric motor
- Scooter is comprised of prefabricated mountain bike parts and all original steel framework
Evaluate concepts/select candidate
In the end after considering the amount of time and money needed to for each proposed design we reconsidered our approach. We sat down, as a team, and decided to find an existing scooter on the market and modify it to fit our needs. We decided on a design that would take a light weight scooter and add material to it to enable the scooter to stand up on its own and stay upright during use.
Detailed Design
This section will describe a detailed design process
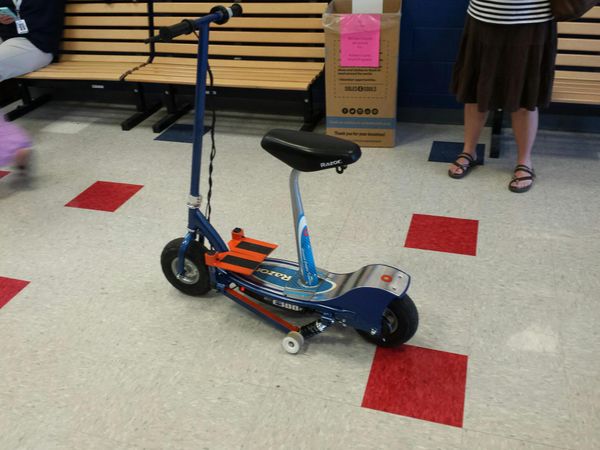
Description of selected design
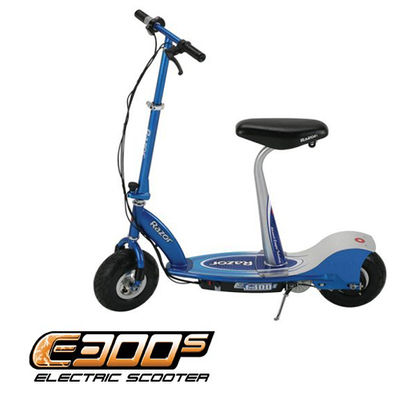
Our final design will involve the adaptation of an electric Razor scooter. The design will add suspension components to the scooter to improve stability and add footrests for comfort. The scooter selected, the Razor E300s comes with a standard seat that will further benefit the accessibility of the scooter.
Detailed description of selected design
Analysis
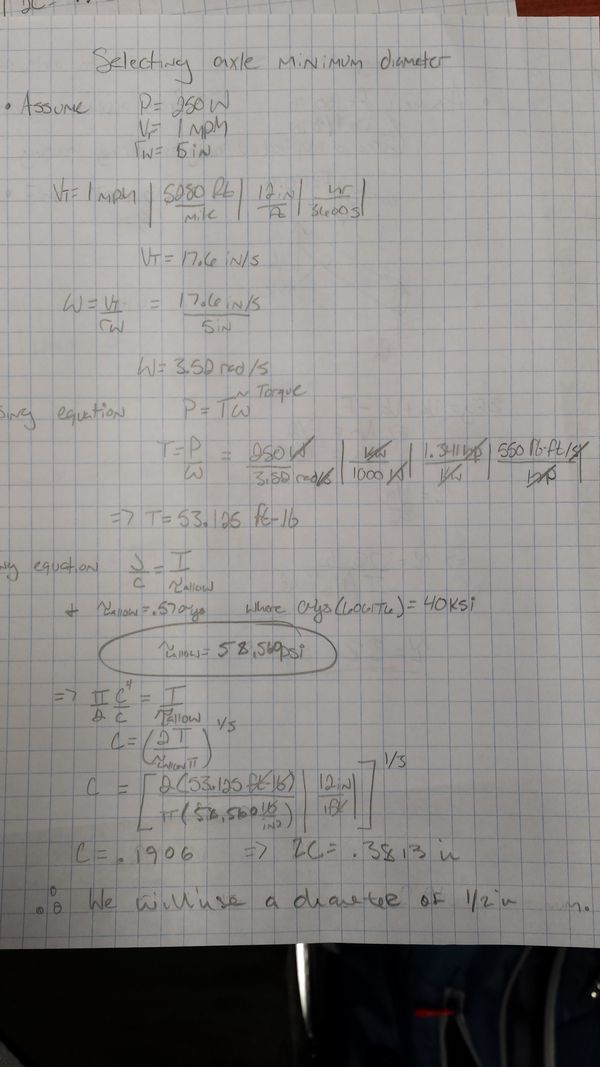
Engineering analysis 1
We first evaluated the minimum required diameter for the axle using 304 steel with the 100% of the power from the motor being transmitted to the wheels.
Engineering analysis 2
Then we evaluated the torsion using our torque solved for from the first analysis using our selected 1/2 inch diameter.
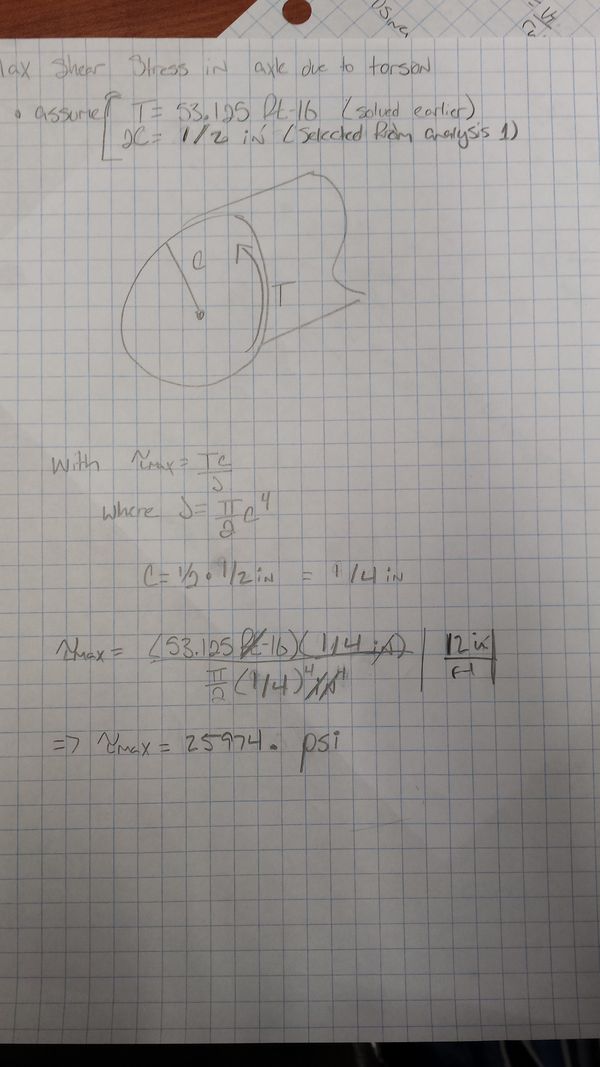
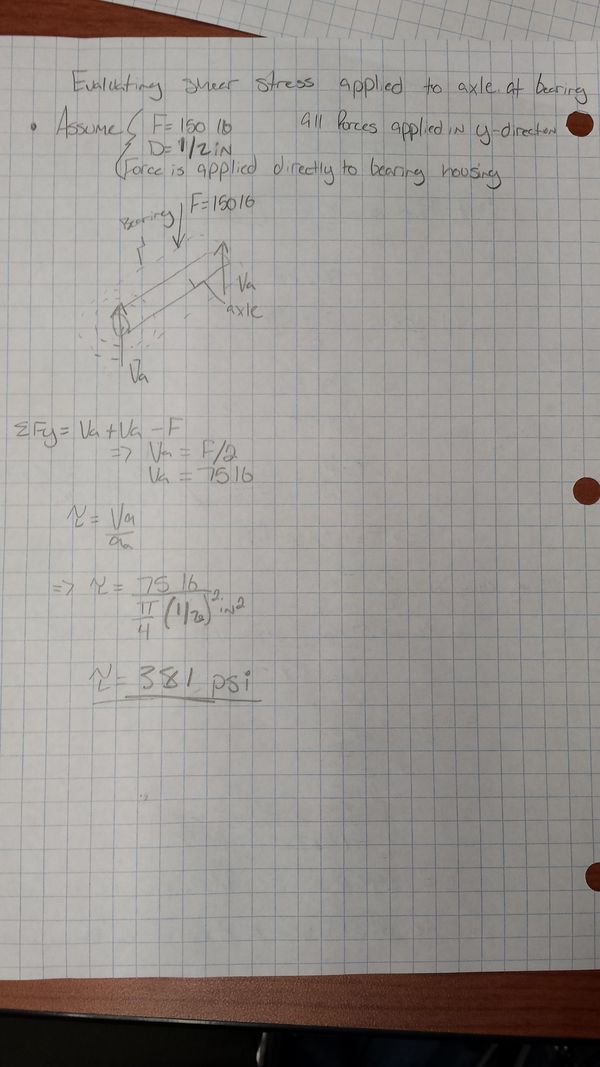
Engineering analysis 3
Finally we evaluated the shear stress being applied to the axle assuming a force of 150 lbs being applied directly over the center of the bearing.
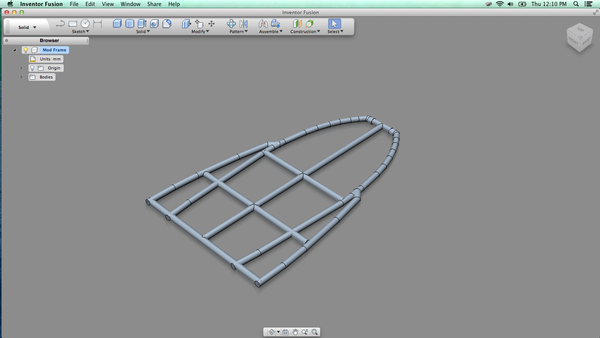
CAD Drawings
Our design will extend the standing surface of the scooter, allowing the rider to stand with legs shoulder length apart. This, along with the additional rear wheel will allow better blanace.
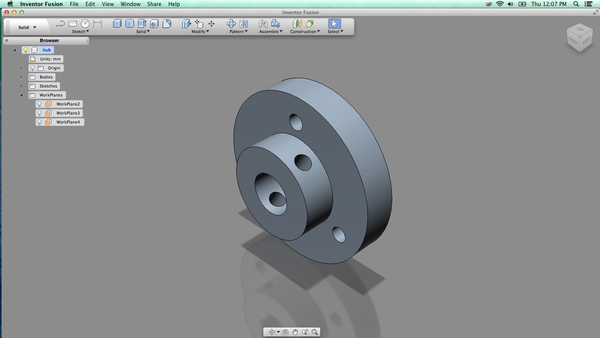
This is a hub that we will use to attach our drive sprocket to the rear axle.
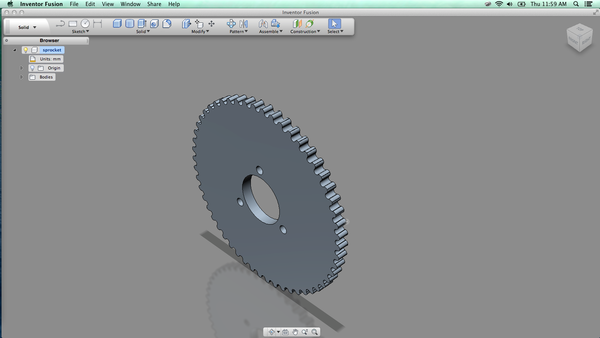
The sprocket that comes with the scooter will be attached to the axle with the hub.
Bill of Materials
qty, item, description, source, part number, price
| Quantity | Parts | Purchased From | Cost | Shipping |
|---|---|---|---|---|
| 1 | Razor E300s Scooter | Amazon.com | $249.99 | $0 |
| 1 | Four Pack Skateboard Wheels with Bearings | Skatebilly Skate Shop (Cookeville) | $54.38 | $0 |
| 2 | 6" Bicycle Rear Shocks | Greenlee's Bike Shop (Knoxville) | $10.00 | $0 |
| 1 | Hardware for Skateboard Wheelss | Ace Hardware | $4.69 | $0 |
| n/a | Misc. Metals | M.E. shop | $0 | $0 |
| Total Cost | $319.06 |
Assembly Instructions
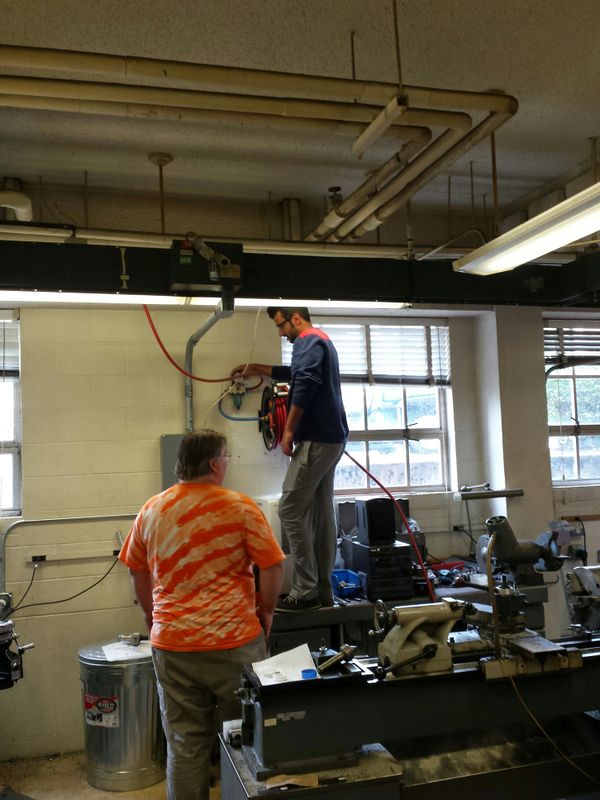
Fabrication Process
Matt disassembling the scooter
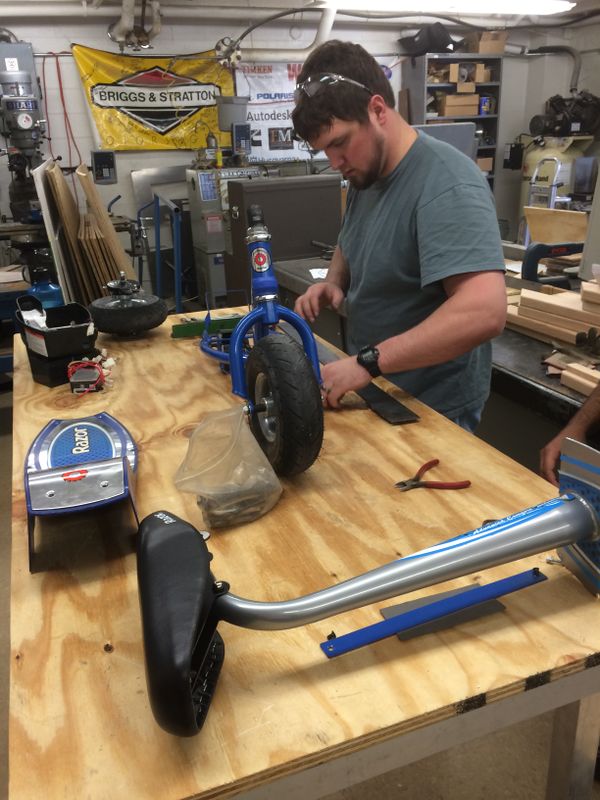
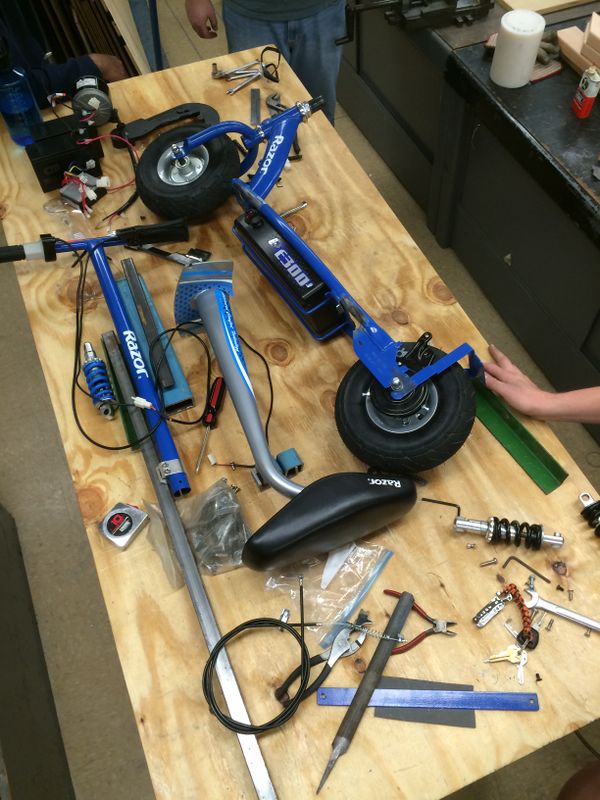
Scooter mostly disassembled
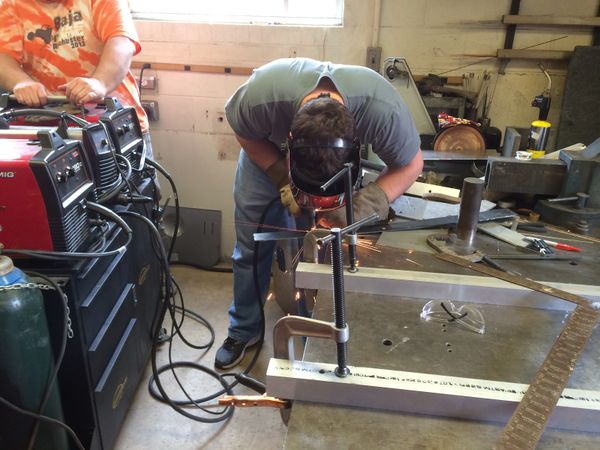
Seth preparing for the welds
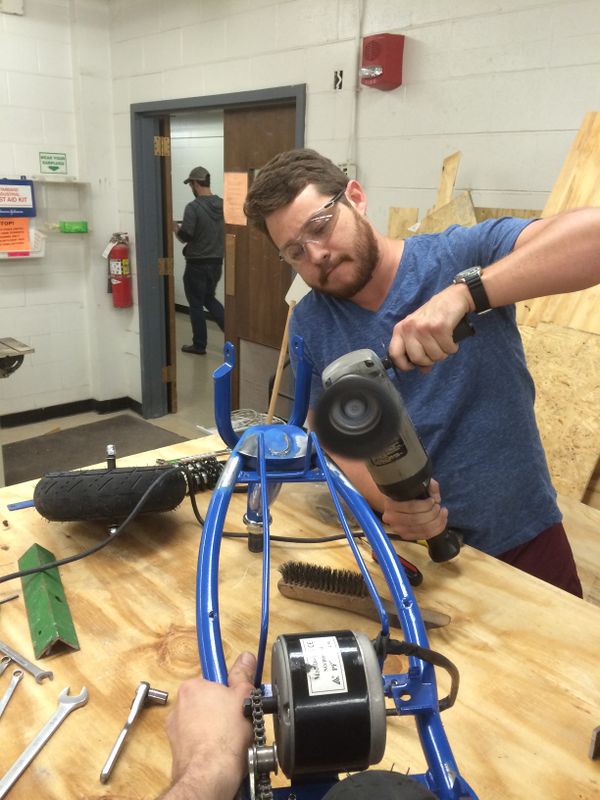
Fahad helping out in the shop (don't try this at home)
Matt trying out the plasma cutter
Arms mounted
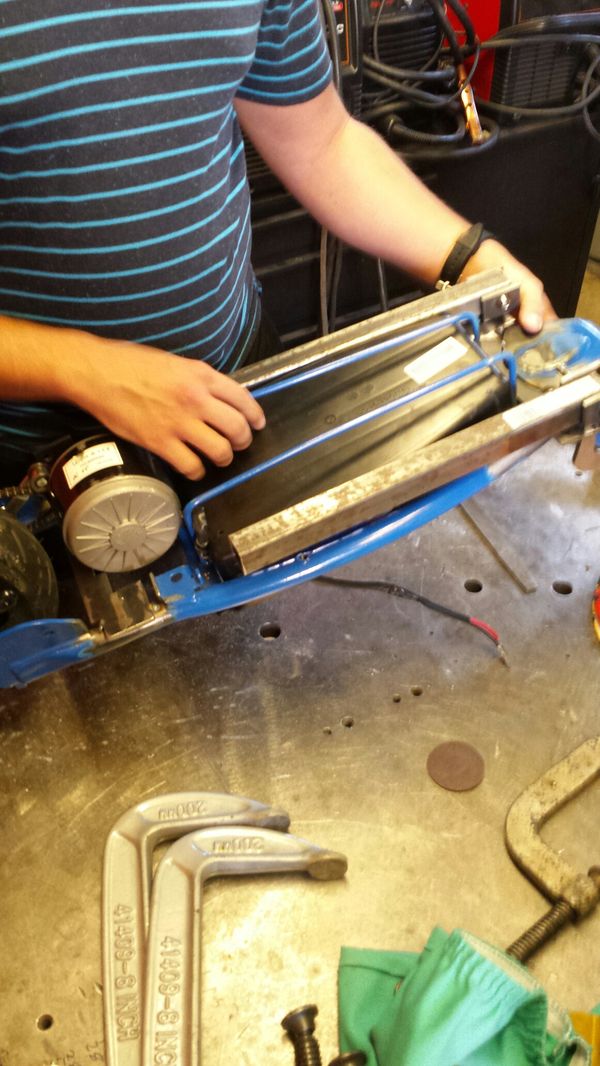
Adjusting the shock's lenght
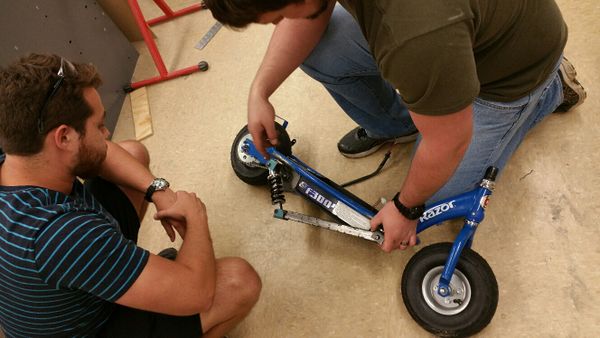
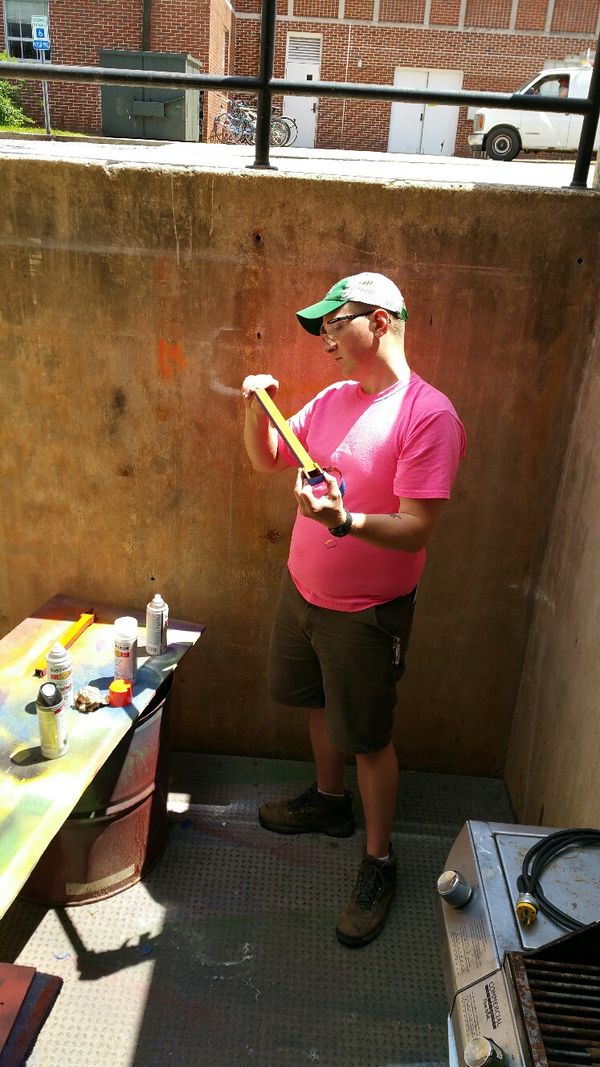
Preparing to paint

Andrew with one of the painted arms
Testing and implementation
Testing
Our focus for testing was to find what surfaces the scooter could handle. During our testing we found the scooter could handle indoor surfaces very well. But when it came to outdoor use the scooter was best operated on paved surfaces. The hard material of the skateboard wheel does not allow free movement over rough gravel or grassy surfaces.
Delivery and Use
We were able to deliver the scooter to the family during a regular school day. This was fortunate for us so we could get a first hand look at how the scooter would be most frequently used. We are happy to report that the scooter performed great in the hallways and sidewalks of the school. As mentioned before different wheels would most likely be needed for different terrains.
Photos of Completed design
Instructions for safe use
Always wear a helmet when operating outdoors.
Maximum recommended load of 200 lbs.
Only one individual should ride the scooter at a time.
Maintain a safe speed when navigating turns.
Keep tires inflated to recommended 45 psi.
Do not use the device unless supervised by an adult that has been fully understood the safe use of this product.