Adaptive tricycle for child with spina bifida
Abstract
Young boy with spina bifida needs a bike so he can participate with his older siblings. He is a very active toddler but has no feeling in his legs and has minimal movement in his right leg. Our plan is to modify a toddler’s tricycle or build one from scratch in order to support his legs, make it “arm powered”, and provide seating tailored to secure him to the tricycle.
Team Members
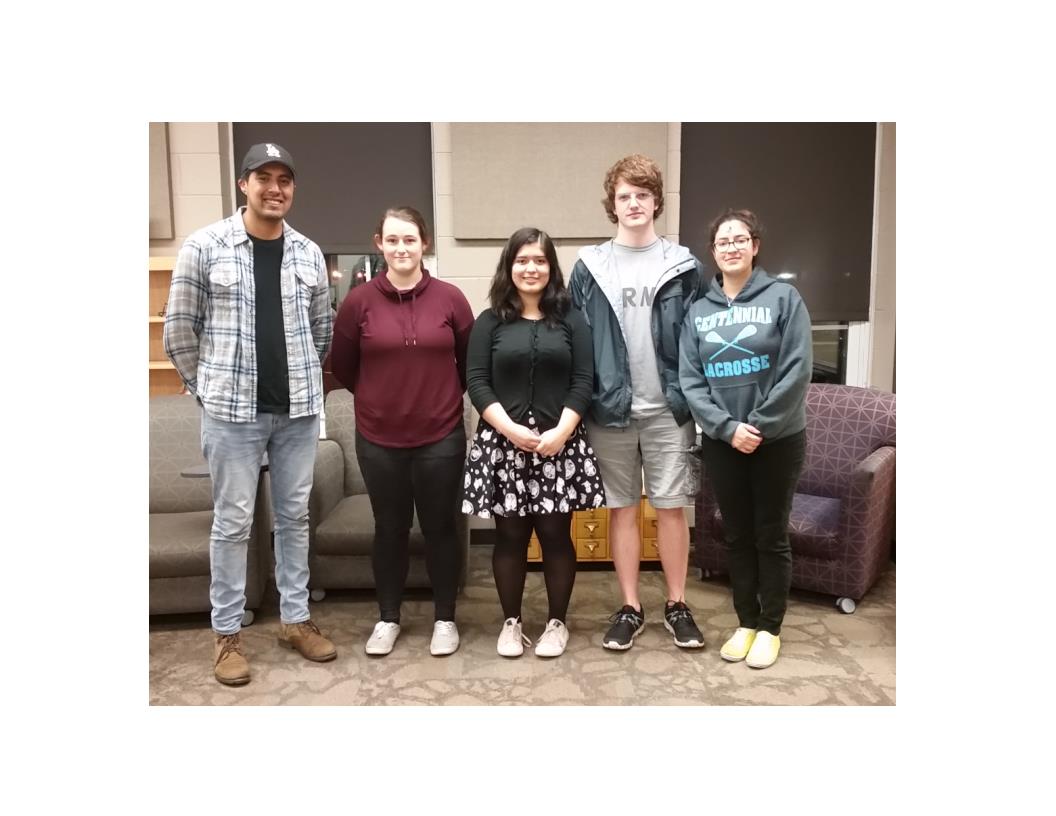
Team Members: (left) Adam Tello, Kimberly Cady, Josie Guzman, Ian Crowder, Marlene Garcia
Special thanks to : Heather Craig (the Therapist), Jeff Randolph, Chris Mills
Problem Statement/overview of the need
A young toddler with Spina Bifida has no lower body movement and wants to be able to ride a bike. The bike will allow for him to gain arm strength while enjoying playing with his older siblings.
Design Specifications
1. Material: bike frame- steel, Seating- wood and foam
2. Must support 50 lbs.
3. Harness on padded seat with slight adjust-ability in the harness
4. Handle for parent to grab
5. Hand cranked
6. Support for legs
Background research
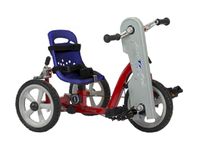
1. Many of the adaptive tricycles on the market are built for adults or for children ages around
4 to 5. These designs are the idea we need but due to his size they will be to big for him to use. In addition, many of the bikes we found would need some slight modifications to meet the design specifications.
2. The prices can be rather high around $600 to $1000 making it a expensive cost for a child that still will be growing. The family would have to pay this high cost every time he out grows the old bike which adds up over time.
Conceptual Design
Design Concept 1: From Scratch
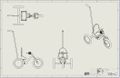
Description: Three wheel tricycle that will be completely built from scratch. The seat will be simi-molded to fit the child with seat belt harness. This bike will be pedaled by hand with a chain running from the front wheel to the handles in a flexible tube chain guard. This will decrease bulkiness and overall weight.
Design Concept 2: Modified Handle
Description: Second concept is a more simple modification it will be using a prebuilt tricycle. The tricycle will be modified to make it a hand powered. All other components of the bicycle will be maintained the same and the chosen to accommodate the child.
Design Concept 3: Modified Handle and Seat
Description: Three wheel tricycle that is prebuilt will be modified to support a child who can not walk. The handle bars will be switched to a hand crank pedal system. The seat will be made to hold the childs torso and legs from sliding side to side. The seat also will have foam to help from injuring the childs back.
Evaluate concepts/select candidate
Estimates of performance and some calculations needed to analyze concepts
The following specifications are rated 1 to 5 with 5 being the best score
| Specifications | Design Concept 1 | Design Concept 2 | Design Concept 3 |
|---|---|---|---|
| Material | 4 | 3 | 3 |
| Weight | 3 | 4 | 3 |
| Adjustability | 5 | 3 | 4 |
| Height off the ground | 4 | 4 | 4 |
| Cohesion | 5 | 4 | 3 |
| Ease of use | 4 | 4 | 4 |
| Cost | 3 | 5 | 4 |
| Total: | 28 | 27 | 25 |
The custom bike had the most points and is the approach selected. Additional concepts that did not feature a hand input similar to a bikes gearing system were looked in to. However, after discussion with the family the idea of a tricycle was preferred and would stay the main design point.
Projected Time Line
| Projected Date of Completion | Item |
|---|---|
| 1/29/2018 | Make contact with family, set meeting time |
| 2/9/2018 | Meet with family/ discuss designs/ collect measurements |
| 2/14/2018 | Have final design concepts/ select final design |
| 2/22/2018 | Meet with family to present final design |
| 3/21/2018 | Have analysis and bill of material completed |
| 3/29/2018 | Meet with Therapist to give update/ order parts |
| 4/2/2018 | Start frame assembly |
| 4/18/2018 | Have seat and chain system built |
| 4/20/2018 | Assemble all components and test usability of bike |
| 4/23/2018 | Paint Bike |
| 4/24/2018 | Reassemble bike run final tests |
| 5/3/2018 | Give bike to family |
Detailed Design
Description of selected design
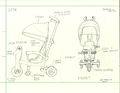
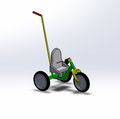
Our final design will resemble design concept 1 but will pull some ideas from the other two. For our final design it will be a custom tricycle built from scratch. This will allow for more adjustability and cohesion in the design.
Detailed description of selected design
The main frame of the tricycle will be made from square tubing carbon steel with the fork and neck of the bike being used off of an already made two wheeled bike. The seat will be made from wood that will be covered with padding and have a safety harness. This will be attached to the bike using a bracket system that can be loosened to adjust the seat distance from the hand pedals. The gearing system will have the pedals even with each other rather than offset by 180 degrees to make pedaling and steering easier. The gears will be in a compact housing to prevent anyone from coming in contact with any pinch points. The brake will be incorporated with the pedals and will have a rod with a handle off the back of the bike for the parent to grab in order to stop the bike as well.
Analysis
We performed 3 types of analysis. First we calculated the critical minimum for the placement of the handles. Then we calculated the total weight of the bike to use in our third analysis of finding the gear ratio.
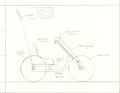
Engineering analysis 1
Analysis 1 is finding critical positions of the location and length of the crank and steering system.
Body to Crank System Analysis
Trial 1: Shoulder to wrist = 10 ½ inches
Trial 2: Shoulder to wrist = 10 inches
Trial 1 vs Trail 2 - length of left arm is ½ smaller compared to right arm.
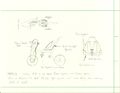
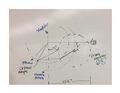
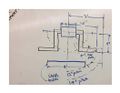
The following sketches analyze the motion of the hand pedal system in relation to the child’s body. The crank system has a circular diameter of 8 (in.) Trial 1 has a critical clearance of 2 in. and trial 2 has a 2 ½ (in.) critical clearance, in respect to the child’s body. The critical clearance is where all bodies are closest to each other.
Trial 1:
Trial 2:
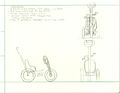
Pivoting:
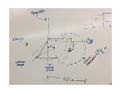
The pivoting analysis, based on Trial 2, shows various lengths of the handle bars and the critical points to the body. The child’s body width is 8 (in.) and has a clearance of 2 ½ (in.). A handle bar length of 12 (in.) has a small angle and hits child’s body. A 14 (in.) length avoids the body and though does have a critical angle.
Trial 1 and a length of 14 (in.) would be ideal following the results of the critical minimum analysis.
Engineering analysis 2
Analysis 2 is calculating the total mass of the bike and its components. This will be used in further analysis for the gear ratio and to keep the mass of the bike in a range that the child can still move.
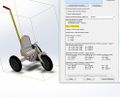
Engineering analysis 3
Analysis 3 is calculating the gear ratio need for the child to move the total mass of the bike. The gear ratio will be used in determining what sprockets can be used in the build.
~~Current thumbnail is incorrect. Follow image and select most current image for correct gear ratio.~~
CAD Drawings
Bill of Materials
qty, item, description, source, part number, price
| Item | Description | Source | Part Number | Quantity | Price | Total Price |
|---|---|---|---|---|---|---|
| Huffy Rock It Bike | Child bike with 12" wheels | Walmart | 562934928 | 2 | 32.08 | 64.16 |
| Black Nylon 1" width1 | 10 yrds to make safty belt | Amazon | 1 | 6.98 | 7 | |
| Child Buckle | Car Baby Safety Seat Harness | Amazon | 1 | 10.99 | 10.99 | |
| Foot Straps | VELCRO Brand 90441 - All Purpose Straps - 27" x 1" | Amazon | 1 | 5.74 | 5.74 | |
| Tension Locks | 2 pack tension locks | Amazon | 1 | 6.35 | 6.35 | |
| Steel square tubing | 1-1/2 X 1-1/2 X 11 GA (.120 wall) A513 Square Steel Tube 4ft | metalsdepot | T111211 | 1 | 37.79 | 37.79 |
| Steel Circle tubing | 1 OD x .083 wall x .834 ID 1020 DOM A513 Round Steel Tube 4ft | metalsdepot | T21083 | 1 | 38.20 | 38.20 |
| Handle grip tape | Cookeville Bicycles | 1 | 4.99 | 4.99 | ||
| hardware | Bolts and Nuts | Lowes | 4 Bolts / 4 Nuts | 2.56 | 2.56 | |
| Child Seat | padded custom seat | Donated by Collins Manufacturing | 1 | |||
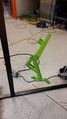
| Powder Coat | Green paint for bike components |
Approximent Cost: $180
Assembly Instructions
To attach the long handle for the parent remove the pin located under the seat and insert the handle end in to the hole. Align the holes of the handle to the small holes located on the post under the seat and insert the pin making sure it passes through all 4 holes. To adjust the seat loosen the four bolts without removing the nut and move seat to desired position. Retighten the bolts making sure the seat is no longer able to move.
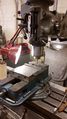
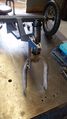
Fabrication Process
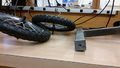
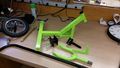
Deconstruction of pre bought bikes
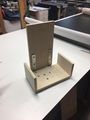
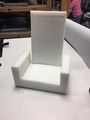
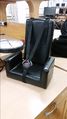
Seat assembly
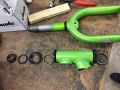
Cutting and welding the frame

Fabrication/modification of components

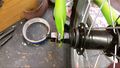
Threading hole in square metal block and attach wheels
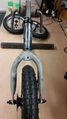
Sand blasting and welding bike fork components

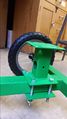
Initial Painting of bike
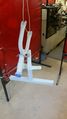
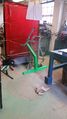
Repainting with powder coat
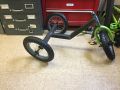
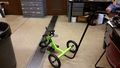
Final/test assembly

Testing and implementation
Testing
1. Weighed bike to verify it will not be too heavy for the child and family. Approximately 34 lbs.
2. To test the gearing and turning of bike we walked behind the bike and used the pedals in order to simulate what the child would be doing.
3. To verify the bike can support at least 50 pounds, force was added and visual inspection for weak points was done. With the initial weight of the bike plus the added force of 116 lbs to seat showed the bike can support over the required 50 pounds of weight.
Implementation
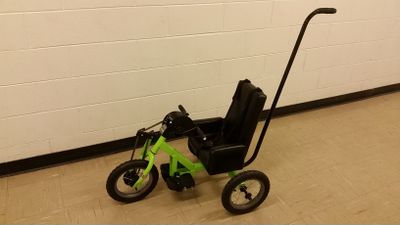
The bike was delivered to the family on Thursday, May 3rd fully assembled. The family intends to use the bike as a way to get the child more involved outside and to develop upper body strength in a fun enjoyable way.
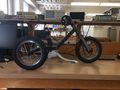
Photos of Completed design

Instructions for safe use
To use this bike unbuckle the child harness and put the child into the seat. Fasten the harness and adjust it so the child will still be able to reach the handle but keep the chest from being able to collide with the crank set when stopping. If the child cannot reach the handles adjust the seat following the assembly instructions. Next take the feet and place them on the foot rest on the side that corresponds with the foot side and fasten the feet in. Once the child and the feet are fastened in the child is ready to go out and have fun. When the child is done playing, unfasten the feet first then undo the seat belt harness.
Check periodically that the handle, and seat bolts are tight and not loose, as well as check the tires are securely screwed into the frame.
For general bike care: Check tire pressure and keep in the range of 35 psi +/- 3psi, clean the bike chain using a chain cleaner and re-lubricate after the chain as dried before using the bike again. Store the bike out of rain to prevent rust from building up on the chain and sprockets.
Do not use the device unless supervised by an adult that has fully understood the safe use of this product.
Project Summary, Reflection
This was a very valuable experience being able to start with a need and being able to give a completed bike for the young boy. Not only do we get the experience of working in a team, we get a better understanding of how the fabrication process works which improves how we approach the design stage of any project. From the start we had the challenge of having a very young child in need of a hand powered bike and throughout the whole experience the design changed and modified to what it currently is. There was only a few modifications that had to be made from the original design, mainly the height of the seat post and the changing of how the bike was painted. Overall, we as a team are pleased with the final product and cannot wait for the young child to be riding around on it.