Adjustable chair S19
Contents |
Abstract
The client was born prematurely weighing only 1.5 pounds with many medical complications. Her brain had not joined together which impacted her motor and comprehension capability. She has endured many surgical procedures in her young life including open-heart surgery. She currently cannot walk, talk, or eat on her own. She is capable of supporting her upper body/head and has leg movement as well. The child currently keeps her toes pointed in an outward position which makes her Achilles tendons scrunch up. The client's parents hope to find a device to support her in a standing position so she can stretch her legs down to the floor with her feet flat on the ground and allow her Achilles tendons to stretch out.
Team members

From left to right: Seth Huner, Thomas Garrison, Logan Unser, Wesley Upshur, Jordan Gamedah
Other Contributors
The Ward Family
Dr. Steve Canfield
Problem Statement/overview of the need
Our client is diagnosed with scoliosis and a brain condition which keeps her from being able to walk on her own. Her toes are constantly pointed straight and she needs a walker to help her stand upright and stretch out her Achilles tendons to avoid having surgery on them. The parents have tried boots and casts on her feet to help the Achilles problem but they have caused too much discomfort to the child to be used effectively for long periods of time. She needs a walker that could hold her in an upright position and allow her feet to lie flat on the floor, stretching out the Achilles tendon under her own weight.
Design Specifications
1) Needs a belt to go around the hips for support, rather than a harness/saddle or bicycle type seat. This will give her more comfort and less restriction at the same time, although it may not be as supportive as a harness.
2) Locking casters so the walker can be locked in a stationary position.
3) Adjusters (similar to the legs of a crutch) for the handles and belt positioning so the apparatus can be adjusted for the child's growth over time.
Background research
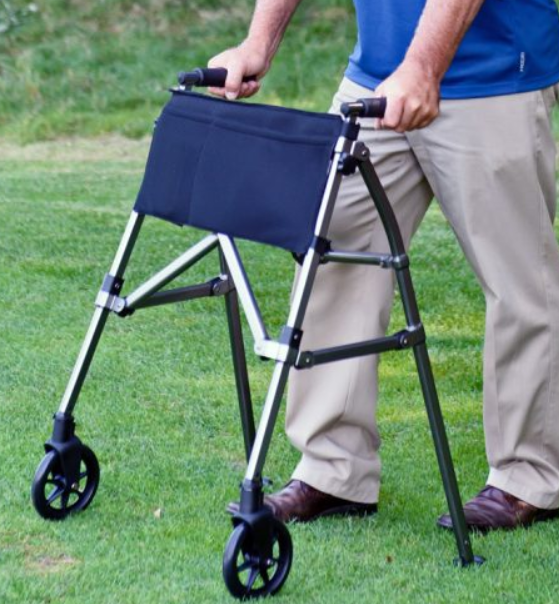
Gait trainers and walkers are products similar to what we will be designing for our client. These products are designed for individuals that don't have the correct posture or proper motor skills and help make walking easier. These products are readily available on the market but they can be extremely expensive. More expensive, dependable walkers can cost as much as $3,000. Our client needs something that is simple and easy to use, yet durable enough to hold her upright and require her to walk flatfooted to stretch her Achilles tendons out.
Conceptual Design
Summarize your conceptual design process. Develop at least three concepts.
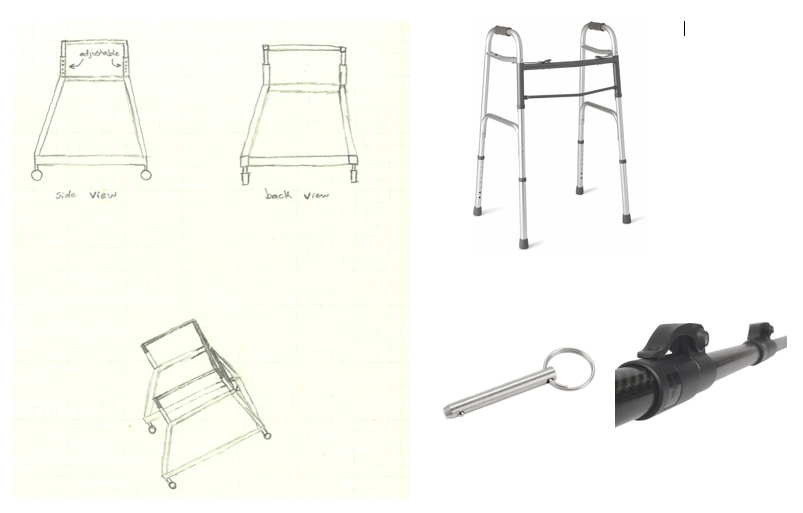
Design Concept 1
- Description
A simple design inspired from a folding walker that will have adjustable arm rails for accommodating the growth of our client. Arm rails could be constructed with Cleveland quick release pins or telescoping clamps, as pictured, for varying heights. Support belt will attach to the main frame under the adjustable handrails. The walker needs to include locking casters in the back to keep it stationary.
pros:
-should be relatively stable
-arm rails are simple to adjust
cons:
-might be heavy and hard to move because of extra support bars
- schematics/pictures/drawings
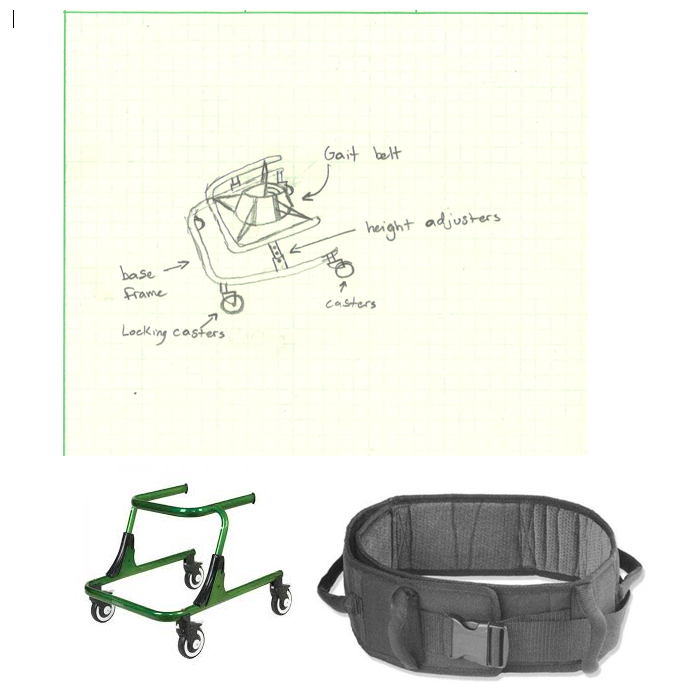
Design Concept 2
This walker is a simplified design of the above one with less support rails. It resembles the toddler's gait trainer (pictured) with the support belt attached. The same type of adjusters can be used for the handrail with the quick release pins or the telescoping clamps.
pros:
-should be relatively lightweight and easy to move
-compact frame
cons:
-frame may not be as stable
Design Concept 3
This design incorporates more support for the user and even a removable seating option to take pressure off the waist or upper torso. Included is a piston cylinder assembly that acts as a shock absorber for the body support frame, a spring could also be used in this place.
pros:
-extremely stable and rigid
-should offer exceptional support for the user
cons:
-might be too restricting for the user
-parents didn't want a seating option but it may be necessary to hold the child up
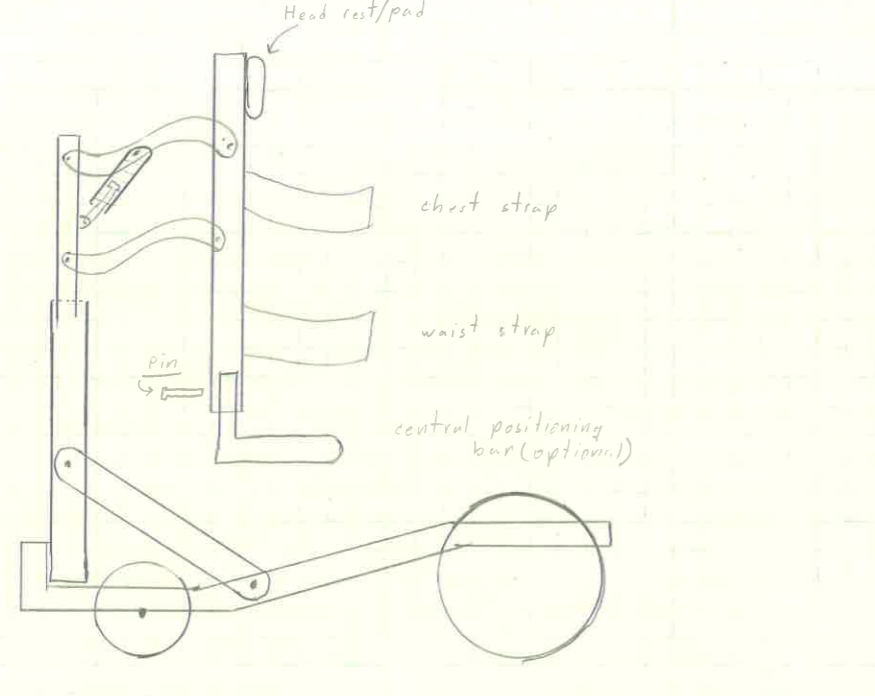
Similar to this design
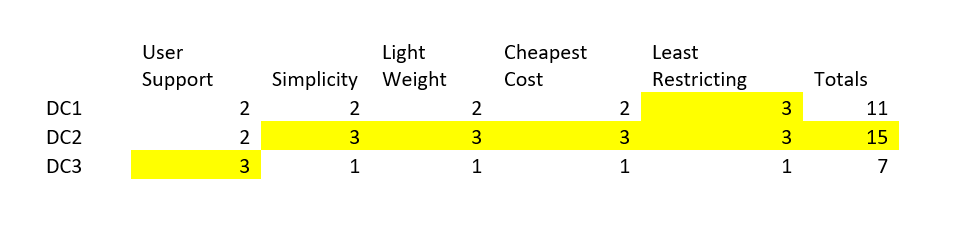
Evaluate concepts/select candidate
We evaluated each design concept by giving it a grade of 1-3 in each category we created. The winning design was the second one.
Detailed Design
Description of selected design
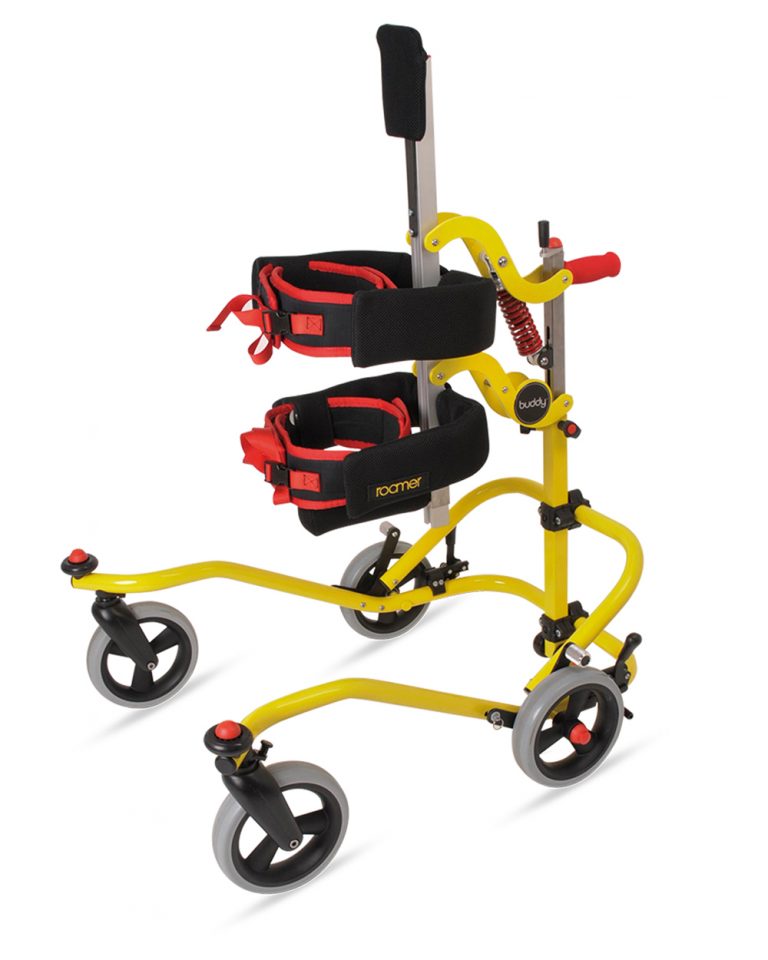
Our design consists of two "U" shaped aluminum tubes that will make up the base frame. These pieces will be connected by aluminum adjusters that will be welded into place on the frame. Angled support bars will extend from the back of the walker to about midway up the adjusters. The adjusters will have holes drilled through for pins to be inserted. The top piece will hold a backrest that will be covered with padding and have the support belt attached.
Analysis
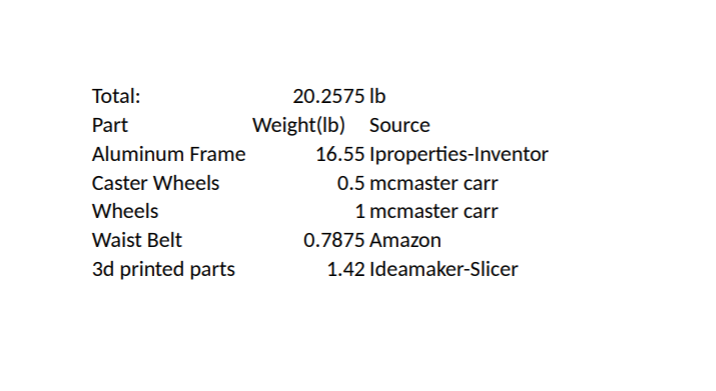
Weight Analysis
Analysis of total weight of the trainer and its parts without the added weight of the client.
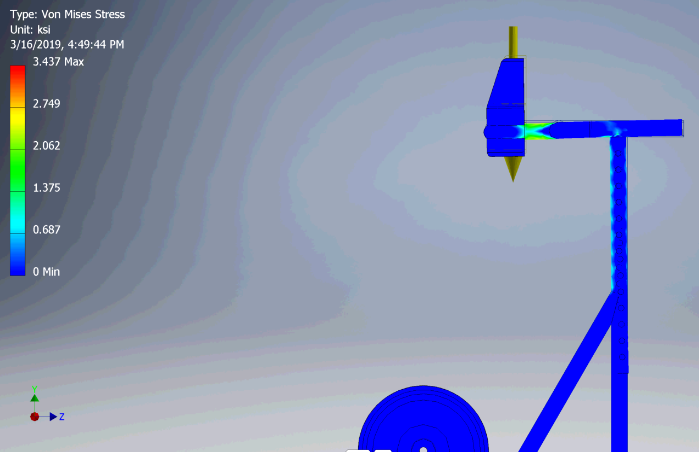
Stress Analysis
Analysis of stress in the walker with the user's weight applied.
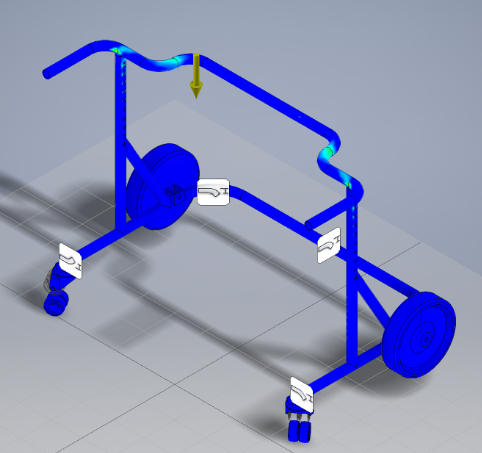
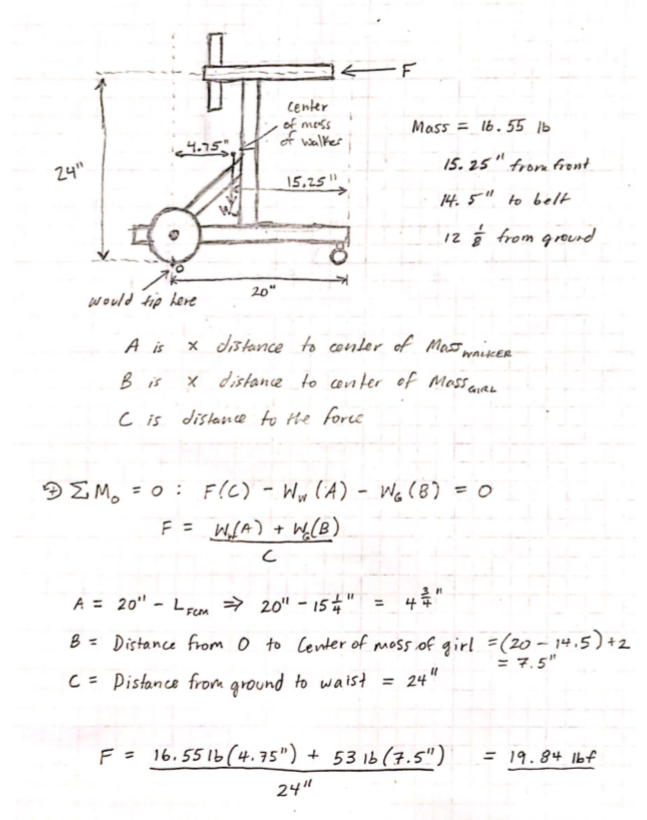
Tipping Analysis
Analysis of horizontal force required to tip the walker.
CAD Drawings
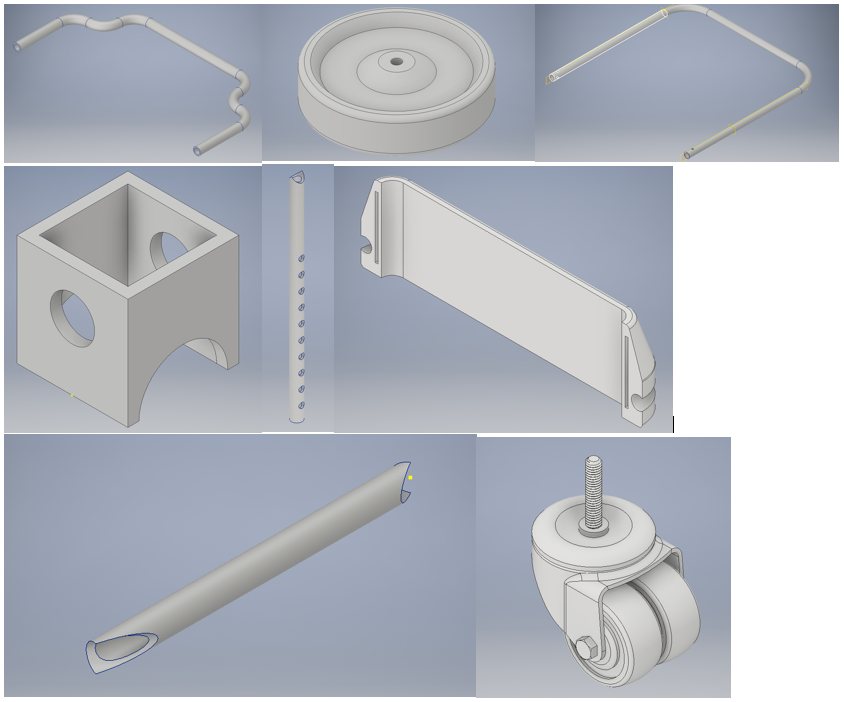
Bill of Materials

Assembly Instructions
1) Aluminum tubing was cut in the ME shop and then bent in the east stadium.
2) We then had the pieces welded together and holes were drilled for casters, wheels, wheel locks, and the back brace.
3) Logan 3D printed a part to attach on the top support so the back brace could fit in and be taken on and off after the frame was welded.
4) The frame was sand blasted so we could have it powder dusted back in the east stadium.
5) We then attached all the casters, wheels, locks, back brace, and hammock seat.
6) After further evaluation we added two anti-tipping pegs onto the back of the bottom frame.
Fabrication Process
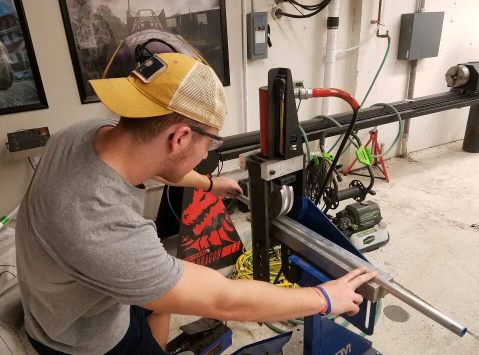
Seth bending the aluminum tubing.
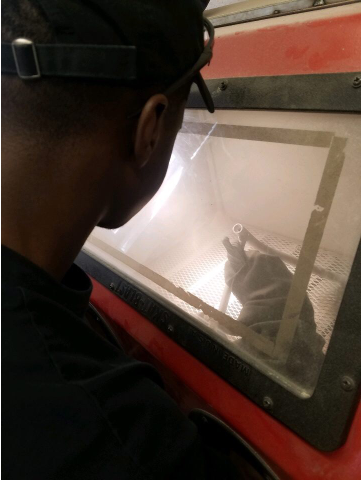
Jordan sand-blasting the frame before it's powder coated.
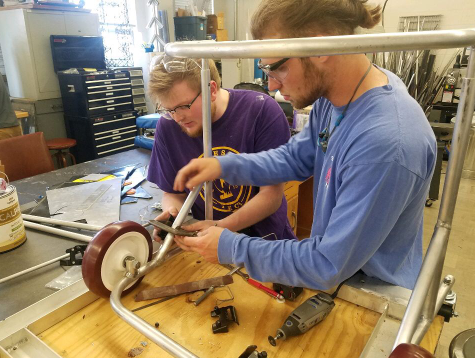
Thomas and Logan drilling holes for the wheel locks.
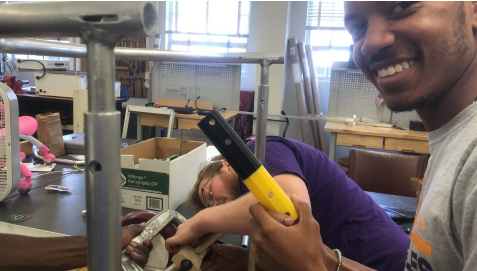
Wesley having fun in the machine shop!
Testing and implementation
Dr. Canfield checked over our walker before delivery to make sure everything worked smoothly. Everything passed inspection except for the tipping hazard that occurred when the walker was locked into place. Part of this was due to the fact that our top support was welded in a position where the weight of the user would be almost directly over the back wheel axle, causing it to easily fall backwards with a slight horizontal force when the wheels are locked into place. We could have had the belt centered more in the middle the prevent this tipping from happening, but since we couldn't "un-weld" our project, we had to create an alternate solution. We ultimately decided on attaching two anti-tipping braces similar to what would be on a wheelchair.
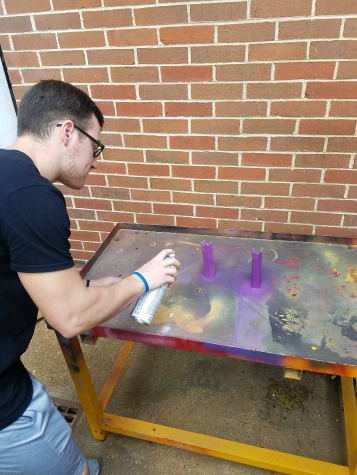
Seth spray painting the parts after Logan machined them.
Logan and Wesley drilling holes to attach the two parts.
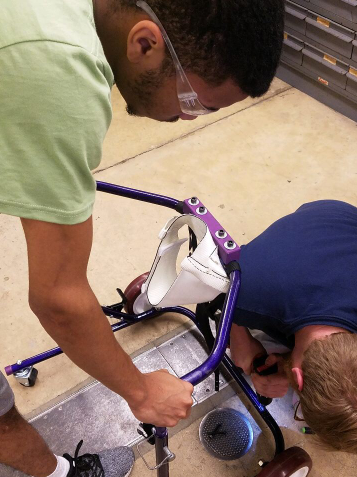
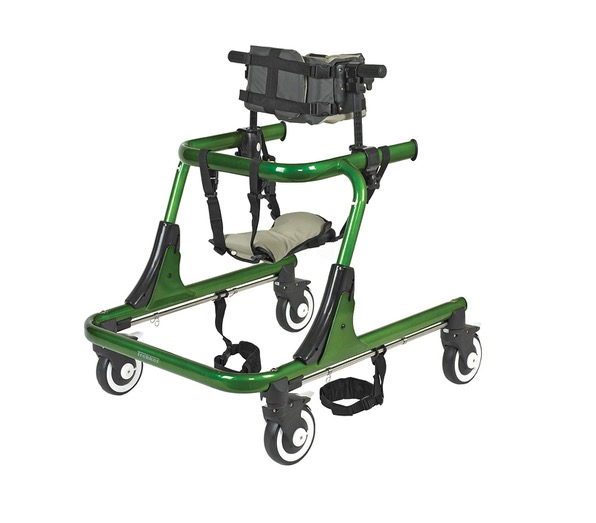
Photo of Completed design
Final product without the anti-tipping pegs added

Instructions for safe use
Do not use this devise on an inclined plane or in wet conditions. Always check to make sure belt and seat are securely attached before each use. Do not use the device unless supervised by an adult that has been fully understood the safe use of this product.
Project Summary, Reflection
This project seemed like a huge challenge at first, but the hands on experience we gained after its completion is something you won't find in another class. Many skills were used, not only with tools in the shop, but also in working with a team and meeting deadlines. It's a little bit of a challenge to juggle schoolwork and a semester long project like this, especially if you don't have much experience. Although, in the end, it feels good to know that all the hard work can be used by someone to help live life a little easier.