Advanced Mobility Toy JJNDC
Abstract
Abstract here - a short statement of the need, findings of project and project outcome.
Team members
- Team [JJNDC] Jared Thaxton, Nathan Ghattas, Caleb Valenzuala, Jacob Davis, Devin Smith.
Acknowledge help of others
- Dr. Canfield
Problem Statement/overview of the need
Children with spina bifida are prevented from using "fun" mobility devices like bikes and scooters because of the almost non-existent market for devices geared toward children with this condition. Because there are not many of these devices, these children will develop slower motor skills and have reduced cognitive abilities. An ergonomic "kid friendly" mobility device for children with lower body immobility needs to be manufactured for the benefit of humanity.
Design Specifications
1. List of design specifications. Some of these must be quantitative and measurable. You should be able to use these to compare design options.
Background research
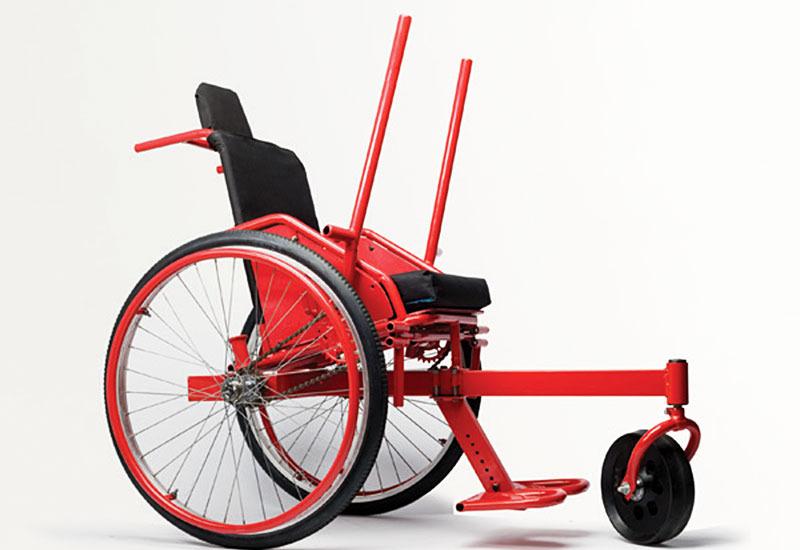
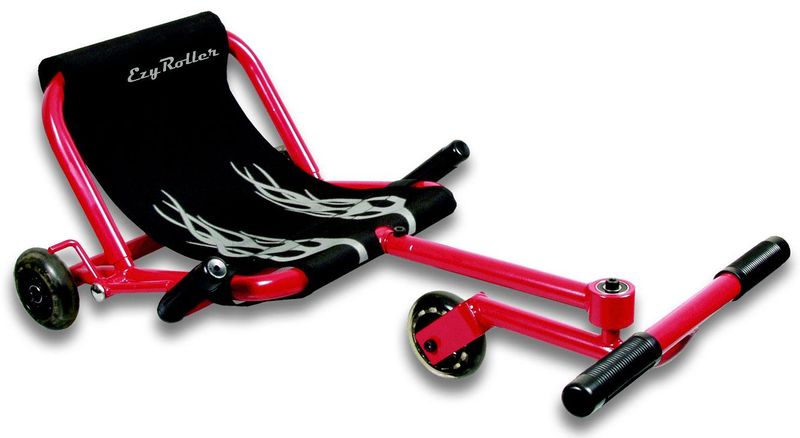
1. We we're inspired by a Ted Talk offroad wheelchair and EZ roller 2. Not much to any affordable selection in the market 3. The Ted Talk wheelchair, as well as the EZ roller, was made from bike parts to be used in third world countries, while the design we are wanting to go forward with will be more ergonomic, kid friendly, and aesthetically pleasing. We want a child to feel like a "cool" kid when riding it.
Conceptual Design
Summarize your conceptual design process. Develop at least three concepts.
Design Concept 1
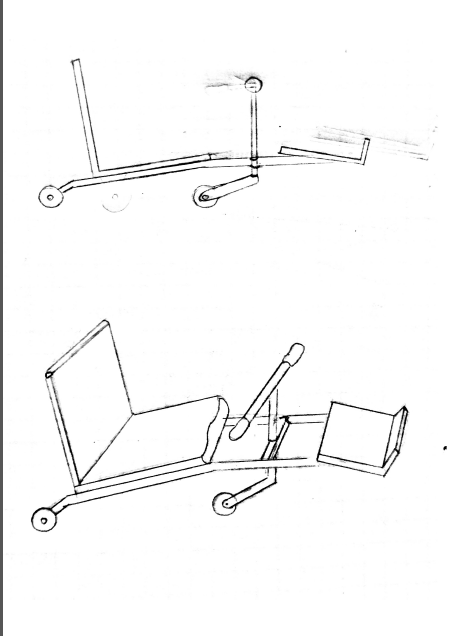
This design is based on the kids' toy the "EZ Roller" which uses the side to side motion of a offset wheel to make forward motion. However, we will be using a center mounted steering column to input the energy instead of the foot pedals of the EZ Roller. Obviously the efficiency will not be great at first because only a portion of the energy is turned into forward energy. But, as it picks up momentum, would become more efficient as it gets into the wave motion.
Design Concept 2
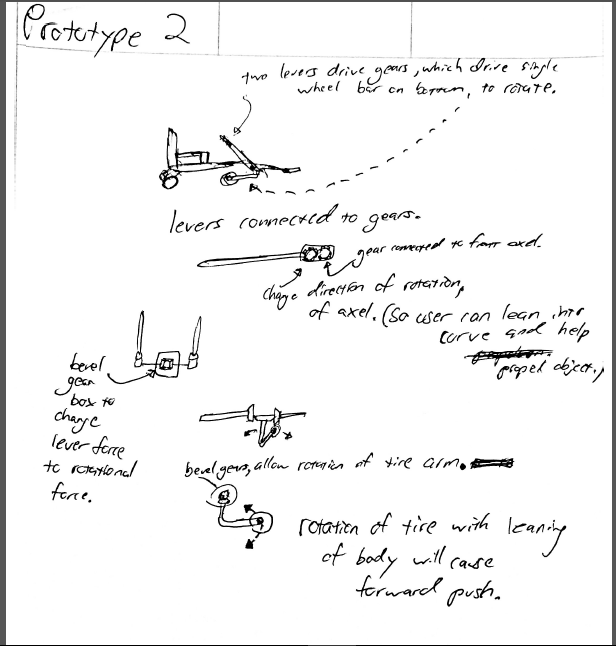
This design is also based off of the EZ Roller, however, it utilizes beveled gears to be able to use a easier way of having levers as the inputs on either sides of the chair.
Design Concept 3
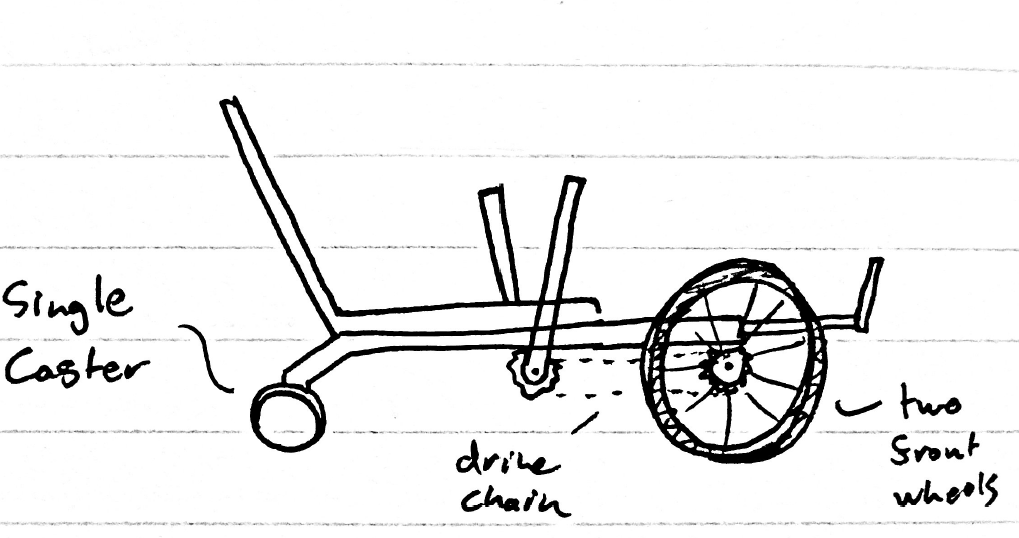
This design is based off a TED Talk designed wheel chair for people in third world countries. It uses chains to attach lever inputs to the front drive wheels. Then in the back we decided to put a caster so the child can have the sense of a drifting motion. We want this design to be as fun and appealing to kids as possible.
Evaluate concepts/select candidate
Use a decision matrix or similar tool to compare designs against project specifications

Detailed Design
.
Description of selected design
For this project we are targeting people age kids. Our main goal is to make a mobility toy that can match performance of a standard bike, so that kids with lower body immobility can have fun with their friend instead of feeling excluded. This design gives the best mobility and maneuverability.
Detailed description of selected design
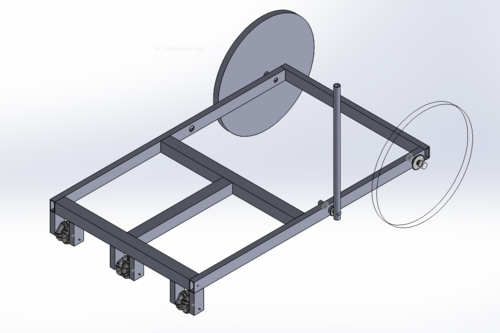
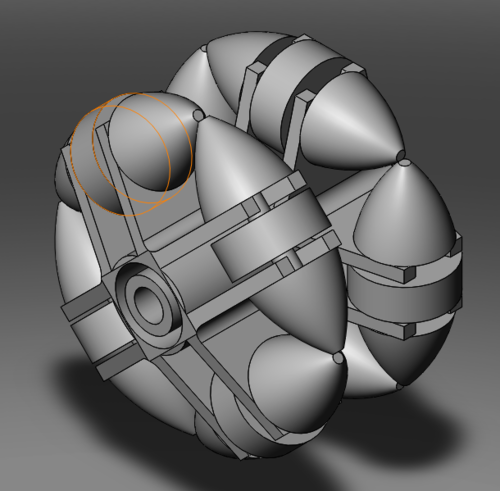
This design has a low to the ground design so that it gives good maneuverability. We will have two standard bike tires in the front which will be driven by hand levers. We will have two omni-directional wheels in the rear which will allow the entire thing to spin on a dime and give the rider the feeling their drifting. Also, we will paint it and make it look like something fun, which it will be.
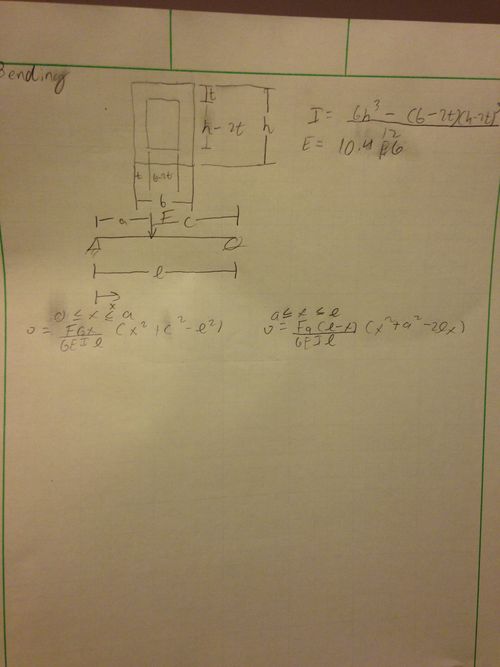
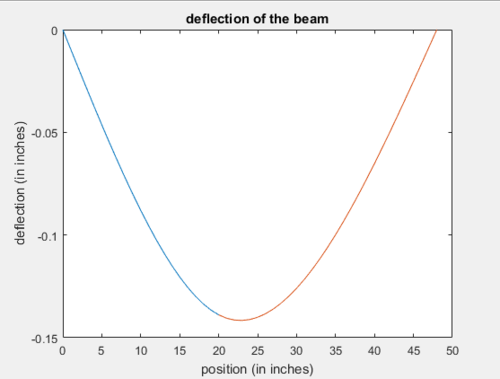
Analysis
Describe three types of analysis to be performed on the design
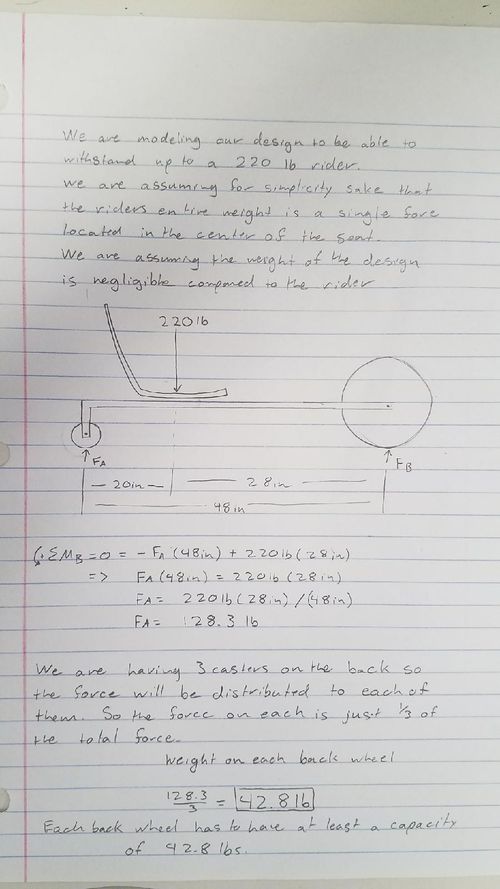
Engineering analysis 1
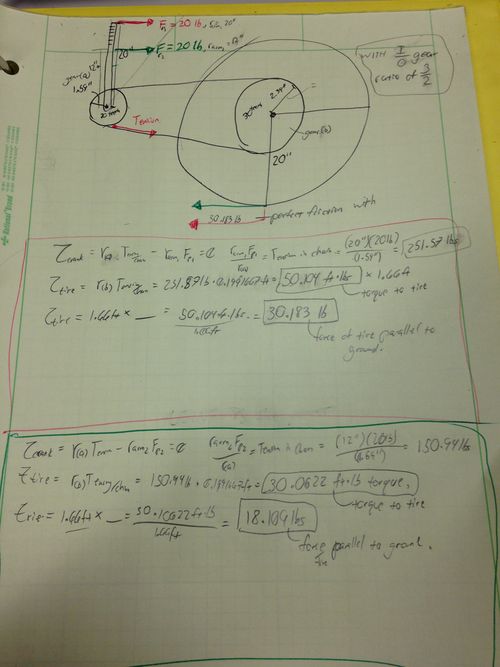
Engineering analysis 2
Engineering analysis 3
CAD Drawings
Insert drawings of all parts and the assembly
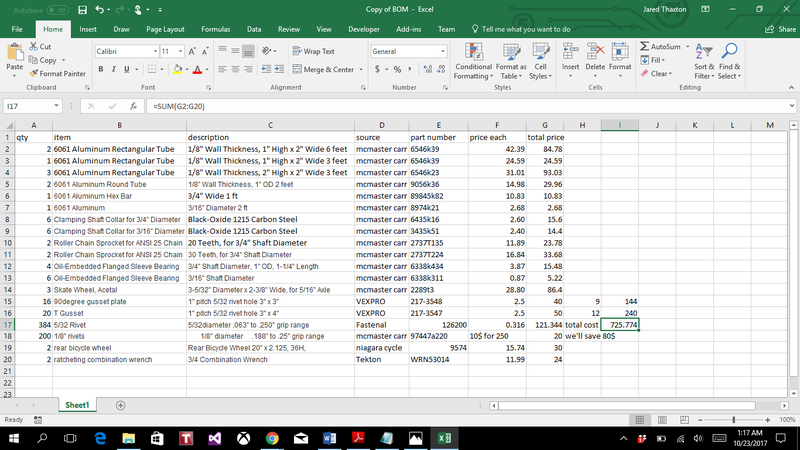
Bill of Materials
qty, item, description, source, part number, price
Assembly Instructions
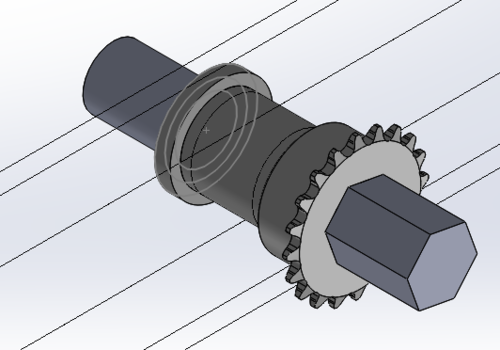
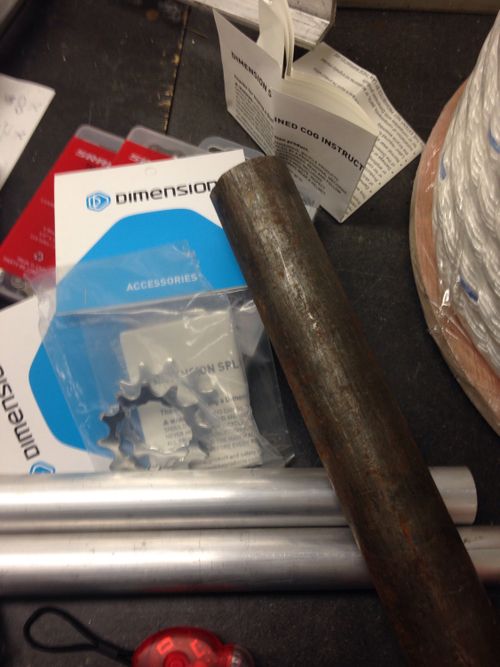
After acquiring all of the parts off of the bill of materials, cut the 2x4" aluminum beam into a 54" segment, and cut the 2x2" beams into 36" and 26" segments. Drill holes into the 4 holes at the front of the 2x4" beam, 4 about 2 ft from the back, and four at the back. Drill holes with equal distances on the middle of the 36" beam and four on each end about 6" apart and connect the beam's middle four holes at the front of the 54" beam making a T shape. Drill four holes about 3" apart on the middle of the 26" segment and connect it two feet from the back of the large beam and bolt all of them in. Connect the caster wheel to the the back four holes using bolts. Cut the 1x1" beam into 4 12" segment, drill 2 holes 1" apart at the one end of each, and cut a place off at the other end and drill a hole on each big enough for the wheels to fit in. Connect the wheels using nuts and drill a .5" diameter hole through each 2x2x2" aluminum block and 2 smaller holes on each perpendicular to the .5" hole .25" from each end in the center. Insert the blocks into the 2x2" 2ft from the back and run the steel rod through the blocks as axles. Bolt the blocks into the 2x2" beam, put shaft collars into the axle, and screw them in. Drill .5" diameter holes 3 in from the bottom of 30" aluminum pipes and attach them to the axle at each end. Drill a small hole through both the aluminum pipe and steel rod and connect them using a STRONG screw (if the screw is weak the torque will destroy it). Weld the gears to each side of the toy on each axle and connect the gears to the wheels using a bike chain. Drill a .5" hole in a strong but slightly flexible tubing and connect to the axle at one end and the 36" beam at the other end using compression. Lastly drill four holes into the bottom of the seat and connect the seat to a plate. Connect that plate to another plate on the other side of the 2x4" beam using screws essentially making clamps. For breaking cut out two 3" section of rubber tube and attach them on the end of two 6" aluminum pipes. Drill 2 holes 1" apart near the end of each pipe and the lever shaft and connect them using screws.
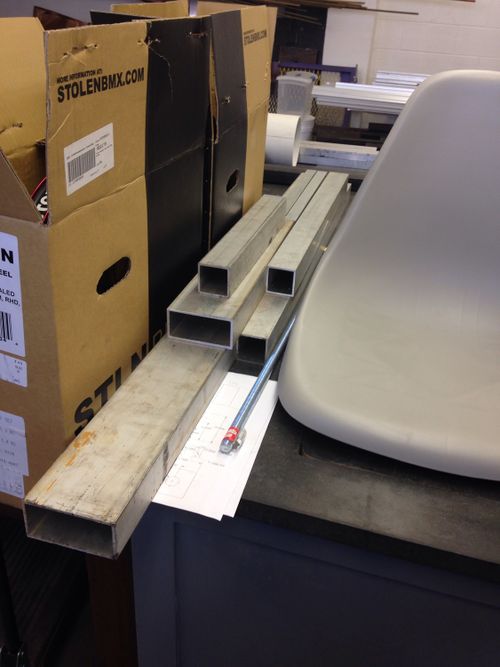
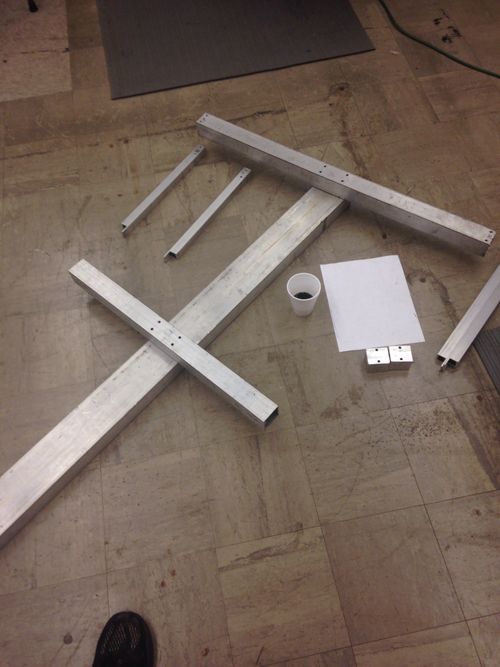
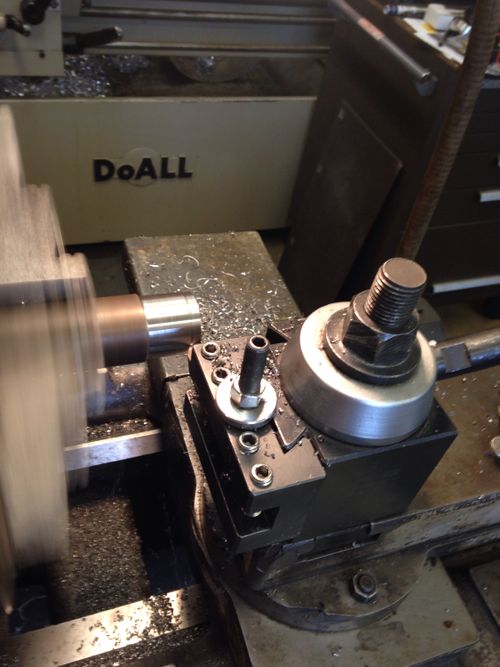
Fabrication Process

Testing and implementation
It was received well by the general populace. We had a few people test it and got some constructive feedback. They really liked the caster idea and were able to get around fairly well. We ran into three walls.
1. Backup capability when stuck. Because of how the freewheel system is designed, one can't reverse without the arms cranking back as well.
2. Free caster in the back for better sliding and turning capability. We restricted some of the motion of the caster to provide better steering, so one problem to fix would be to have a damper/spring system to engage/disengage full movement of the caster for better control when needed, but to also allow zero degree turning.
3. Safety, safety, safety. We need to make it safer and maybe with a better material than aluminum if making one for a child. We would also need to add leg supports and straps to make one securely locked into seat.
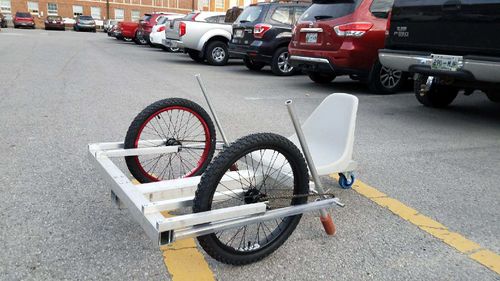
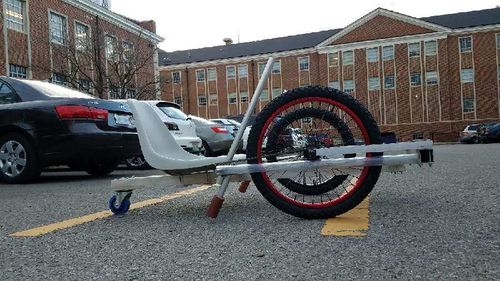
Photos of Completed design
Instructions for safe use
The child will be seated facing forward with both of their legs up on the aluminum frame and be strapped in with a Velcro strap to where he or she will not be able to fall off the toy. There will also be other safety measures taken such as, safety reflectors placed on the toy and a helmet is to be worn at all times.
This toy is meant for kids with lower body immobility to have fun and feel like a "normal" kid, but the bike should not be rode without the supervision of an adult figure, and also in a very low populated area.
Project Summary, Reflection
After completing this project, our group as a whole felt like we got a better grasp on how to use certain tools in the shop and develop construction techniques that are essential all the while using certain tools to get the best results.
At the beginning of the project we didn't have a set child, so we set out to build it for a child ranging from the ages of 12-18 years of age. With no specific bike type toy on the market for a disabled child, our group felt like we met the expectations set out before us.
Our group really worked well together and everyone came together the last few days to get the final product ready. With that being said, getting all of our group members together at the same time was very difficult because of prior arrangements: work, church, family.
For the next years group who get this project there are a few ideas we would like to share with them. Take account the gear ratio for the input, add a few more safety features ie leg constraints and seatbelts. Also buy shaft collars and not try to make them yourself.