Arthrogryposis Assistive Device
Abstract
The student we are assisting with this project has Arthrogryposis. "Arthrogryposis means a child is born with joint contractures. This means some of their joints don't move as much as normal and may even be stuck in one position" (seattlechildren.com). We plan to make a device to help this student with some of his every day tasks.
Team members
Matt Bridges
Parker Burton
Sam Epley
Brandon Patterson
Problem Statement/overview of the need
For this project we observed the student to find some of the students biggest needs and tried to think of some things that would make his life easier/better. One of the things that we immediately noticed was that the student VERY little motion or control of his arms. His arms are locked in "stuck" in the extended position. He can bend his arm by putting his arm on something but has almost no control or motion with his hands. We noticed that he struggled to play his game on the ipad because as he would try to touch the screen, he would put three fingers on it, instead of the usual one. We then noticed that the student struggled to eat a piece of cake because he could not hold a fork steady enough to cut the pieces.
Design Specifications
1. Must be light-weight and comfortable to wear.
2. Must not "look medical" so the student doesn't stand out.
3. Must hold pencil and utensils steady enough to use.
Background research
1. What exists already, similar products 2. availability 3. identify gaps in existing products or technology to be addressed
We have learned that the student was originally give a velcro strap that will hold things like a pencil. However, the student refuses to use this device because he doesn't want to stand out. This is something that we plan to address in our design. We plan to make it Batman themed (his favorite super hero). We believe this will encourage him to use it more.
Conceptual Design
Summarize your conceptual design process. Develop at least three concepts.
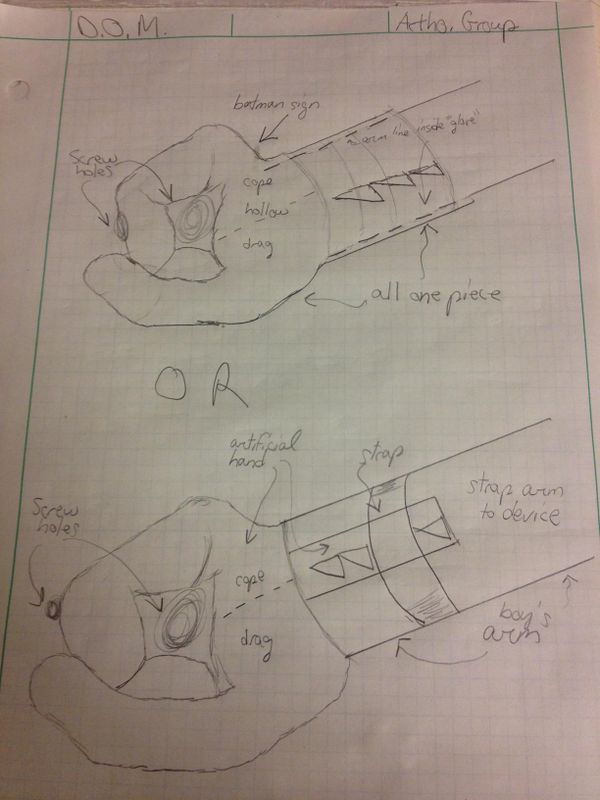
Design Concept 1
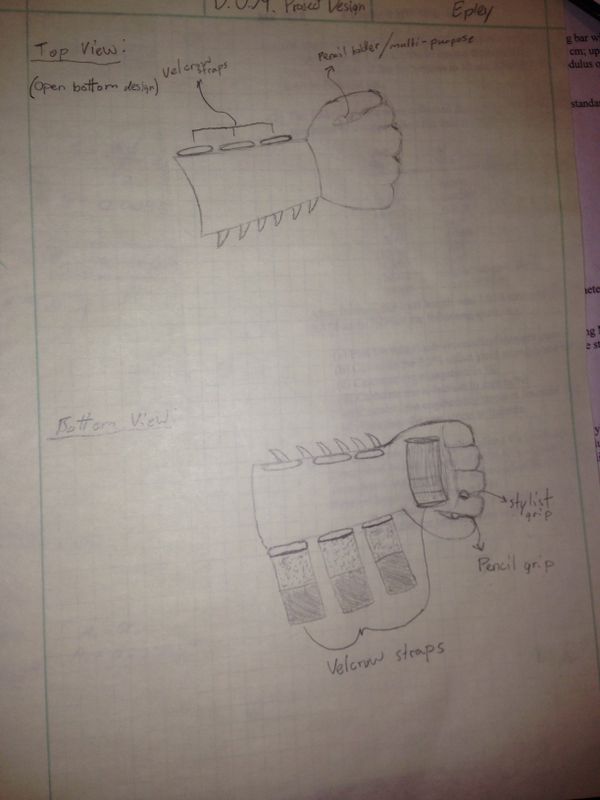
Design Concept 2
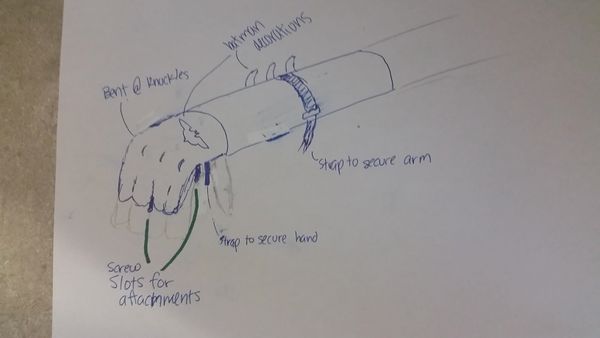
Design Concept 3
Design Concept 4
Evaluate concepts/select candidate
TOTAL: Concept 1 = 22, Concept 2 = 25, Concept 3 = 36(WINNER), Concept 4 = 27
| Categories | Concept 1 | Concept 2 | Concept 3 | Concept 4 |
|---|---|---|---|---|
| Comfortable | 5 | 6 | 8 | 7 |
| Functionality | 5 | 6 | 9 | 6 |
| Design Simplicity | 4 | 7 | 9 | 5 |
| Appearance | 8 | 9 | 10 | 9 |
Detailed Design
The design process consisted of several steps.
- The needs of the child that needed an assistive device were considered. How this device was to meet said needs was debated and decided upon.
- Individual ideas and designs were presented to each other within our group as well as our Professor.
- The design that seemed to best fit the needs previously discussed was chosen.
- An autocad version of the design was created.
- Once the design was created in a file type that could be read by a 3D printer, the device was 3D printed.
- Initial trial fitting of the device was performed.
- Any needed alterations were made.
Description of selected design
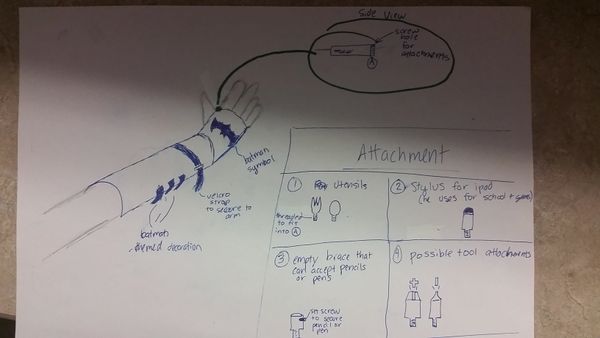
The design chosen was concept 3. There were several reasons why this concept was chosen.
- This concept allowed for the easiest detachment/attachment of the various clips that are used to hold utensils.
- The best way to fit device to child was achieved.
- Met desired needs of child in the best way possible.
Detailed description of selected design
Concept 3 has the following characteristics:
- Comprised of one main piece for the general structure
- The main piece covers two main portions of his arm. These being the lower half of his forearm and his hand down to his knuckles.
- Only covers the top half of his arm
- Has three Velcro straps and holes positioned in such a way that will hold the device steadfast to his arm.
- Has custom Batman insignia
- Has hole for pencil/stylist.
- Has strap that fits across the bottom of his hand that provides extra stability, a place where he can grab, as well as a slot to hold a spoon/fork/other eating utensil.
Analysis
The various analyses performed are as follows:
- The summation of the weight must be calculated. Weight of the device being created must be taken into consideration due to the fact that the child that this device is being created for has extremely limited upper body strength and control. The calculation of the weight of the device is also essential for the following two analyses.
- Friction Force and Normal Force required of the screw to hold the utensil in place must be calculated. This is due to the fact that if said screw is not screwed in tightly enough, the utensil being held in place by the screw will slip out of place when used.
- The Bending Stress that the Clip must be able to withstand was the last analysis performed. This was vital to the creation of this device. When considering the results of this analysis you will be able to determine whether or not the clip holding the utensil attachments in place will break.
Engineering analysis 1
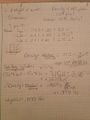
Summation of Weight of Assistive Device
Engineering analysis 2
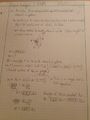
Friction Force and Normal Force required of Screw to hold Utensil in Place
Engineering analysis 3
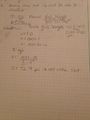
Bending Stress that the Clip must be able to withstand
CAD Drawings
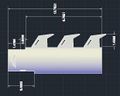
Caption1
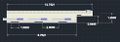
Caption2
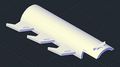
Caption2
Bill of Materials
| Material | For | Source | Price |
|---|---|---|---|
| ABS Plastic | Body of part | Tennessee Tech | N/A |
| Clamp on trammel | Pencil Grip | Micromark pt#83187 | $21.90 |
| Velcro | Straps | Department Store | $12.00 |
| Fabric | Non adjustable hand grip (Optional) | UNK | UNK |
| Foam padding | Comfort | Physical Therapy Clinic of Child | N/A |
| Paint (black,etc) | Style | Department Store | $10.00 |
Assembly Instructions
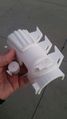
- Step 1: Print the body on a 3d printer
- Step 2: Paint the body
- Step 3: Attach the pencil holder grip
- Step 4: Sew fabric w/ a pouch in it and attach it in the slots of the hand
- Step 5: Attach the velcro and sew where needed to keep it attached
- Step 6: Batman!
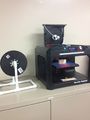
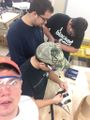
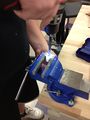
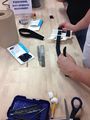
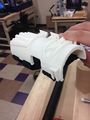
Fabrication Process
Photos of the fabrication process feature here:
Testing and implementation
- Testing for this device comprised of determining whether or not the device fit the child appropriately. This was not difficult due to the fact that the child was excited to try on the device.
- Delivery proved to be somewhat complicated. This was due to the fact that we had only one opportunity a week to possible see the child. This was during his physical therapy session that occurs once a week.
- The child uses the device for eating, writing, and playing games on his I-pad. The device was well received by the family. They seemed appreciative and eager to accept any help that they could get.
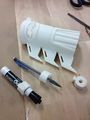
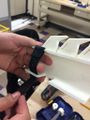
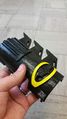
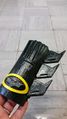
Photos of Completed design
Pictures of the final product:
Instructions for safe use
Provide a clear summary of safe use for the family. Do not use the device unless supervised by an adult that has been fully understood the safe use of this product.
- DO NOT USE THE DEVICE UNLESS SUPERVISED BY AN ADULT THAT FULLY UNDERSTANDS THE SAFE USE OF THIS PRODUCT!
- Only use this device on arm that puts the "Batman Spikes" away from your body (outside).
- Device should be set on the TOP of the user's arm.
- Make sure that padding is not coming out of the inner wall of the assistive device. If it were to do so, it could make slight abrasions where the device comes in contact with the user's arm.
- This device is intended to be used for the following activities: eating, writing, playing games on computer/I-pad. Note: it is NOT LOAD BEARING. The device is durable, however it was not made to withstand large amounts of pressure. (Example of such pressure: body weight.)
Project Summary, Reflection
Project Summary
The members of the Arthrogryposis Assistive Device group utilized the capabilities of Tennessee Tech's 3D printers. This project was a great experience that encouraged the members of this group to use their knowledge of engineering principles to provide for their community. Advances in the child's ability to write legibly were seen immediately after putting on the product of this project. The professors, therapists, the child's family, and students all worked together in a timely, professional fashion to make the completion of this project possible. A young child's life was changed for the better as a result.
Reflection
As students, we greatly enjoyed learning in such a way that provided new opportunities for a child in need. An excellent representation of real-world engineering was on full display. Future engineers worked together to evaluate, determine, and address the needs of a customer and went through all of the required phases of a product producing process to develop a product that met said needs.