Bath chair
Abstract
A boy with limited mobility needs a larger bath chair.
Team members

Problem Statement/overview of the need
A boy with limited mobility needs a larger bath chair to accommodate his increasing weight and height. The parents requested an adjustable foot rest as a requirement, so that his feet do not dangle and lose circulation. A head rest and side pillows were also requested to help support him.
Design Specifications
Modifications for new bath chair:
- Increase height of base to parents’ hip height and make this adjustable
- Increase length to support feet/provide better foot rest and make this adjustable
- Increase length to support head/provide better head rest and make this adjustable
- Chair frame needs to be lightweight and easy to move
- Chair fabric needs to be removable and washable
Background research
- There was a similar designed product to our project are made already selling on "adaptivemall.com". The design they made only goes up to Size 3. The R82 Manatee Bath Seat Size 3 is a reclining bath chair for children approximately early teen years to small adults with special needs.
- The R82 Manatee pediatric special needs bath seat features independently adjustable back and lower leg supports that allow for horizontal or upright positioning. Angle adjustments can be made to both supports to reposition the seat to accommodate the child's specific support needs.
- Angle and height adjustable bath seat made of Latex-Free, anti-microbial material.
- The product is in the price range of $600-$800.
- There will be no gaps in existing products or technology to be addressed.
Conceptual Design
Design Concept 1
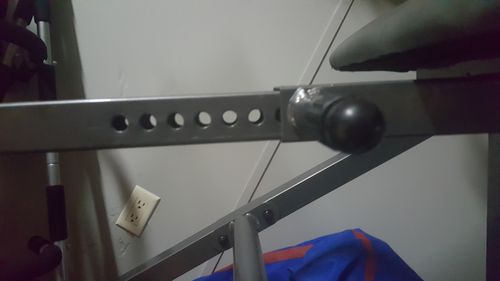
Various methods of creating extendable linkages are available to us. For the legs and backrest locking mechanisms, one solution is to use pins. This thought derives from the strength of locking pins for exercise equipment. These pins would be able to maintain the weight of the child, and likely more as he grows. The estimated maximum weight of the child, according to the parents, is 110-115 pounds. Locking pins should have no trouble handling that weight. We would likely mount the pins in place with a spring or some sort of tie to keep them attached to the frame and make it easier for the parents to adjust it as needed.
Design Concept 2
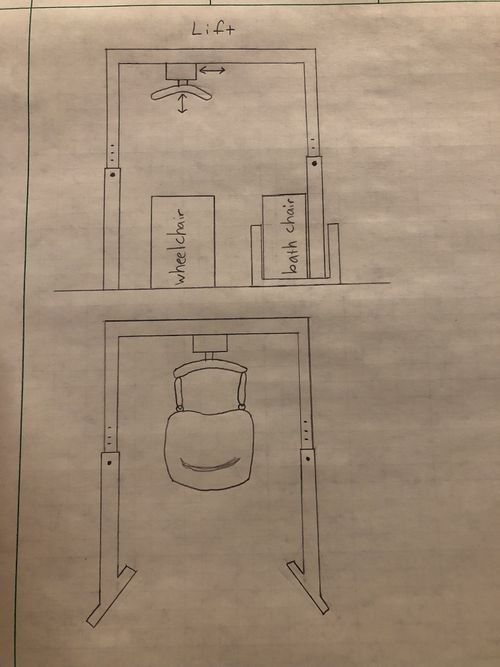
This design concept is a variation of lifts that are currently on the market. The cloth sling detaches from the bar and slides under the child. It is then attached to the bar and used to raise him out of his wheelchair. The sling slides along the top bar and is used to lower the child onto the bath chair. Finally, the sling can be detached and removed.
Design Concept 3
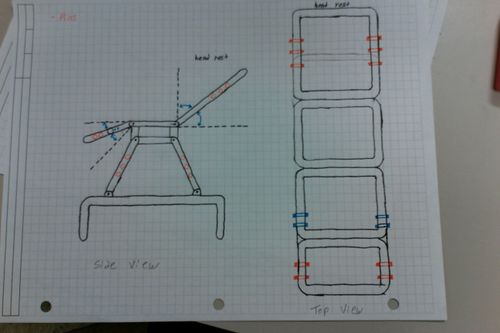
The third design concept involves the use of the previous two concepts in the extension of the chair length. The difference in this design is that it involves creating a lifting mechanism for the parents to make it easier for them to put the child into the shower. This mechanism involves sliders which lock the chair into a guide when in the shower, but can be slid out of place to allow the chair to rotate around and tilt out over the edge of the bathtub into a position which would allow for easy transfer of the child and can be lifted with support from the chair. This design does not adjust the height of the frame (which would be hard set at 36 inches from the ground, as provided by the mother), but instead takes on the challenge of moving the child more easily, effectively meeting the requirement of the parents.

Note from the editor: The image needs to be rotated 90 degrees. Wiki is rotating the image after upload and I can't figure out how to rotate it back.
Design Concept 4
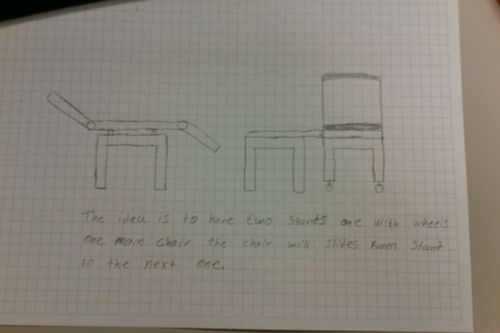
The idea is to make the chair and two bases. One of the bases will be placed in the bath tub that base will have rails that connect the two bases. the other base will have tires to transport the child. The main chair will slide from one base to the next one.
| Concept Design No. | Safety | Mobility | Affordability | Simplicity | Total |
|---|---|---|---|---|---|
| Concept 1: Pins | 4 | 4 | 4 | 4 | 16 |
| Concept 2: Track | 3 | 3 | 3 | 3 | 12 |
| Concept 3: Rotate | 2 | 3 | 2 | 2 | 9 |
| Concept 4: Lift/Pins | 2 | 1 | 2 | 3 | 8 |
| Rank: 1-4 (1=Worst, 4=Best) |
For our winning candidate, we decided to combine the track and rotate concepts. The size and layout of the bathroom pose challenges that we must consider. We think this combined design will allow for the most versatility and maneuverability.
Detailed Design
Description of selected design
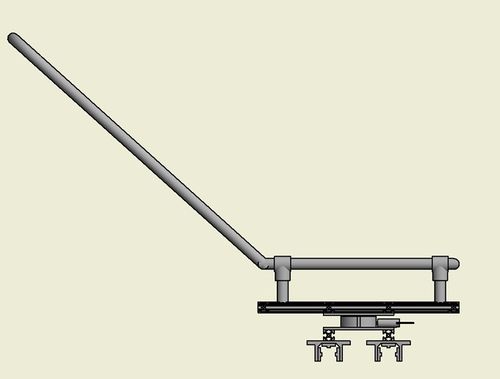
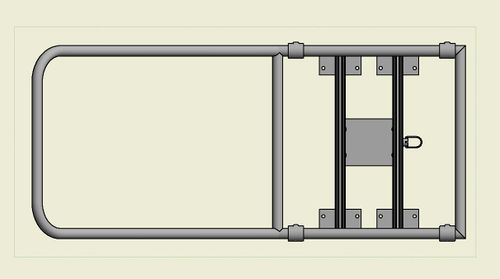
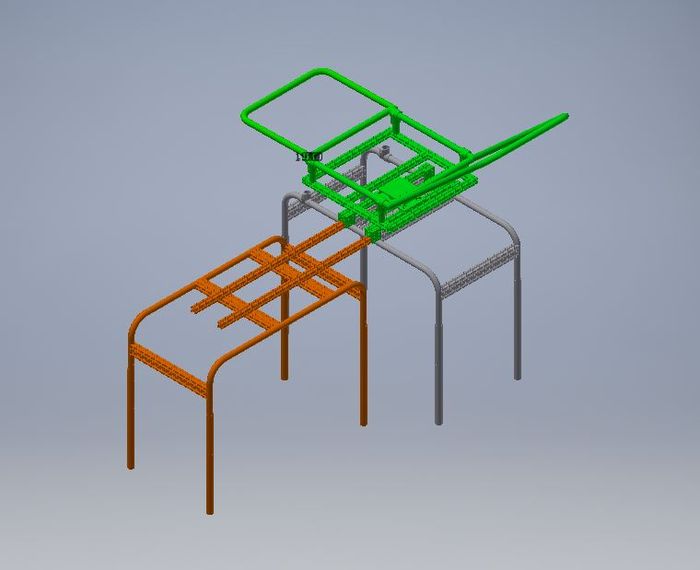
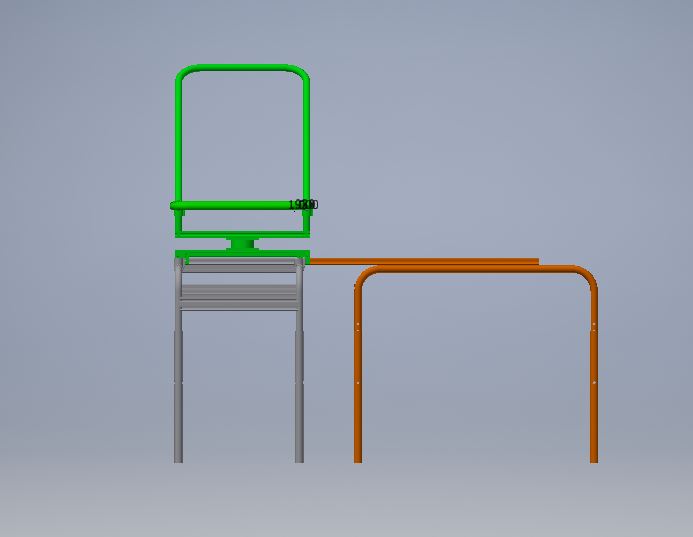
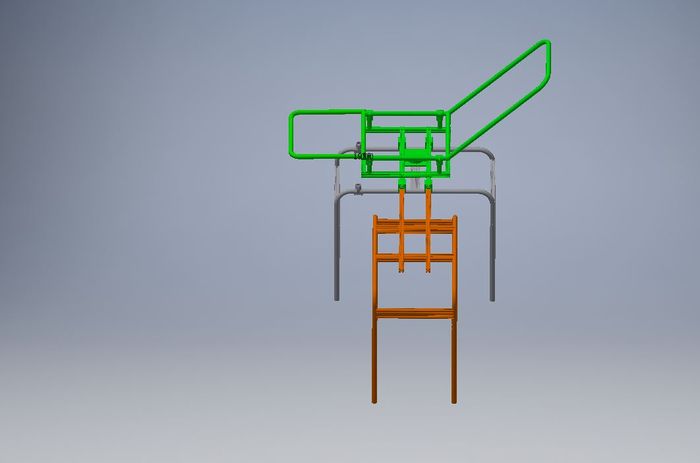
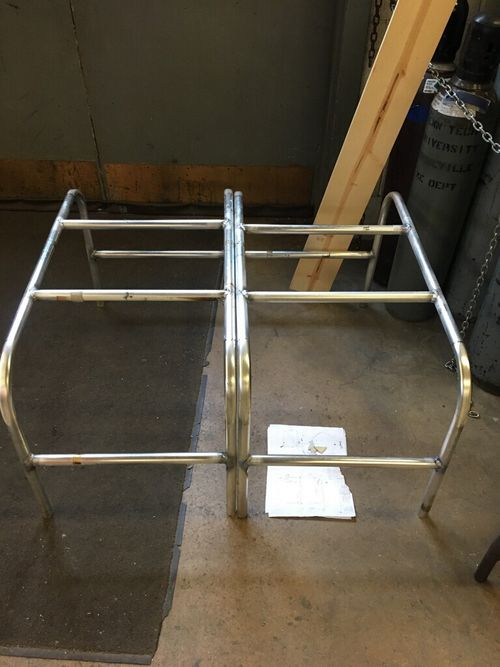
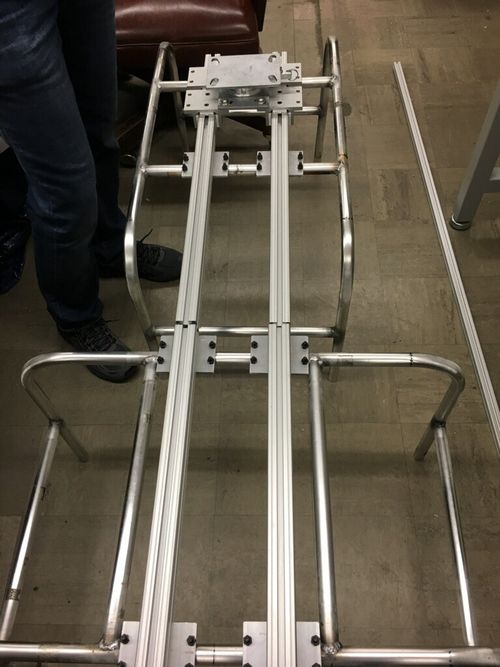
The selected design combines two of our concepts, the track and rotate concepts. There are three main components to the bath chair: the transfer chair base, the bath chair base, and the chair seat that will slide between the two bases and can rotate.
Detailed description of selected design
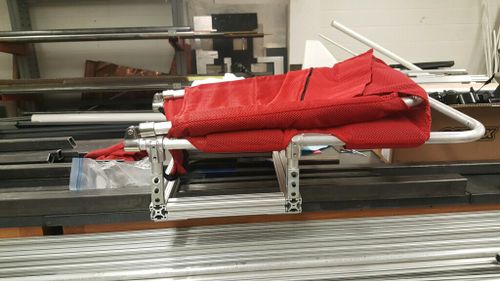
The transfer chair base is the component that will remain outside the bathtub and serves as a bridge between the boy’s wheelchair and bath chair. It is on wheels so the transfer process can take place outside the bathroom where it’s more convenient. The wheels and chair seat lock in place for safety. The angle of the headrest can be adjusted to make the transfer easier.
The transfer chair connects to the bath chair base, which is in the bathtub. The bath chair base is a fixed structure with attached footrest. The seat with headrest slides along a track between the two bases. It rotates in order to aid the transfer process into the bathtub. Once in place, the chair locks for safety and the transfer chair base can be removed.
Analysis
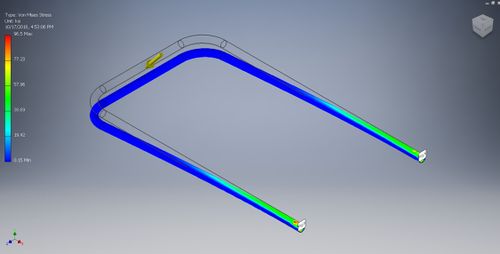
The analysis was performed to determine the Factor of Safety and to see how much stress it can take before it breaks. Type: Von Mises Stress Pressure: 120 psi
Engineering analysis 1
The stress analysis of the Aluminum 6061 frame was studied and the results are shown below.
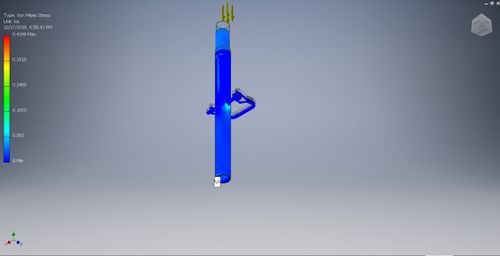
Engineering analysis 2
The stress analysis of the Aluminum 6061 pins.
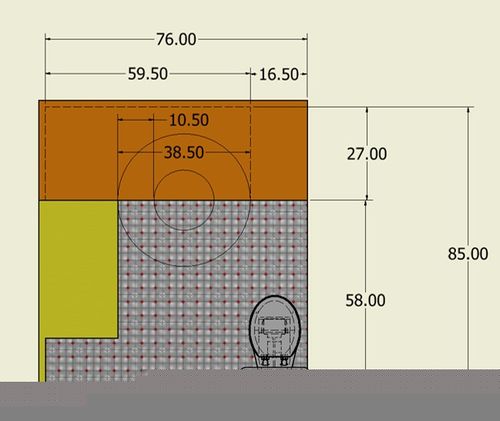
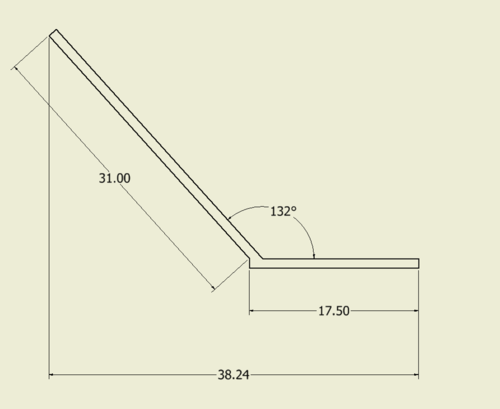
Engineering analysis 3
Clearance test for the bathroom, so the chair we design will be able to slide and rotate within the required area. The bigger circle is the space for the chair with the head rest set at 132 degrees, which is the maximum angle that will clear. The smaller circle is the space for the chair with the head rest set at 90 degrees.
CAD Drawings
First Design:
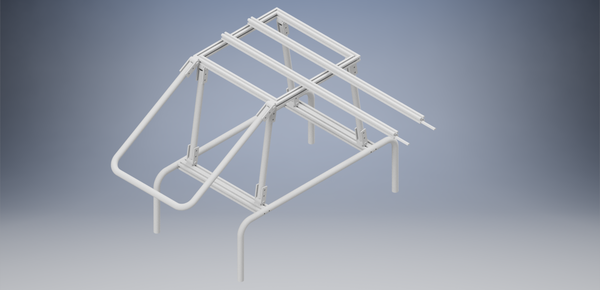
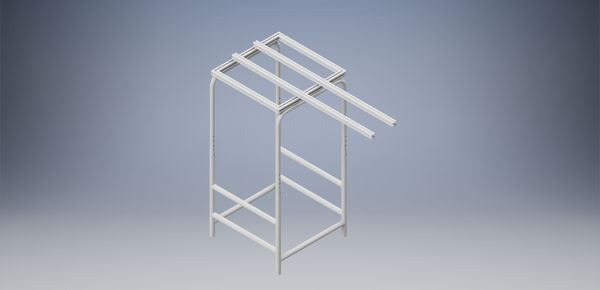
Second Design (after modifications):
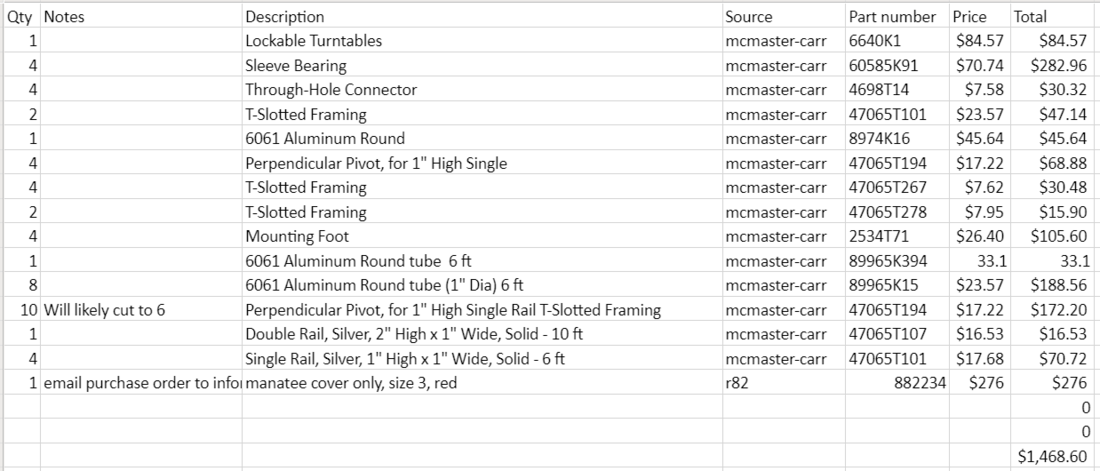
Bill of Materials
Assembly Instructions
Seat x1
Base x2
Pins x8
Leg Extensions x8
Check for stability
-Assure all pins are in place.
-Place in shower or bath.
-Periodically check to assure that all screws remain tight.
Fabrication Process


Testing and implementation
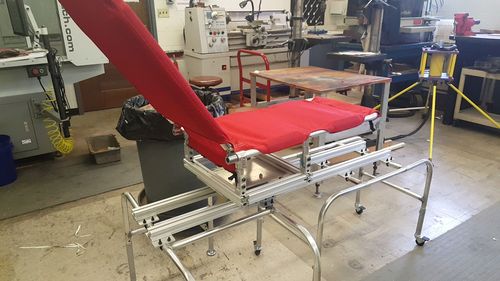
The group members did a run-through with the chair to ensure it functioned properly. We also checked the dimensions of the chair in the family's bathroom. The chair was inspected by Dr. Canfield and Jeff. We delivered it to the family's house, assembled it in their bathroom, and gave them instructions on its proper use. They were very excited to receive the chair.
Photos of Completed design
Instructions for safe use
Adjusting the Leg Extensions
1. To make adjustments, remove the pin and slide the leg extension to one of the 3 adjustment holes for the desired height.
2. Place the pin fully through the adjustment hole of the leg extension.
3. Repeat STEPS 1 and 2 for the remaining legs.
4. Place the bath chair base in the bath tub. Ensure that all four feet of the base are in contact with the floor.
5. Make sure all four legs are adjusted so that the bath chair base is level.
6. Make sure to lock the wheels on the transfer chair base when the bath chair base and the transfer chair base are aligned.
NOTE: After every adjustment and BEFORE every use, ensure that the seating platform is level and stable before using.
Project Summary, Reflection
This was a challenging and beneficial project. It was a great learning experience to increase our knowledge of the engineering process as well as our practical skills. It was also very rewarding to create a device to help the family.