Communication Doll
Abstract
This project objectives is to create a doll that can serve as means of communication between a non-verbal child and a caretaker or healthcare provider. Inability to communicative verbally is very common among child with Autism with an estimated 25% speaking no or few words. While Autism is a major cause of a child being non-verbal, any child that fails to meet developmental language milestones for their age group and be classified as non-verbal regardless of the child being Autistic or not. Our doll will not attempt to aid a child in developing verbal communication. It will only serve to aid the child in communicating with a caretaker. The doll will have attached sensors with programmable responses to the sensor trigger which is squeezing.
Team members

Mark Potts, Tyler Marcrum, Hayden West, and Graham Williams-McKay
With Additional Help from Alyssa Conger
Problem Statement/overview of the need
It is estimated that a minimum of 25% of all Autistic individuals are non-verbal or have extremely limited verbal abilities. As of 2018, 1 in 59 children were diagnosed with Autism. This represents a growing need to address issues that Autistic child and their caretakers struggle with. To clarify, by growing need, we mean the increased interest in understand the issues that people with Autism face and the attempt to make the world a more inclusive place for those individuals, not whether or not the rates of Autism are increasing. The goal of our project is not aimed specifically at non-verbal Autistic children, but they do make up a very large category of non-verbal children.
Currently, technology does exist for older and more advanced children that are non-verbal. For example, children may touch an images of actions or feelings on ipad (or similar device) and that pictorial representation is voiced through a speaker. However, our communication doll is intended to aid the children at a developmental level below that ability. Inability to communicate a need or feeling, at minimum can be a frustrating event for the child and at maximum extremely dangerous. An example is that many non-verbal child commonly have eardrums burst because they are unable to communicate that they have an ear infection (common, extremely treatable childhood illness) to their care taker. With our doll our hope is that the care take could ask the child to indicate if they are in pain and where it hurts. The child would press or squeeze that area to trigger a response from the doll. We hope that our efforts will greatly increase the ability for a non-verbal child to communicate its wants or needs with an adult.
Design Specifications
For our design we have discussed the utilization of an Arduino unit incorporated with a soft-bodied baby doll in order for it to be used as a form of communication between a caretaker and a child. The Arduino board will be paired with pressure sensors embedded throughout the doll that are programmed to expel various audio commands prompted in the code when pressed. The doll will be anywhere from 15-20 in. tall and just over 10 in. in width (basing dimensions on a cabbage patch doll). This will reassure that we has as much room as we need to fit the arduino unit into a 3D printed box with whatever accessories we choose to incorporate on it. This may include but is not limited to: various ports for wiring, a switch to pick between different settings, and a USB plug-in to power the board. The Arduino board will either be 2.7 in. x 2.1 in. or 4 in. x 2.1 in. or whichever board type that our team decides will be best for our operation. The wiring for the pressure switches will be the standard 20 gauge wire that is used for various Arduino applications. To supply power to the board we have discussed the implementation of a battery pack located within the 3D printed case, or simply having a direct USB plug-in from a standard wall outlet since the doll will be solely be used in an office setting.
Background research
What exists already, similar products 2. availability 3. identify gaps in existing products or technology to be addressed Dolls are already used as therapy devices to help bring out empathy in children. Speech devices also exists in apps for cell phones or computers. These are also available in toys for young children. These two separate products are easily accessible to the general public. There are products that are the combination of the two products such as "Tickle Me Elmo". The product needed for this project requires a doll that a child can relate to and the customization to allow for easier communication through the doll as a tool rather than educational uses.
Conceptual Design
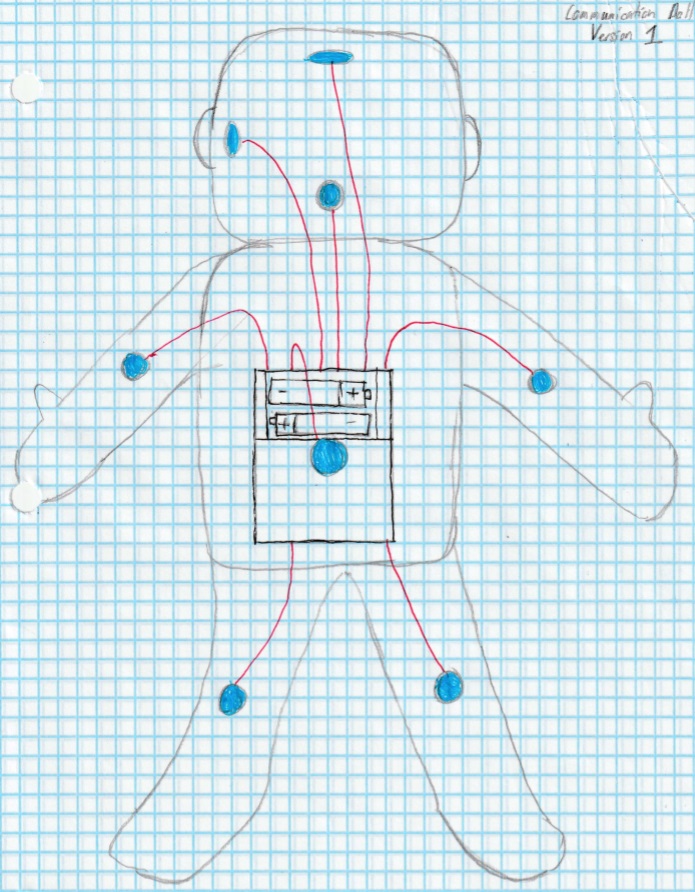
Design Concept 1
- A very basic design with an Arduino in its core. The Arduino is protected by a case inside the doll. Several buttons (highlighted in blue) are connected to the Arduino with wire (highlighted in red). A battery pack would power the doll.
- One concern with this design is that the wires are unprotected and could easily be damaged or disconnected.
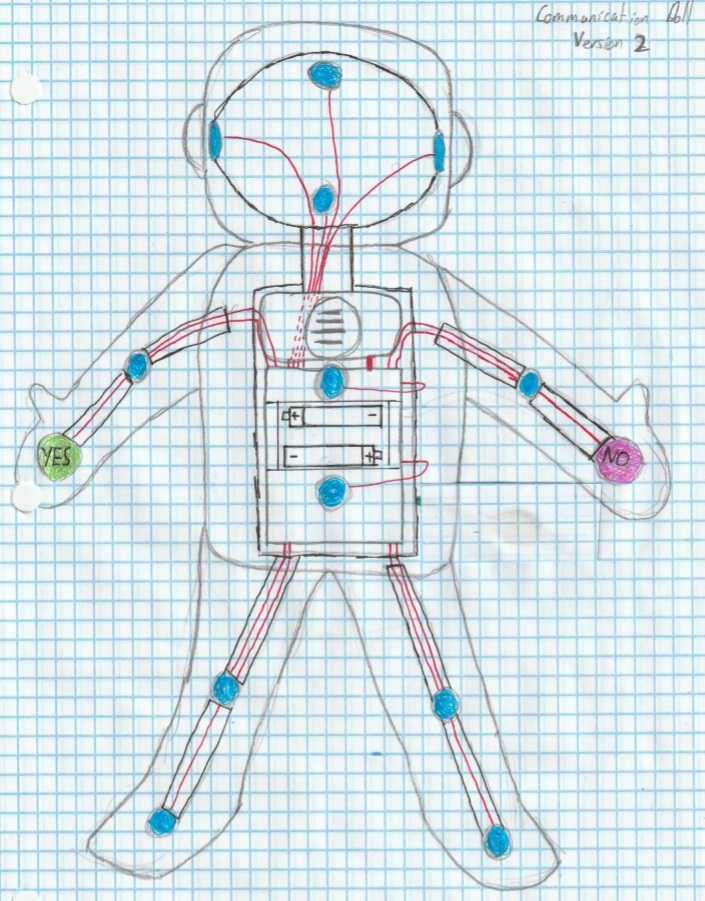
Design Concept 2
- A more complicated design. More buttons have been added to the doll, including both "yes" and "no" buttons in the palms of the hands. A rough skeletal inner frame has been added, protecting vulnerable areas such as the head and neck, as well as covering the wires to help prevent damage. This design also adds in a speaker in the body.
- One issue this design may suffer from is the battery pack; needing to recharge or replace batteries may turn out to be a hinderance.
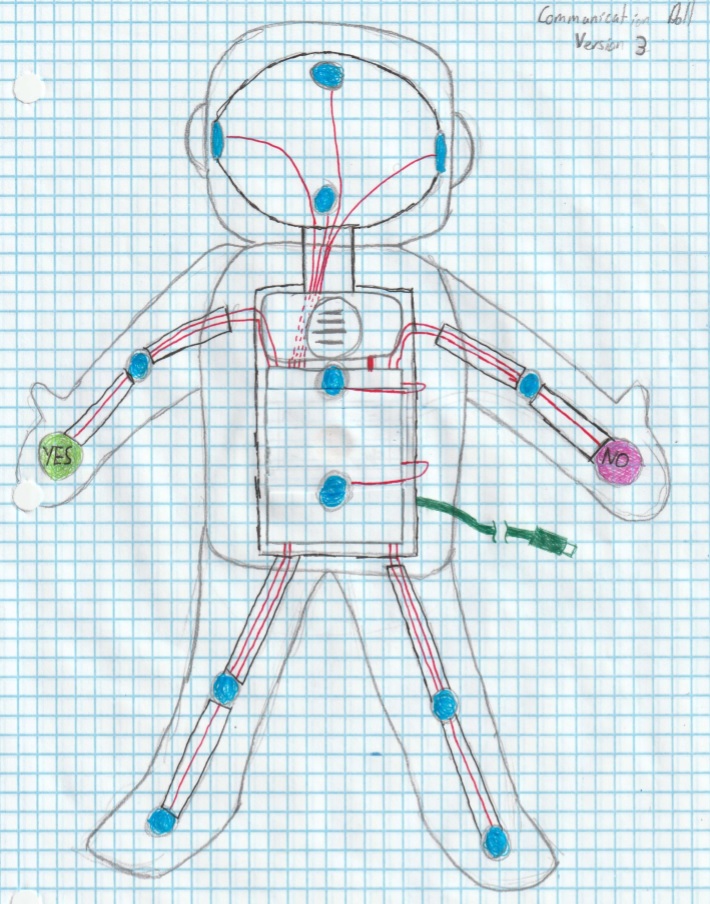
Design Concept 3
- Our final design, it is the same as design two, barring the power source. This version has a micro-USB plug on the back of the doll, allowing it to be hooked into the wall using a phone charger or similar device. This will simplify the use of the doll in the long run.
- The one downside to using a micro-USB for the power is that the cord may have difficulty reaching certain areas, so cord length should be a consideration when purchasing parts.
Evaluate concepts/select candidate
The table below outlines some of the differences between the designs, with better features being bolded and italicized. Overall the third design appears to be the best. It and appears to have the easiest method of powering the doll, it is just as durable as the second design, and it has a speaker.
| Design # | Power Source | Inner Frame | Speaker |
|---|---|---|---|
| Design 1 | Battery Pack | Arduino | No |
| Design 2 | Battery Pack | Arduino, Wires | Yes |
| Design 3 | Wall Charger | Arduino, Wires | Yes |
Detailed Design
Description of selected design
We have chosen design 3. However, we have reduced the amount of buttons to 7: Jaw, L/R ear, stomach, chest, and L/R legs. These will be digital inputs. The arms and legs will have analog squeeze sensors that can measure pressure. A speaker will be included. There will be a short test program that attempts to get the child engaged with the doll. For example, "Can you squeeze my left foot for Yes?" We will have to work with the Therapist to modify the script to get more interaction.
Detailed description of selected design
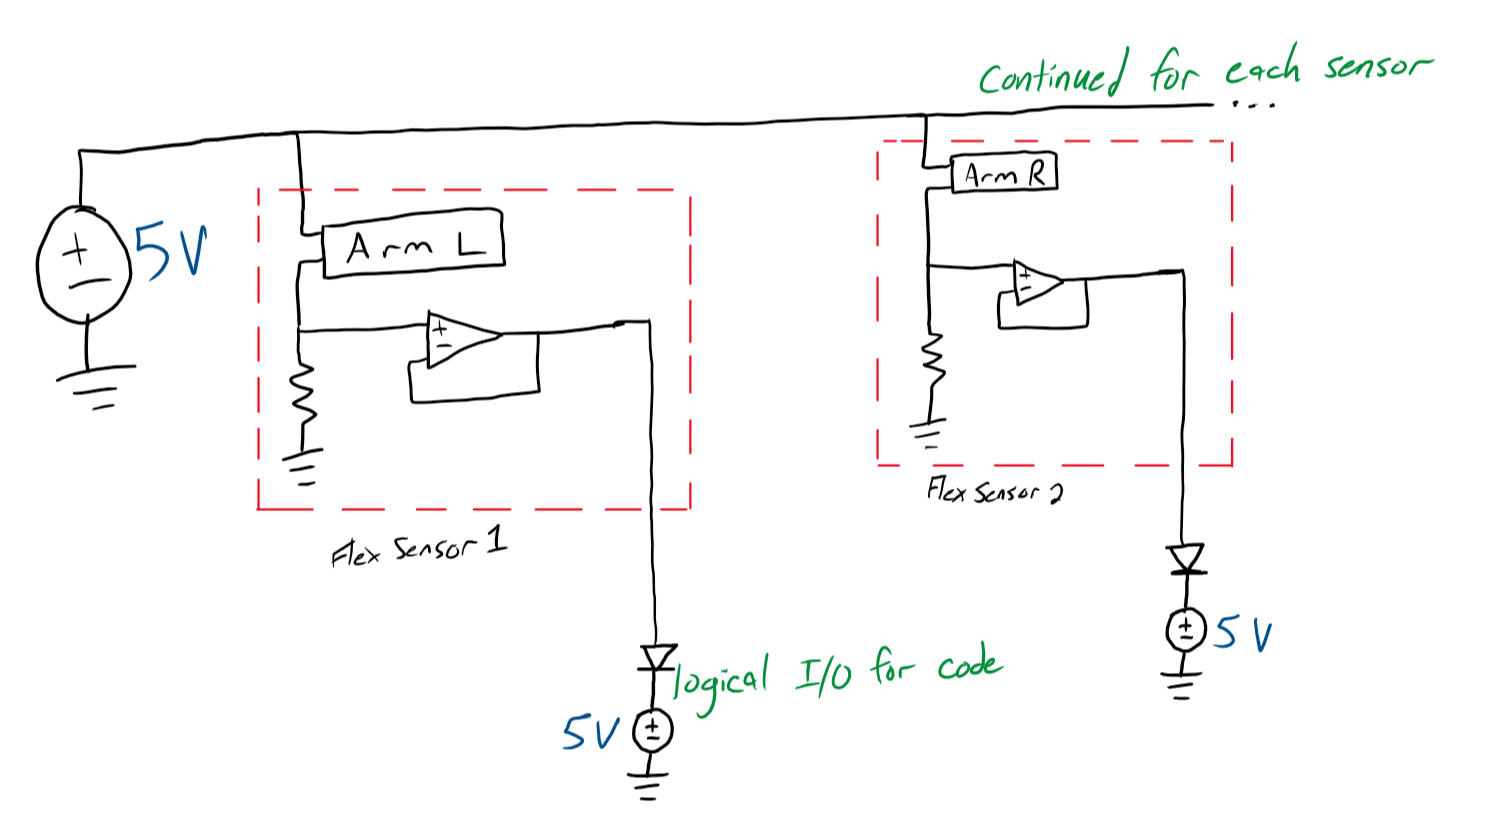
The design we chose uses an Arduino MKR WIFI 1010: Model 7630049200258 powered by a micro-usb. This will implement a small speaker to play mp3 files that we will convert into WAV files so that the Arduino can read the files. We will use air hoses throughout the doll to make sure the wires do not come under tension. The flex sensor resistors will be glued to stress balls to allow them to be easily squeezed by the child and provide a reliable input. The Arduino provides 5 volts as a logical HIGH source. From that we will wire our flex sensor resistors and digital push buttons in parallel to the voltage source to minimize voltage drop across each resistor. The voltage drop from the resistor will allow for us to have a potential voltage of 0 across to give us a logical LOW for the diode. When the flex sensor is squeezed it will increase its resistance and drop the voltage by a significant amount. The drop in voltage will give us an adequate potential voltage to change the diode to a logical HIGH. The speaker will have a resistor that we can adjust to get a desirable power output through experimental analysis. Instead of having a switch to change between the different types of feedback the therapist is looking for, we will have a program for each one and give her the ability to download each from her laptop.
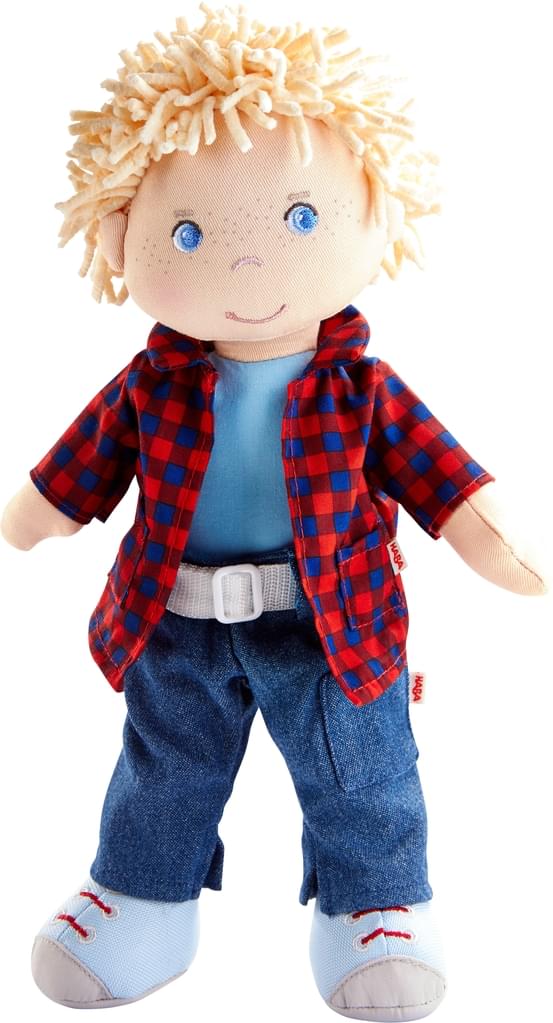
Doll chosen:
Analysis
Circuit Analysis of force sensors, Tipping Analysis on Doll, and Circuit Analysis of speaker.
Engineering analysis 1
Engineering analysis 2
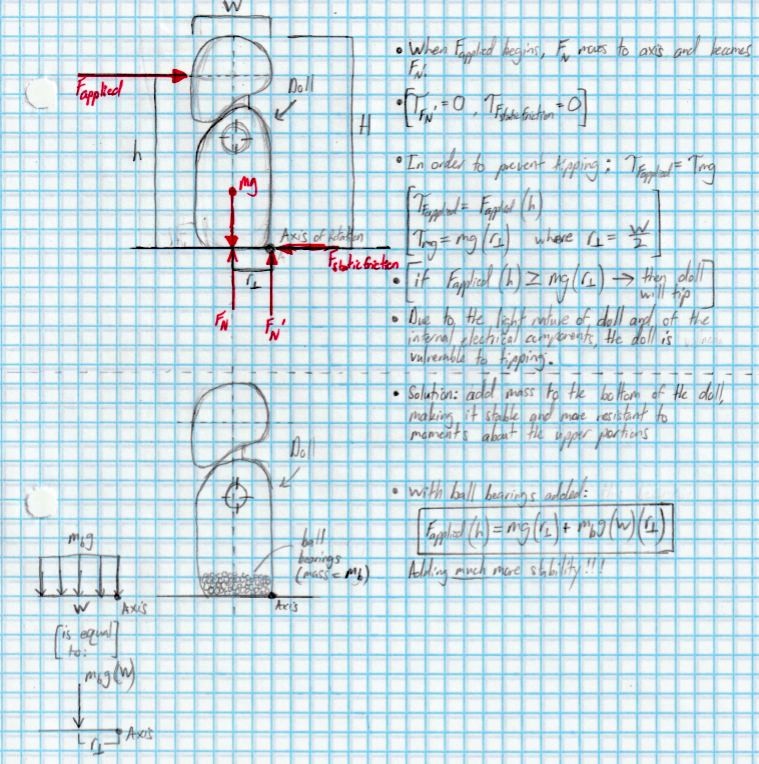
Analysis of the Doll's stability and its ability to resist a force causing it to tip:
Engineering analysis 3

CAD Drawings
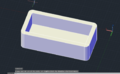
Note: Case shape is subject to change due to possible alternate ways to install Arduino in doll (measurements have not yet been accurately determined)

View of the Case
Alternate View of the Case

View of the Lid
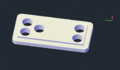
Alternate View of the Lid
ARDUINO MKR WIFI 1010: Model 7630049200258
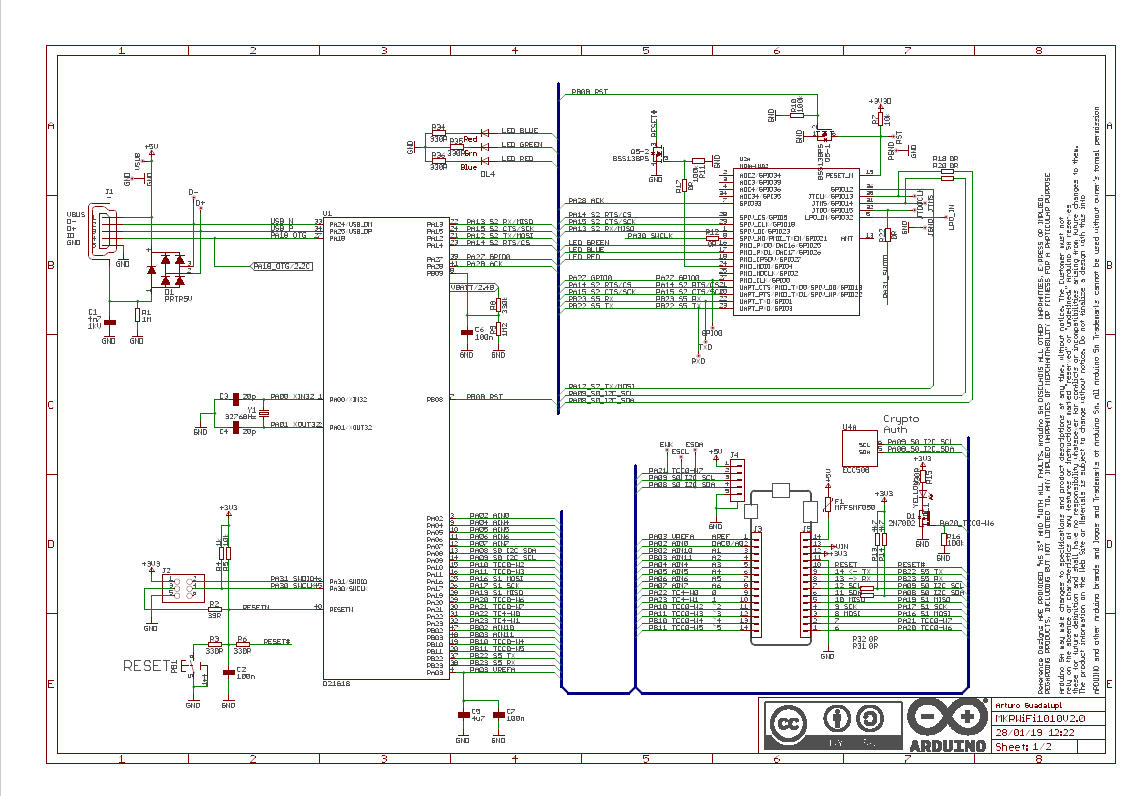
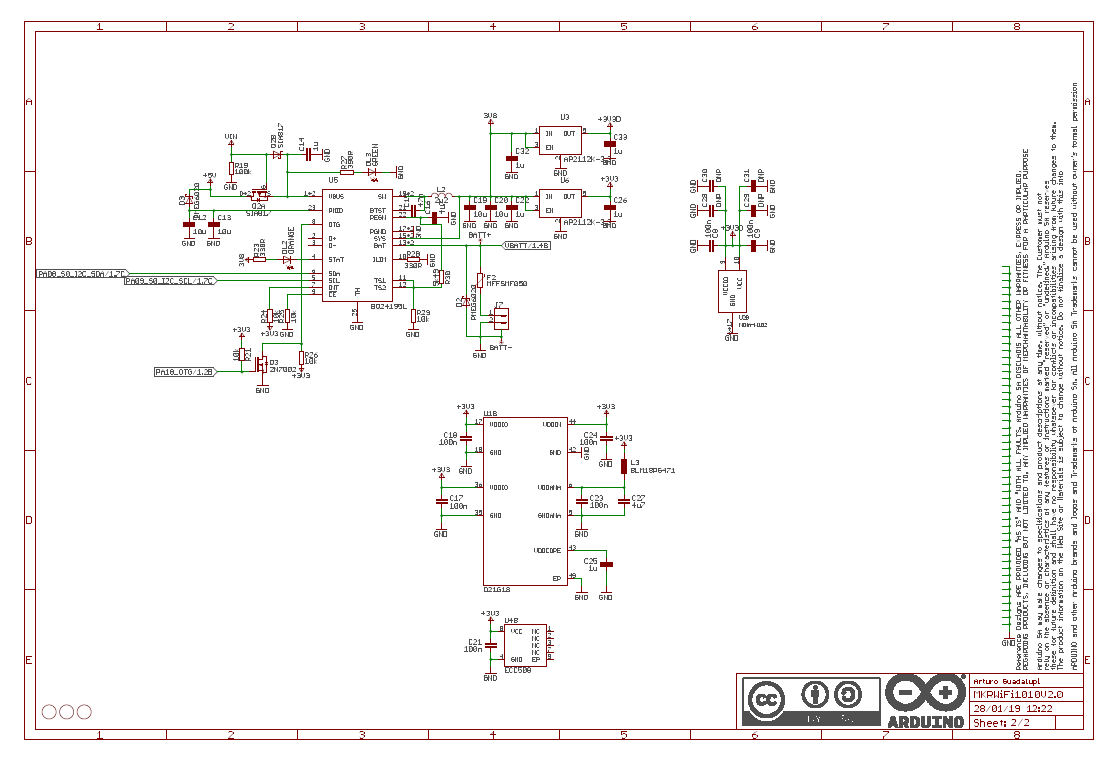
Detailed schematic was found at: Arduino MKR wifi 1010
Bill of Materials
 (Price indicated is before shipping costs have been added)
Assembly Instructions
Fabrication Process
Insert pictures of fabrication process
Testing and implementation
Describe testing, delivery, how used/received by the family
Photos of Completed design
Insert pictures of the final product
Instructions for safe use
Provide a clear summary of safe use for the family. Do not use the device unless supervised by an adult that has been fully understood the safe use of this product.