Interactive walker F13
Contents |
Abstract
Develop a walker for a little boy with slow muscle development that is just beginning to walk.
Team members
- Andy Holden
- Kaitlyn Keen
- Tyler Cortner
- Ben Kimball
- Will Nicholas
Problem Statement/overview of the need
This walker will be designed for a two year old boy who is currently ready to start learning to walk. Due to his slow muscle development, it has been decided that a walker would help aid him through his learning process. This walker will be built to be interactive to not only increase interest but to also incorporate activities to encourage a squat and reach motion with the hopes to build muscles and stability throughout the walking process.
Design Specifications
The walker must satisfy the following specifications:
1. Have enough stability to assist child while walking.
2. Be adjustable to provide proper fit throughout the growth of the child.
3. Have varying resistance to help muscle development to encourage independent walking.
4. Incorporate activities to encourage squat and reach motion.
Conceptual Design
Design Concept 1
Our first design concept primarily focuses on stability and maneuverability that is achieved with a conventional style walker.
Pros:
- Stable
- Lightweight
- Adjustable
- Easily transported
Cons:
- Looks too much like a traditional walker
- Hard to incorporate interactivity
- Difficult to create resistance mechanism
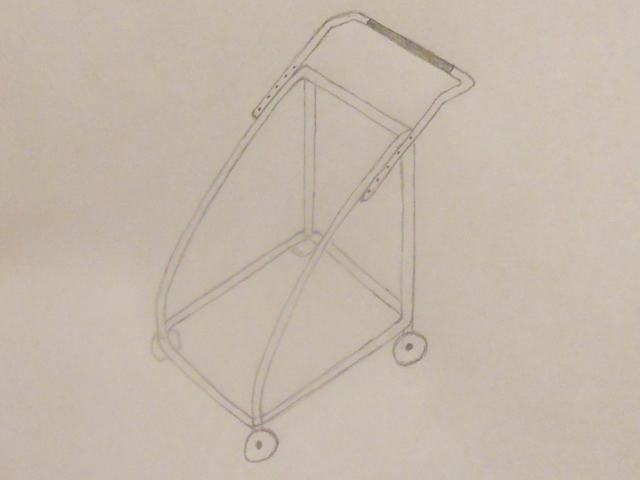
Design Concept 2
Our primary focus was on making this design look more like a toy wagon rather than a walker for the child. It focuses on being highly interactive and aesthetically pleasing.
Pros:
- Wide base provides stability.
- Simple construction for reliability.
- Open base for storage.
Cons:
- Potentially too heavy for the child.
- Difficult to incorporate adjustability.
- Hard to transport.

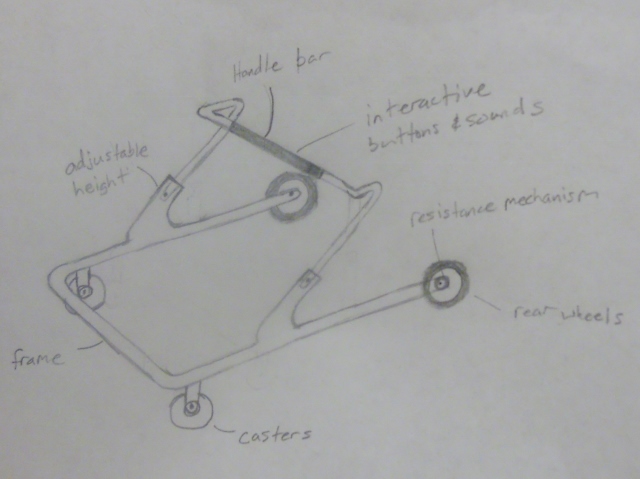
Design Concept 3
This design allows us to incorporate all the features that were asked for by the family into a toy that does not look like a typical walker.
Pros:
- Lightweight and maneuverable
- Adjustable height and resistance
- Easy to incorporate the squat-and-reach motion
- Capable of being very interactive
- Safe rounded edges to prevent injury
- Simple and reliable construction
Cons:
- Narrow base
- Not collapsible
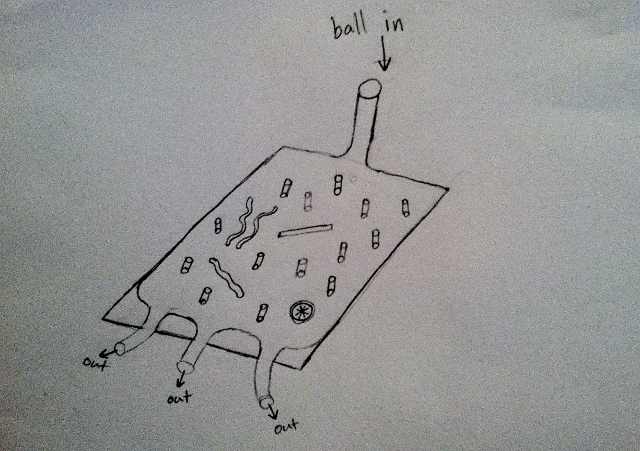
Activity Design 1
This is a pinball like design that would be installed inside of the walker frame.
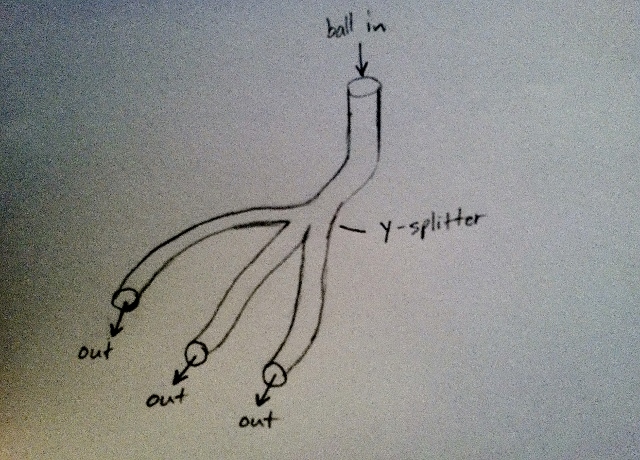
Activity Design 2
This activity is similar to the one above but instead uses clear plastic tubing.
Concept Rankings

Detailed Design
Description of selected design
Our final design choice most resembles concept three. Due to all the different features that are to be incorporated, this design best meets the needs of the customer. Some modifications of the frame shape were made after the materials were selected and an extension of the base length was necessary in order to increse the stability.
Key Features:
1. Aluminum Tubing and Fittings
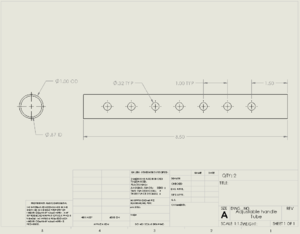
2. Adjustable Handle Length
3. Ball Peg Board
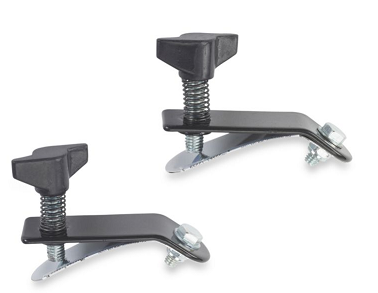
4. Resistance Mechanism
Analysis
The following engineering analysis are needed for our final design: Overall Weight, Tipping, and Mobility
Engineering analysis 1
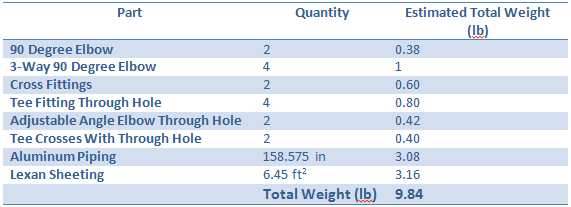
Estimated Overall Weight. One of the main areas of concern for the family was making the walker light enough to easily be pushed around by the child. Here we calculated up the total weight of all our parts needed in construction to give an accurate value for the final weight of our product. Keeping it around 10 lbs was the goal, and as shown below the weigh is exactly 9.84 lbs.
Engineering analysis 2
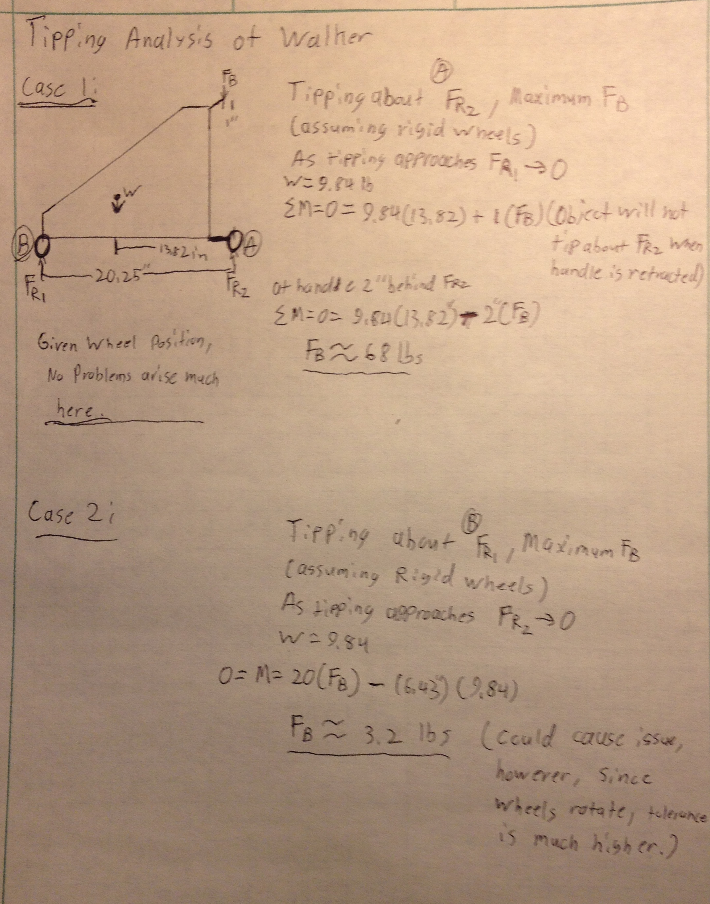
Tipping Analaysis. Since one of the primary goals of our design was making it way as less as possible, we then faced a concern of the walker tipping. If the walker was too easy to tip over then the child's safety would be compromised and the walker would fail its purpose of assisting the child in walking. Assuming that the walker was a static rigid body, and excluding the wheels in our calculations, we took the moment of the Walker at the handle bars and at the front base of the walker. Shown belown are the calculations from these points.
Engineering analysis 3
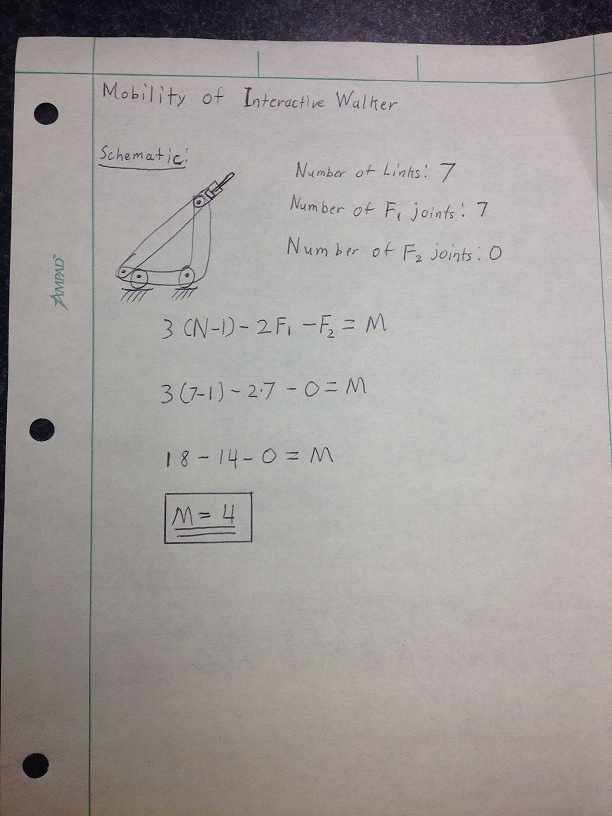
Mobility Analysis
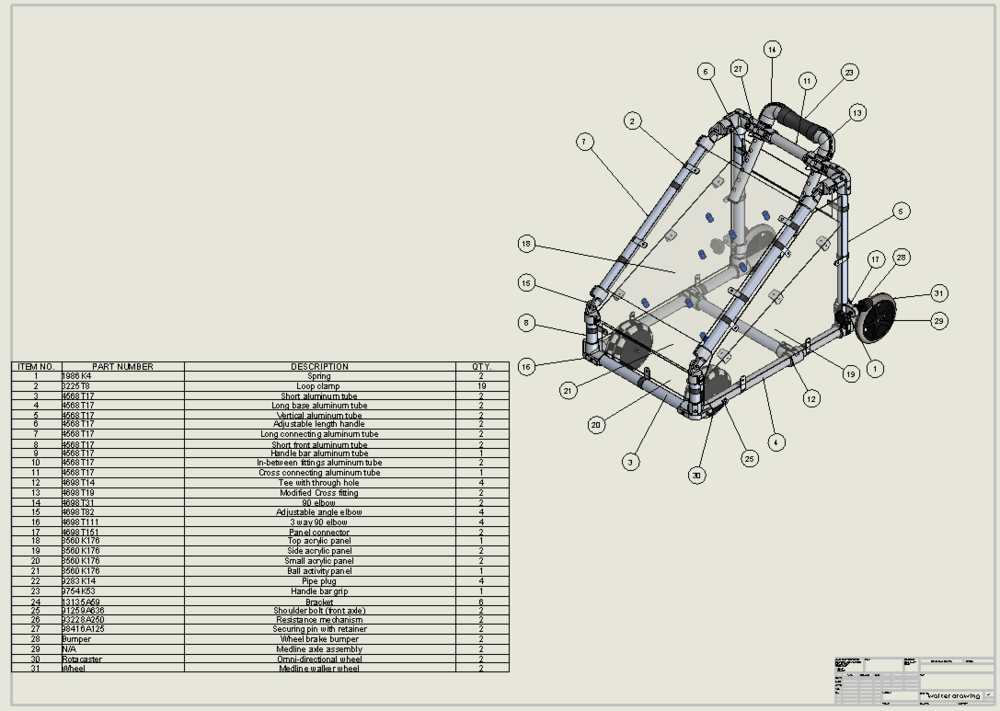
CAD Drawings

Walker Front View
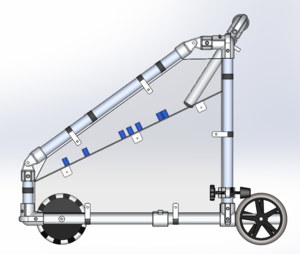
Walker Side View
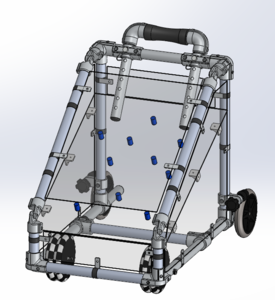
Isometric View
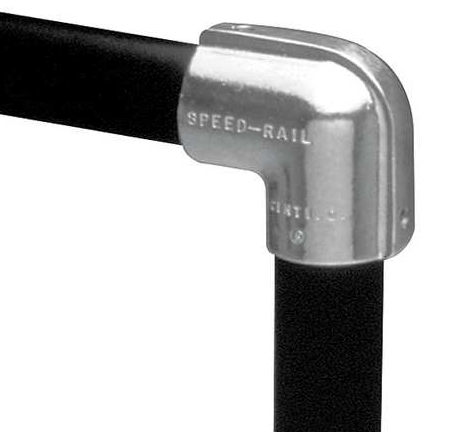
Aluminum Slip-on fittings:
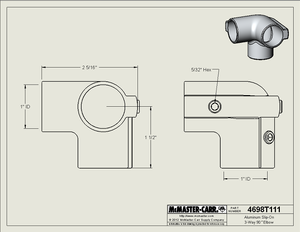
3-Way 90° Elbow
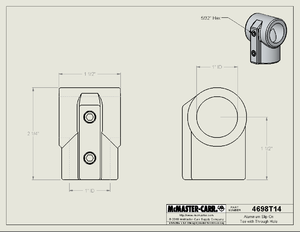
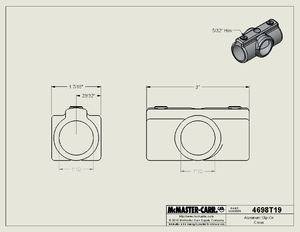
Tee with Through Hole
Cross Pipe
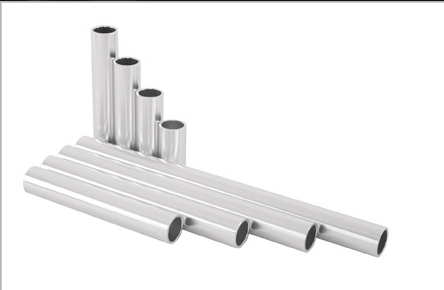
Aluminum tubes:
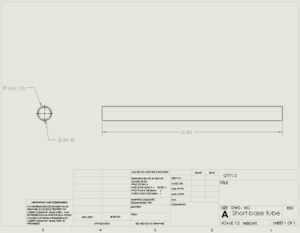
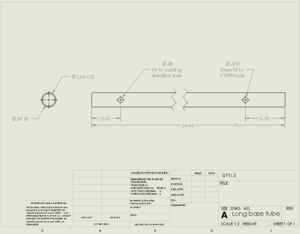

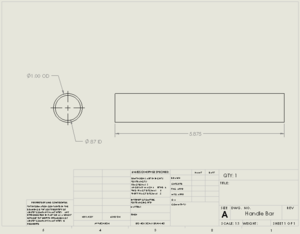
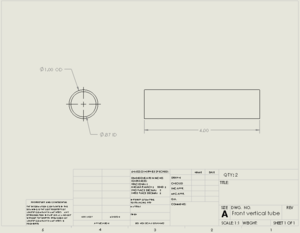
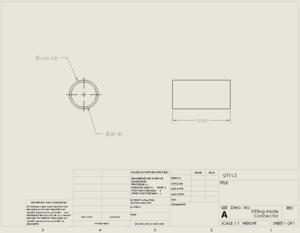
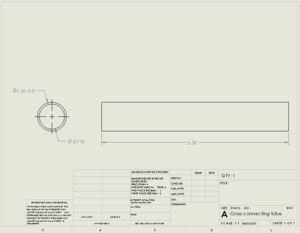
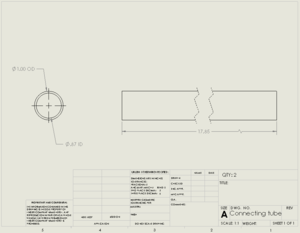
Specifics
This is the resistance mechanism which will be installed on the back wheels to enable the ability to vary the resistance of the walker.
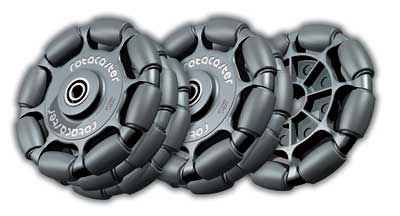
Omni-directional wheels will be used for the two front axles, allowing our customer to turn the walker with ease.
Aluminum tubing will be used to build the frame since it is lightweight yet strong.
Slip-On Aluminum fitting will be used to contrust the frame.
Bill of Materials

Assembly Instructions
STEP 1: Cut the Aluminum Tubing to appropriate lengths based off initial CAD design.
STEP 2: Using slip on fittings, construct the frame of the walker.
STEP 3: Drill the holes into the Adjustable Handle Bars, and attach to frame.
STEP 4: Using both the omni-directional wheels and the fixed axis wheels, attach to the frame. Completing the framework of the walker.
STEP 5: Cut the LEXAN into the appropriate lengths based off measurements taken from the constructed frame.
STEP 6: Drill Holes in appropriate places on LEXAN and attach to the frame of the walker.
STEP 7: Add the pegs to the inner LEXAN Plate.
STEP 8: Add the Resistance Mechanism to the Fixed Axis wheels to increase/decrease difficulty of walker movement.
STEP 9: Using the Flexible Piping attach to the body of the walker to create the reach-and-squat motion for the child.
STEP 10: Clean and Decorate.
Fabrication Process
The Fabrication Process
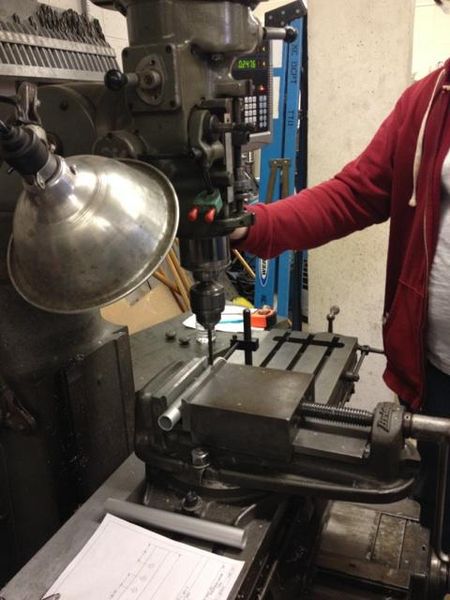
Drilling Holes for the Adjustable Handle Bars
Making the Holes for the pins to fit into for the Adjustable Handle Bars
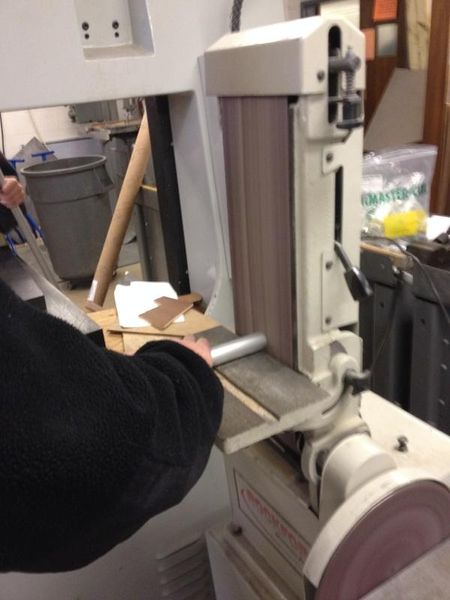
Sanding down the Aluminum Tubing for a smoother finish

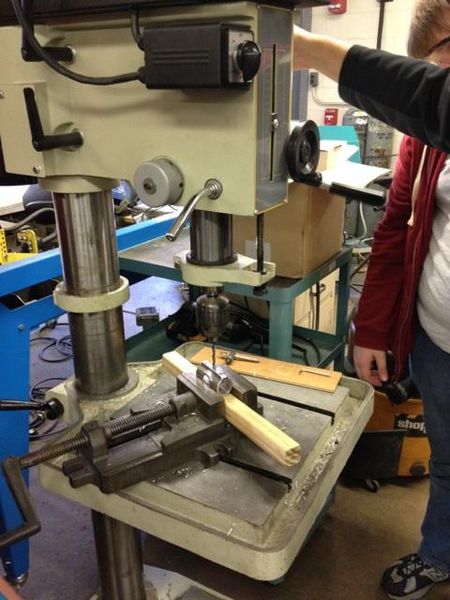
Cutting the Tubing to appropriate size
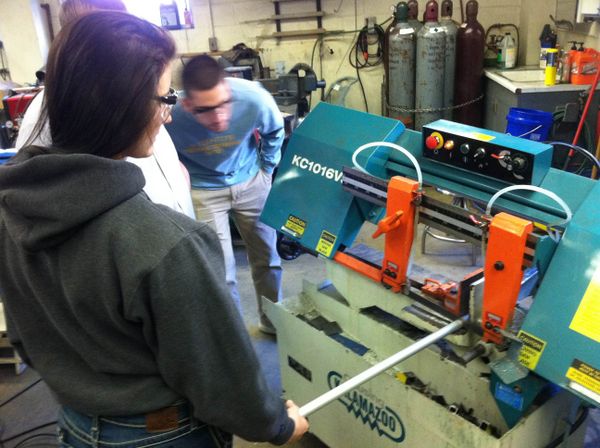
Cutting the Tubing to its appropriate size

Press Drilling the Tubing
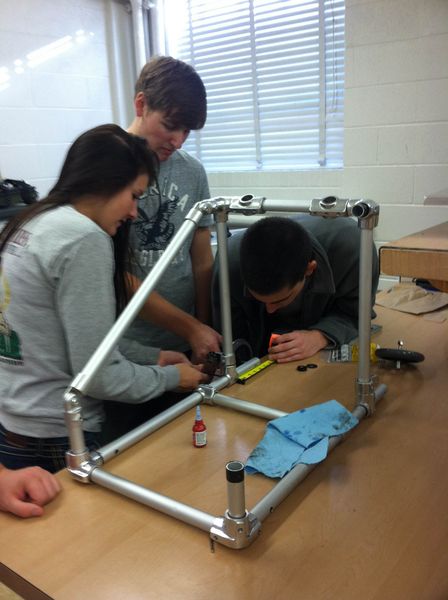
Constructing the Frame of the Walker
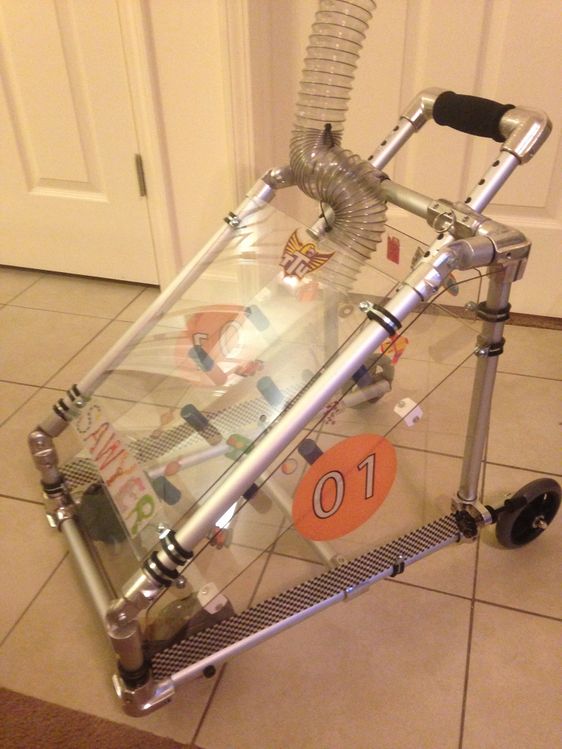
Completed design
The Finished Interactive Walker
Instructions for safe use
1.Only for use under adult supervision. NEVER leave a child unattended.
2.Avoid use in hazardous areas (ie. pools, ledges, staircases, etc.)
3. Avoid putting fingers near wheels. The rubber stopper and wheels can potential pinch fingers and toes.
4. Adjusting wheel resistance and handle bar height should be done only by an adult.
5. Tube is made for balls only, do not place foreign objects in to the ball tube.
Summary and Conclusions
As a team, we created an interactive walker that we think will be of great value to the 2 year old boy who has trouble walking. It will allow him to balance and also learn how to walk around on his own, which will build his muscle development. We also incorporated a squat and reach motion with the ball going though the tube and coming out the front of the walker. This will allow him to reach to his highest point and drop the ball in and then squat down to retrieve the ball as it comes out on the floor in front of the walker. The walker has padding and a firm structure, which will allow him to be safe while using it. It also has adjustable handlebars and a resistance mechanism on the wheels. These two features will allow his mom or whoever to adjust the handlebars has he gets bigger and also to adjust the resistance as his muscles get stronger and his balance improves. We are excited we got to experience a special opportunity to help a young boy out and are looking forward to see him progress in learning how to walk on his own.