Lighted Box for Prone Stander S14
Contents |
Abstract
We are creating a therapeutic light box for the visually impaired kids at Cane Creek Elementary School.
Team members
- Austin Good - Clay Shearer - Jihad Alhijji - Rudy Beaty - Ossam Islam annnnnnndd - Zack Gray
Problem Statement/overview of the need
We plan on purchasing a trace box (with LED lights ) and then modifying it by removing all the electrical "guts" and then constructing our own box based on the dimensions on the stander at Cane Creek Elementary School.
Design Specifications
1. The Light Box needs to be fixed to the desk underneath ( from the sides and also the back by means of straps)
2. It has to be lightweight ( Doesn't exceed 25 lb )
3. It needs rounded edges (fillets) to prevent any type of injuries.
4. Acrylic screen.
5. The light has to be low to moderate brightness to avoid triggering seizures and it has to have a dimmer switch.
6. No need for batteries, but the power cord has to be around 20 ft.
7. It has to be rigidly attached to the desk so it doesn't get pushed off it. (4 total straps)
Conceptual Design
We have developed three designs that each have their own pros and cons.
Design Concept 1
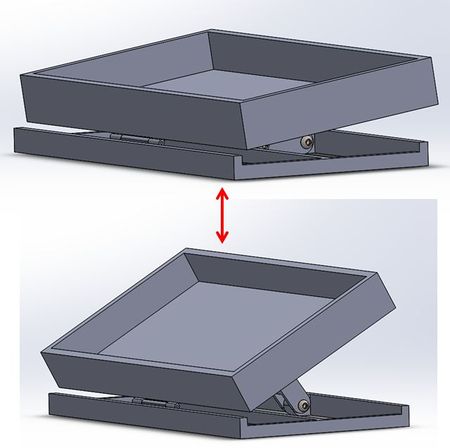
Designed by Clayton A. Shearer
Pros:
-adjustability
-Customer's original request
-Aesthetically pleasing
Cons:
-More complicated design that has more components than necessary
-Less cost efficient
-two piece design
-Pinch points between pieces
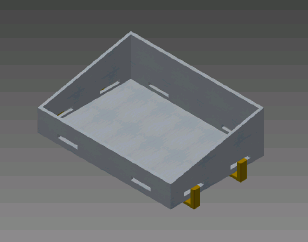
Design Concept 2
Designed by Rudy L. Beaty
Pros:
-Simplistic
-No moving parts
-One piece design
-Lighter weight
Cons:
-No adjustable angle
-Clamps produce stress concentrations
-Only fits one table size
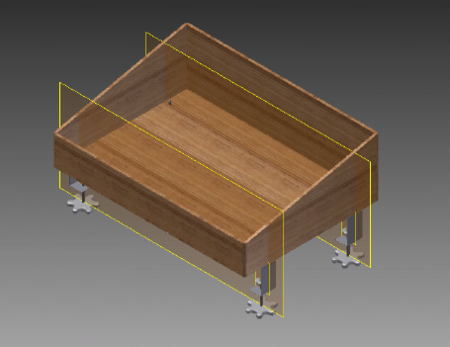
Design Concept 3
Designed by Jehad Alhajji
Pros:
-Easy to transport
-Less stress concentrations
-Can be used for another stand
-Lighter weight design
Cons:
-No adjustable angle
Selection of Design
Based off of an analysis of each design (weighing pros vs. cons for each, a group vote, and client input) we have tentatively selected design concept 3.
Detailed Design
This section will describe a detailed design process
Description of selected design
We have decided to go with the Design number 3 because it includes all the requirements needed in the most efficient way.
Detailed description of selected design
- We are going to modify the light box using plywood.
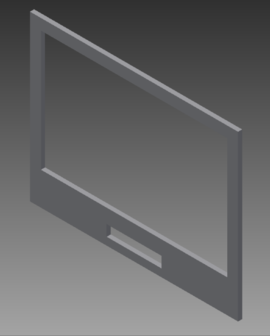
- Our modified box will have an Acrylic screen thats is going to slide in and out using channels on both sides of the light box.
- The light box we ordered will be taken apart and we will outfit the major component on the screen.
- We are going to add another strip of LED lights to the box to provide a brighter light.
- We are going to add a dimmer switch to adjust the lighting when needed.
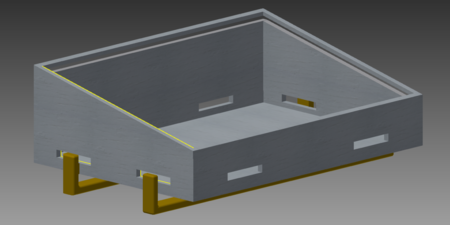
- It will be fixed on the stand using 4 straps crisscrossed to provide better stability.
Analysis
For our three Engineering Analyses we as a group decided to look at the following aspects of our Light Box:
1)Deflection of Acrylic Screen
2)Locking Mechanism of Faceplate
3)Tension of the mounting straps
Engineering Analysis 1
The following is an analysis of the deflection of the Acrylic used in the screen of our Light Box:
Performed by: Zack Gray

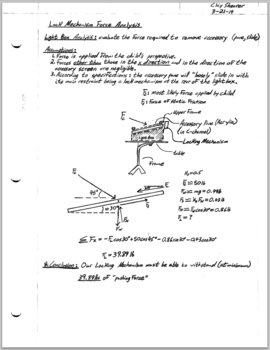
Engineering analysis 2
The following is a Locking Mechanism Analysis:
Performed by: Clay Shearer
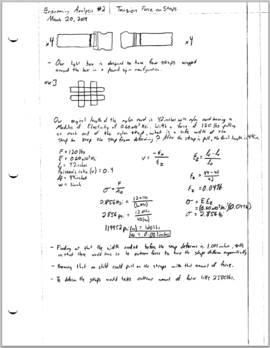
Engineering analysis 3
The following is an analysis of the tension in the straps that mount the Light Box to the stander:
Performed by: Austin Good
CAD Drawings
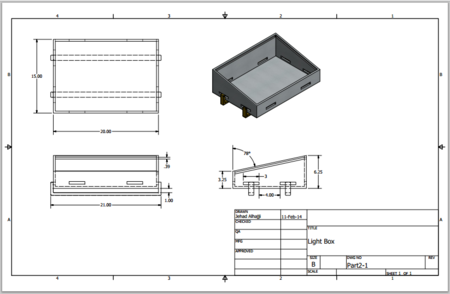
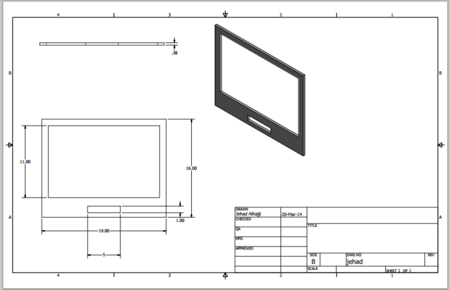
Inventor Drawing of Light Box Shell:
This is the AutoCad Drawing that will serve as our working drawing during construction:
This is the Inventor drawing of the slide-in Faceplate that the Light Box will actually be contained in:
This is the AutoCad drawing that will serve as the working drawing for the Faceplate during construction:
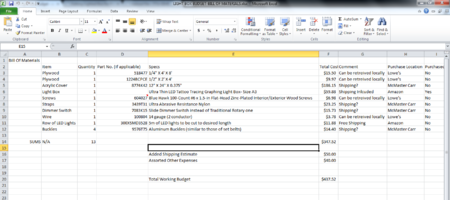
Bill of Materials
The following is our Bill of Materials/Working Budget for this Light Box and Faceplate Assembly
(Contains qty, item, description, source, part number, price)
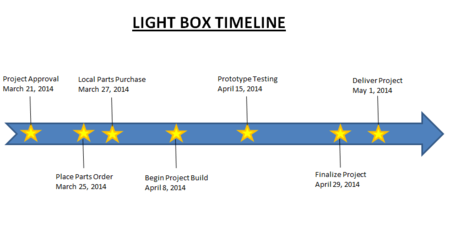
The following is an estimated project timeline from today until the completion of the project:
Assembly Instructions
Our group's assembly process consisted of three major components:
1) Constructing the hull- We had to make the actual box from scratch out of plywood
i) We began by marking up the boards for the bottom and the sides.
ii) We then cut them using a table saw and a radial arm saw.
iii) We pre-drilled holes (to prevent wood splitting), and then attached all the pieces with screws.
iv) We cut out the holes for the switch box and the cord.
v) We cut the pieces for our channels in the box.
vi) We stained the box
2) Wiring all the electronics-
We had to learn how to do all the wiring (None of us are EE's)
i)We began by reading all the specifications for the LED lights.
ii) We found the need for an LED transformer to wire up to the dimmer switch
iii)We utilized the internet to find the specific wiring diagram for our LED transformer
iv) We wired it all up using an AC plug and got the ability to dim the LED lights just as we were wanting to achieve.
v) We established a need for a for a light board to place our rows of LED strips on.
vi) We constructed said board.
3) We put all of this together for the final product (as pictured below in detail)
Fabrication Process
The following are some pictures that highlight part of what we did to fabricate our project:
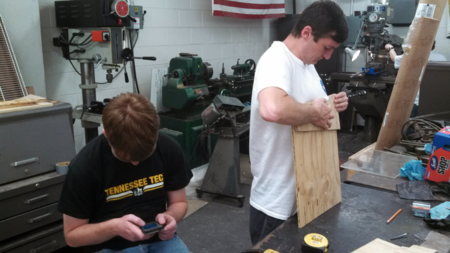
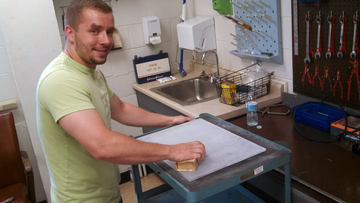
(Above) The picture shows Austin Good and Rudy Beaty as they cut some of pieces for the "hull" of our box
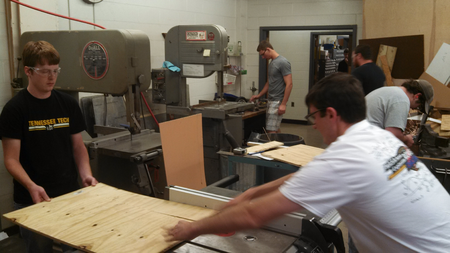
(Above) Another photo of Austin Good and Rudy Beaty cutting the bottom piece of the hull using a table saw.
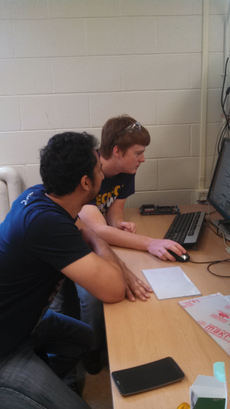
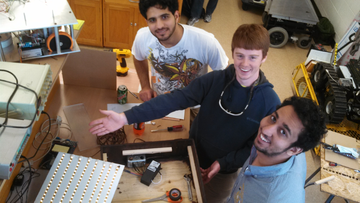
(Above)This is a photo of Austin Good and Ossam Islam using the internet to find a wiring diagram for our dimmer switch/ LED transformer set up.
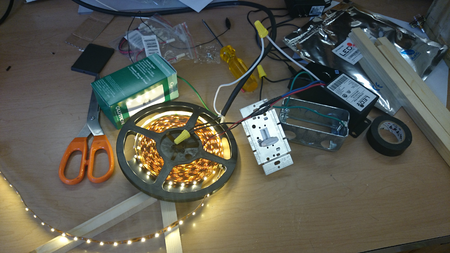
(Above) Picture of part of the wiring set up contained within our box.

(Above) Jehad Alhajji and Rudy Beaty using the milling machine to cut the slots for the straps.
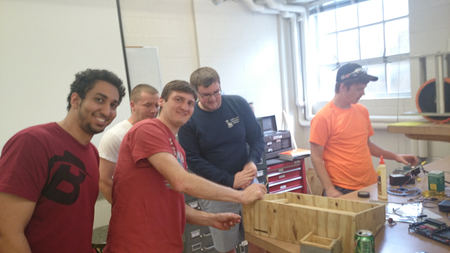
(Above) A photo of our group at about the halfway point of fabrication
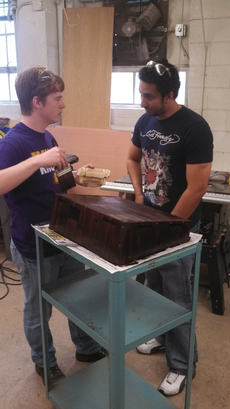
(Above) A photo of Austin Good and Ossam Islam staining the hull of the box with a Red Mahogany stain. The picture looks tense but it was right after a lame joke was told :)
(Above) A photo of our completed strap assembly. We had to sew snaps onto the strap to keep the buckle on one end of the strap, the other end is adjustable.
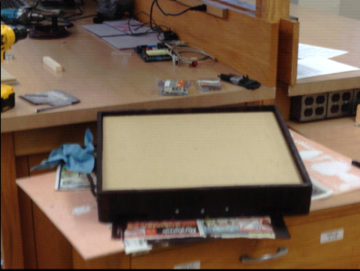
(Above) Picture of the box as it nears completion.
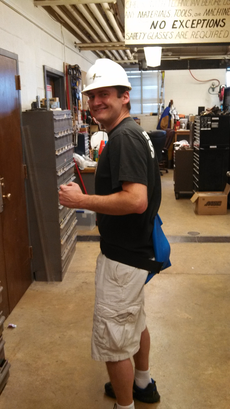
We had a healthy amount of fun in the process :) (Rudy wearing Ramon's Bike seat, at least he's using proper safety!)
Photos of Completed design
The following are a few pictures that depict our finished product:
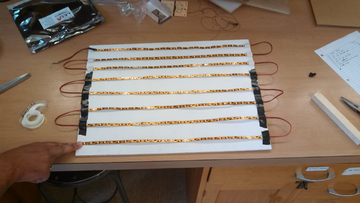
A picture of our panel containing the strips of LED lights contained in our light box. There are 8 total strips were used, approximately 216 total lights on the panel.
We finally got all of our electronic guts set up and placed in their proper place. We (Ossam,Austin, and Jihad) had to take a picture to commemorate this milestone.
Clay Shearer sanding the final piece of acrylic for the screen of our box.
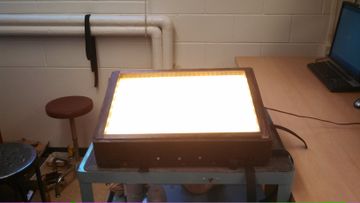
Our completed project!
Instructions for safe use
Begin by unwrapping the cord and carefully plugging into a standard 110 volt wall outlet.
Use dimmer switch to vary the light intensity output from the LED light strips; adjust to desired level for activity.
Feel free to construct puzzles, play games, or partake in other activities on the acrylic screen.
ENJOY THE LIGHT BOX!!
Instructions for Cleaning the screen of the Light Box:
There are two ways that we recommend cleaning the screen of the light box:
1) Use a product similar to Windex and a paper towel or rag and clean the screen.
2) Use a sanitizing cloth to wipe the screen down.
Do not use the device unless supervised by an adult that fully understands the safe and proper use of this product.
Summary and Conclusions
We began this project at the beginning of the semester with honestly no idea of what the light box was, what it would do, and how we would make it. Throughout the course of our project we have learned many things, from mechanical skills, to advanced applications of CAD, and how to apply course materials from Dynamics Of Machinery and others to do engineering analyses to further our project. As with anything that takes a lot of hard work, there are easy times and harder times in a project setting. Through all of this we have accomplished our initial goal and will successfully deliver a product to our client, who we anticipate will be overjoyed upon receiving the completed project.

--Team LightBoxers--