Sensory Playbox
Contents |
Abstract
Niomi is a 2-year-old girl that has a gross delay, hearing, visually impaired, and has some stability issues. She is attracted to bright colors. She is in need of a toy to help her on developing some sensing easily. She needs a sensory play box with various textures, lights, and colors to develop her learning skills.
Team members

From left to right
- Bishoy Basha
- Michael Habib
- Merna Boktor
- Brenden Ragsdale
- John Carson
Problem Statement/overview of the need
- Niomi has a lack of interest with toys. Also, she has issues with her stability and her listening, hearing, sensitivity skills. The ideas is various about how the sensory box will look. How much space we have for the toy? what is progress will be after using it?
- Therefore, she needs a sensory play box that helps her play safe and develop her sensitivity, hearing, and vision more by providing different textures, colors, and lights so she would be able to play safely while working on her development.
Design Specifications
Needs:
- A safe structure
- Lighting
- Music(Bells, rings, etc...)
- Area concern
- Contrasting colors
- Sensory issues
- A stable structure
- Buttons with different texture
- Dark background
Wants
- Easy-disassemble structure
- Something would be used in the future
- Touch screen
Background research
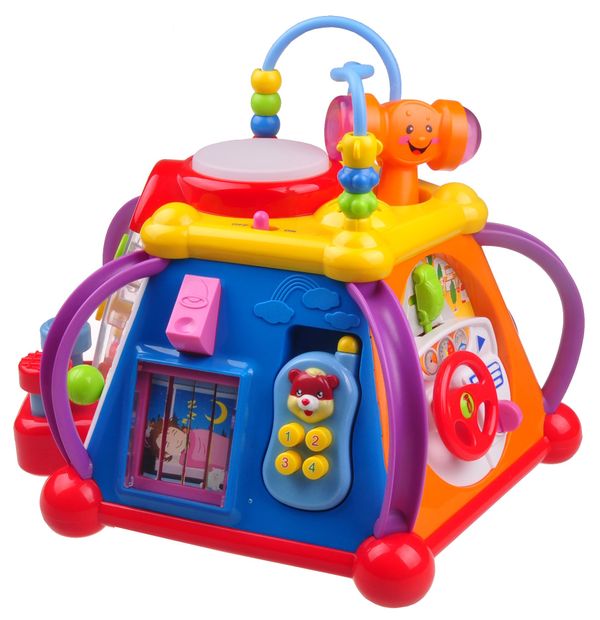
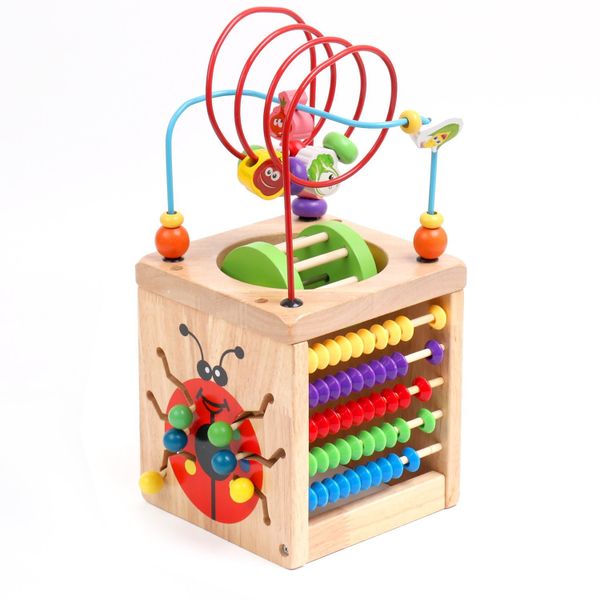
There are a few small designs that already exist. We haven't found any that provide the support she needs. The ones on today's market do not allow for the child to enter into the object; they are purely outer interaction.
Conceptual Design
Design Concept 1
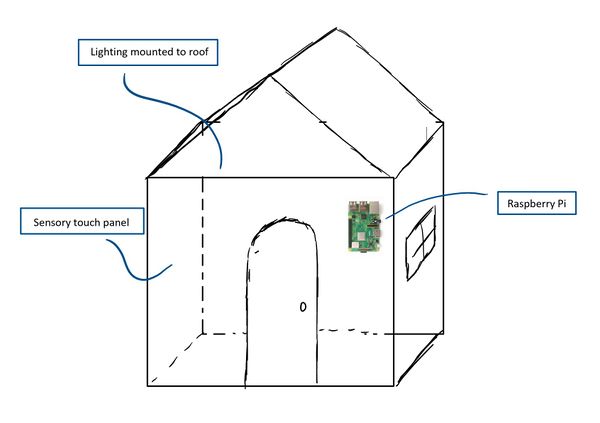
This is a house style concept design. it has a ground of sensors running in the bottom so it would turn on lights and sound when Niomi steps on them so that every step in a specific point has a corresponding light or sound.
It's a design that meets most of the needs or the goals such as contrasting colors, sounds, sensory games, etc... and has the flexibility to assemble it and disassemble it.
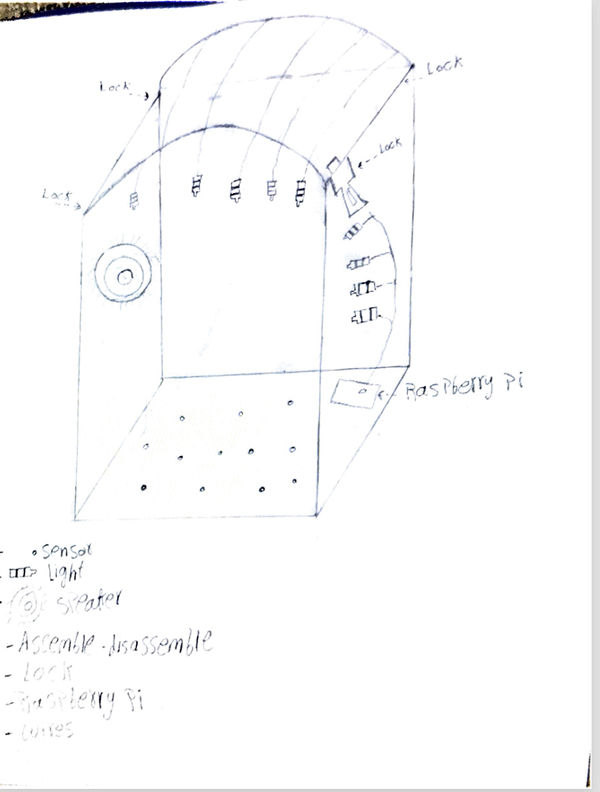
Design Concept 2
Concept 2 is based on a typical house style structure. The wall of the house are hollow allowing for safer routing of wires/sensory to accomodate the Raspberry Pi. Multiple configurations of lights/buttons/etc. will be used and secured to the walls of this structure. Curtains will be added to windows to insure a dark scene inside the house.
Design Concept 3
Concept 3 is also a house style. However, this model is made from a pvc or dowel frame, and the walls are fabric. This concept has the least stability but is the lightest and easiest to store away.
Evaluate concepts/select candidate

Detailed Design
The design will be home with different buttons operated by a computing platform to control the lights needed. The design will fulfill Niomi's need to improve her learning and developing skills. The sensory playhouse design creates the most hands-on educational environment for Niomi. The child-friendly construction of the house was a big concern, and this design will allow for safe play for Niomi. From extensive discussion with Niomi's mother and therapist, the house design will create an inviting environment for Niomi. She will learn basic response behavior with the use of various buttons, switches, bells, and other attributes implemented into the house's interior. Based on her history medical records, Niomi will begin to broaden her sensory mindset with the use of this house through long term use.
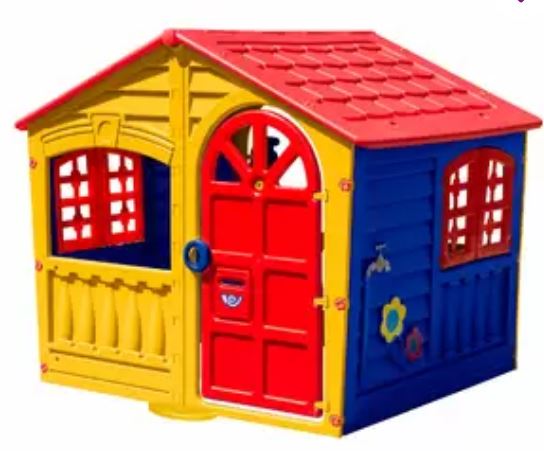
Description of selected design
The design will include a prepared home, a computing platform, cables, lights, bells, and a battery. The home is sold on the market. It is contemporary styling playhouse for toddlers. It is easy to assemble with lightweight. It also easy to relocate. It supports and fosters Niomi’s growing imagination. It house has 2 working doors and 2 windows with opening shutters.
The computing platform will be Arduino Uno. Arduino is an open-source micro controller board. The Arduino will be equipped with sets of digital and alongs of inputs, which will be specific orders to turn on/off the lights, and outputs. It will have a CPU Microchip AVR, 8-bit, Memory of SRAM, and Storage of flashcard.
The battery will be TalentCell rechargeable Lithium battery. it will provide 5 Volts with 12000 mill-amp.
The Lights will be LED strip Lights. It has a length of 16.4 ft and 150 LEDs. Each LED will have different color and brightness. It is easy to installation. It has the Super bright 5050 waterproof flexible LED RGB light strip can be cut in every 3 LEDs. We chose it because it has ling life span, lower consumption and environmental friendly.
we will include 6 single bells with 1 in craft bells bulk., and 5 16 mm push buttons.
Analysis
We decided that in order to meet the safety requirements for our project, we need to have three types of analysis:
- Force Analysis
- Heat Transfer Analysis
- Battery Life Analysis
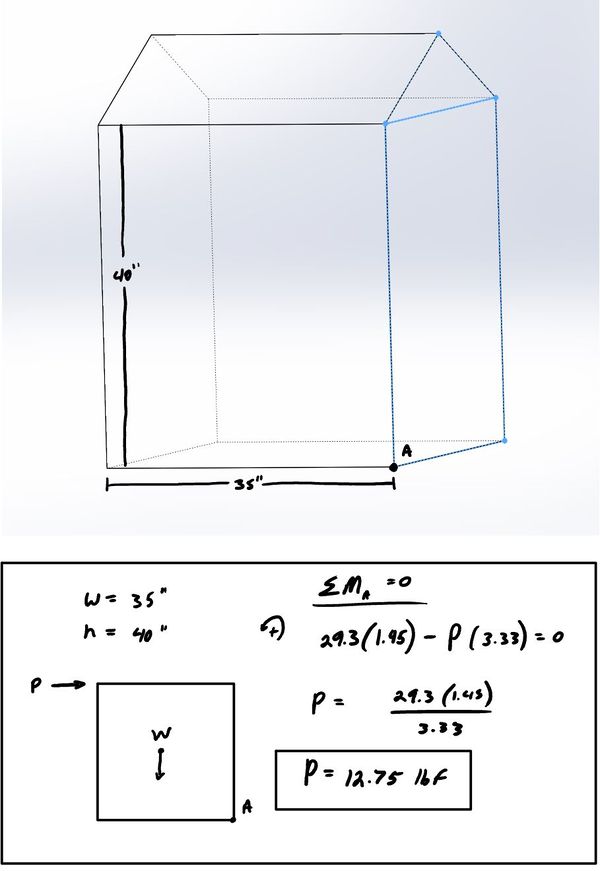
Engineering analysis 1
Niomi's parents expressed a lot of concern in having a sturdy structure, and something Niomi wouldn't be able to knock over like her previous sensory devices.
Engineering analysis 2
Heat Analysis
Safety is our first priority and therefore, we had to ensure that our project is safe enough for Niomi to play with and even more to plan for the unexpected situations. In order to make our project safer and since will will be using lots of electric components such as LED strip, Arduino..etc, we decided that we should do a Heat Analysis where we see how hot will the Arduino will get and how would that impact the house its self.
- The house material: Plastic mostly Polyolefin
- The components need to be analyzed: Arduino, we will not going to analyze the LED strip since we will not use it to its maximum brightness which will not leave any impact on the house:
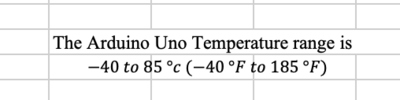
- Since the material is not really specified, we did further our research and we found that most of the toys 97% are made of Polyolefin which can resist up to the following temperature:
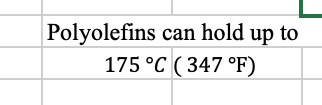
- Therefore, even if we reached the maximum temperature for the Arduino Uno, we still in the range of the allowed temperature for Polyolefin and hence it will not leave any impact on the house.
Engineering analysis 3
Battery Lifetime Analysis
To make our project safer and more convenient for the family we felt it was necessary to make it independent of wall outlets, making it necessary to use a battery pack. We started by determining a minimum constant run time of 5 hours. Then we summed the power required by the system to run. The Ardiuno Uno R3 requires 50 milli-amps and can run on 5 to 12 volts DC without damaging the board. The LED strip requires a power source of 5 volts DC and 1.8 amps per meter at full power, with the project employing 3 meters of the strip. It is, however, unnecessary to run the device at these requirements given the interior dimensions of the house. Even at only a quarter power the LEDs should provide around 200 lumens, which should be more than sufficient. Using the requirements of our system and the minimum run time, we can then calculate the parameters needed for our battery pack. The battery we decided to use was the TalentCell Rechargeable Lithium Ion battery pack which provides 5 volts and 12000 mill-amp hours. We also plan to run real time trails once the mechanism is assembled.
Board Amperage (A_b) : 50*10^-3 A
LEDs Amperage:
Full (A_f): 5.4 A Half (A_h): 2.7 A Quarter (A_q): 1.35 A
Summed Amperage:
A_fb = A_f + A_b = 5.4 + 0.05 = 5.45 A
A_hb = A_h + A_b = 2.7 + 0.05 = 2.75 A
A_qb = A_q + A_b = 1.35 + 0.05 = 1.4 A
Battery Pack Requirements: mAh = A*t
Full: A_fb*t = (5.45 A)*(5 h) = 27.25 Ah = 27250 mAh
Half: A_hb*t = (2.75 A)*(5 h) = 13.75 Ah = 13750 mAh
Quarter: A_qb*t = (1.4 A)*(5 h) = 7 Ah = 7000 mAh
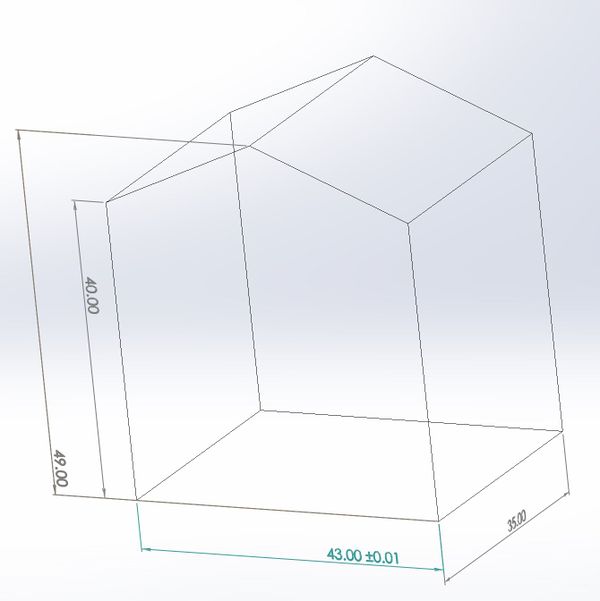
CAD Drawings

Bill of Materials
qty, item, description, source, part number, price

Assembly Instructions
Fabrication Process
Insert pictures of fabrication process
Testing and implementation
Describe testing, delivery, how used/received by the family
Photos of Completed design
Insert pictures of the final product
Instructions for safe use
Provide a clear summary of safe use for the family. Do not use the device unless supervised by an adult that has been fully understood the safe use of this product.