Trampoline S13
Contents |
Abstract
Developing a safe trampoline for children with special needs, 18-36 months old.
Team members
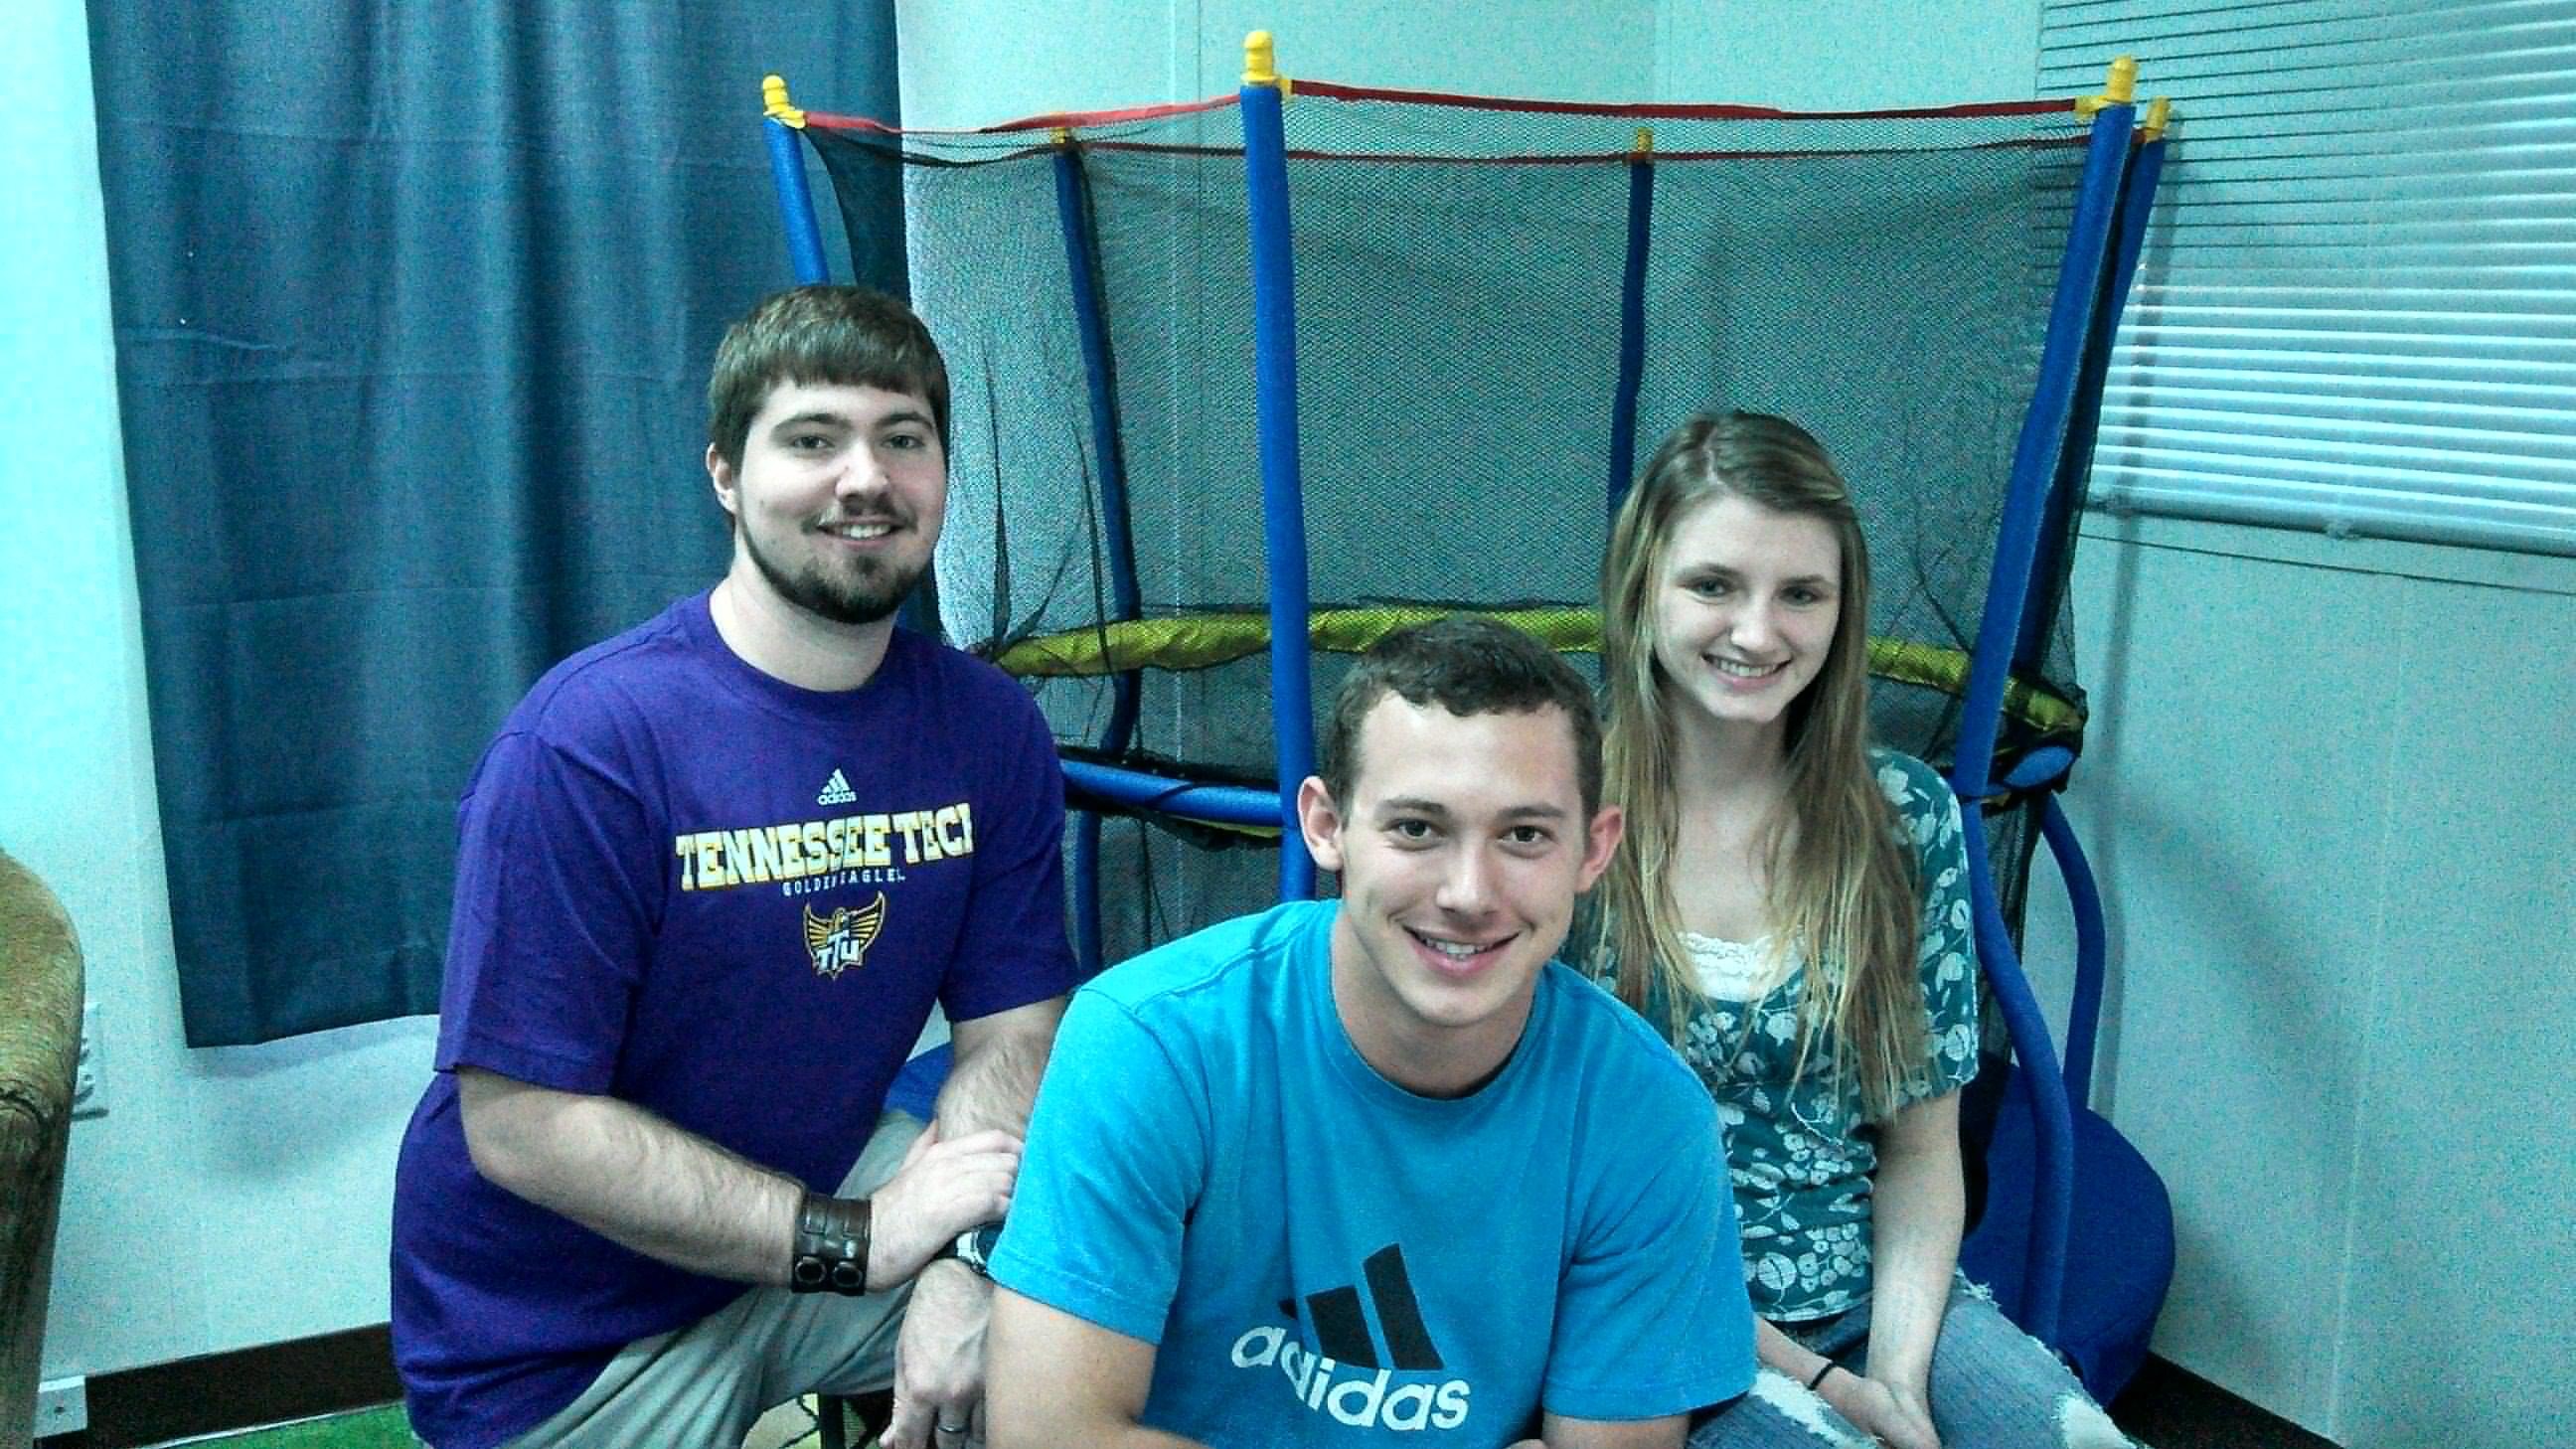
Carolyn Bentley, Nick Mabe, Bret Noel, Heath Phillips, Emily Williams
Introduction
Our group drove to Jamestown, TN to discuss with Ms. "Smith" the details of a trampoline design. We not only were able to see the facility where the trampoline would be used, but we were also fortunate enough to learn the details of all of the children, their disabilities, but more importantly, their abilities. We learned about the program that Ms. "Smith" runs and how her goal is to nurture and treat children with a wide range of disabilities from the age of 18-36 months. Her goal is to simply catch them up to where they should be at 36 months. She is the reason that many children overcome whatever disability they have, and many of them grow up without ever having memory of being behind with a disability holding them back.
Our job is to provide mainly one hyper little boy the means to jump into working off some energy. Literally! Obviously, a trampoline can get that job done! Safety is obviously the number one issue, and our design will be based on that foundation. Making it fun and appealing will come next. We will be meeting with Ms. "Smith" over next few months and will be keeping her informed with every step of the process.
Design Specifications
• Designed for use of one child at a time
• Built off of a standard exercise trampoline ~38 in (circular or rectangular)
• Maximum weight allowed: 200 lbs (heaviest child is 45 lbs); Factor of Safety: 4.44 (VERY HIGH)
• All springs (if any), corners, hard materials, etc., will be covered in foam or some soft material
• Indoor/outdoor use
• Easily taken apart for ease of transportation
• Net will be implemented
• Safe enough to accommodate the wear and tear from many years of play
Conceptual Design
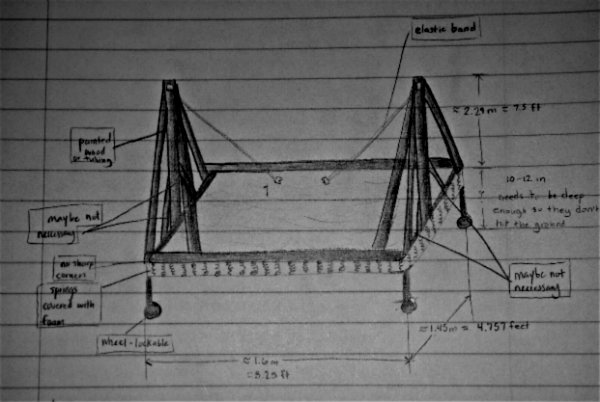
Trampoline with Harness
Features:
1. made of aluminum tubing
2. rectangular trampoline shape
3. chest harness
4. bungee cords for controlling height of jumping
Trampoline With Harness 2
Features:
1. made of aluminum tubing
2. circular trampoline shape
3. chest harness
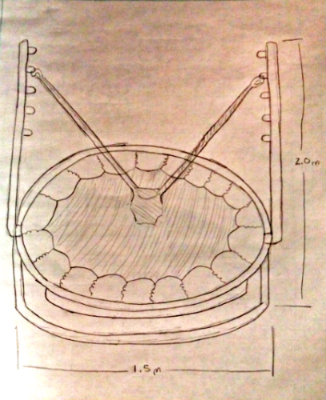
Trampoline with Net/Holding Bar
Features:
1. made of aluminum tubing
2. circular trampoline shape
3. holding-bar covered in soft material
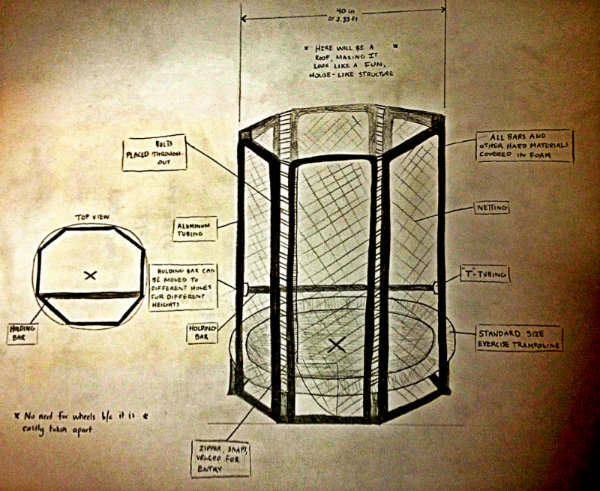
Bounce House
Design Specifications
• Designed for use of one child at a time • Maximum weight allowed: 100 lbs (heaviest child is 45 lbs); • All corners, hard materials, etc., will be covered in soft material • Indoor/outdoor use • Easily taken apart for ease of transportation
Pros: Made of durable but relatively soft vinyl. Highly Portable Useful indoors or out doors. Doesn't take up space permanently Tall side protection to prevent falling out of Comes with a repair kit
Cons: Inherently dangerous due to the nature of the activity. Requires electricity for air pump
This design recommends the bounce house sold by Kohls (Blast Zone® Magic Castle Inflatable Bounce House.) The construction materials themselves make this more safe than a trampoline could ever be without serious modification outside the scope of this project. Most injuries occur during collisions between children, entering, and exiting the structure. This particular bounce house targets entering and exiting issues with a ramp to assist children. This particular Bounce house also comes with a repair kit, which satisfies some issues with maintenance voiced by the client.
- Injury Chance Assessment Kohl's Bounce House
| Part/Injury | Leg | Arm | Fingers/Toes | Head | Hair | Clothing |
|---|---|---|---|---|---|---|
| Friction Burns | 7 | 7 | 0 | 0 | 0 | 0 |
| Netting | 0 | 0 | 4 | 0 | 3 | 0 |
| Ramp | 2 | 2 | 4 | 0 | 0 | 0 |
| Categorical total | 9 | 9 | 8 | 0 | 3 | 0 |
| Total | 29 |
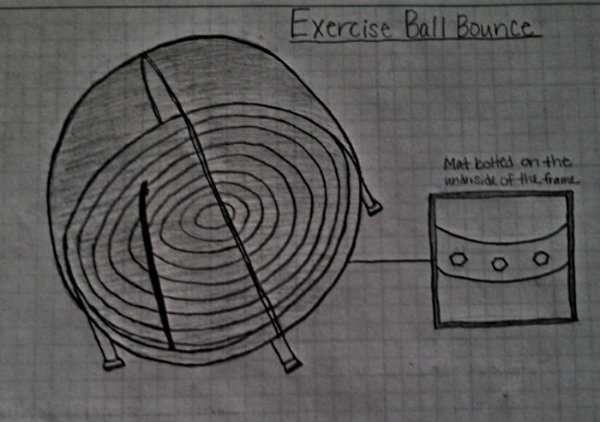
Exercise Ball Bounce
Features:
1. Mat made of exercise ball material
2. Standard mini-trampoline frame
3. Lightweight, bendable metal poles to hold netting enclosure
4. Mesh type netting
Pros:
Spring-less trampoline,
No holes in netting for fingers to get caught in,
Fully enclosed to prevent falling out,
Durable
Cons: Difficult to take apart, Not intended for use outside
- Injury Chance Assessment: Exercise Ball Bounce
| Part/Injury | Leg | Arm | Fingers/Toes | Head | Hair | Clothing |
|---|---|---|---|---|---|---|
| Friction Burns | 7 | 7 | 0 | 0 | 0 | 0 |
| Netting | 0 | 0 | 0 | 0 | 0 | 0 |
| Categorical total | 7 | 7 | 0 | 0 | 0 | 0 |
| Total | 14 |
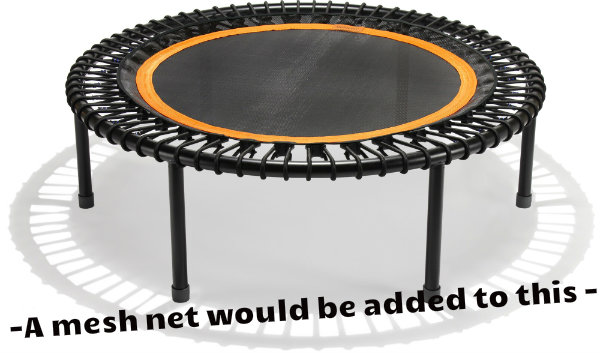
Bellicon Rebounder with Added Net
Features:
1. Steel frame
2. Highly elastic mat (polypropylene)
3. 5 year warranty
4. Bungee cords instead of springs
5. Mesh type netting
Pros: Spring-less trampoline, No holes in netting for fingers to get caught in, Fully enclosed to prevent falling out, Durable
Cons: Takes some time to take apart, Not intended for use outside
- Injury Chance Assessment: Bellicon Rebounder with Added Net
| Part/Injury | Leg | Arm | Fingers/Toes | Head | Hair | Clothing |
|---|---|---|---|---|---|---|
| Friction Burns | 7 | 7 | 0 | 0 | 0 | 0 |
| Netting | 0 | 0 | 0 | 0 | 0 | 0 |
| Categorical total | 7 | 7 | 0 | 0 | 0 | 0 |
| Total | 14 |
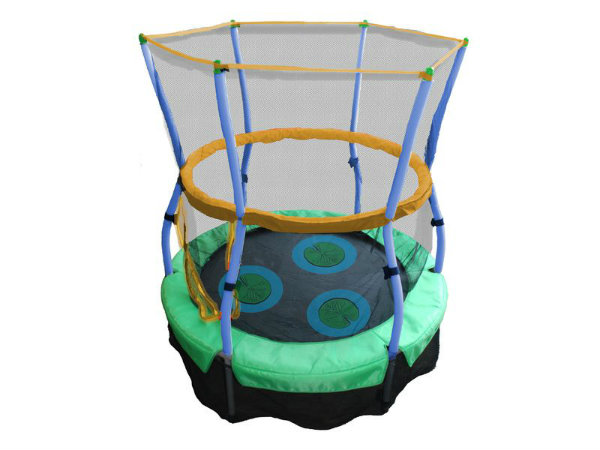
Skywalker Bounce-N-Learn
Features:
1. Interactive sound jump mat
2. Safety support handle
3. Enclosure door
4. Safety enclosure
5. Lower enclosure netting
6. No spring bounce
7. Interactive sound on/off switch
8. UV protected
Pros: Spring-less trampoline, No holes in netting for fingers to get caught in, Fully enclosed to prevent falling out, Durable
Cons: Takes some time to take apart
- Injury Chance Assessment Skywalker Bounce-N-Learn
| Part/Injury | Leg | Arm | Fingers/Toes | Head | Hair | Clothing |
|---|---|---|---|---|---|---|
| Friction Burns | 7 | 7 | 0 | 0 | 0 | 0 |
| Frame | 0 | 0 | 0 | 0 | 0 | 0 |
| Categorical total | 7 | 7 | 0 | 0 | 0 | 0 |
| Total | 14 |
Detailed Design
After analyzing all of our preliminary designs, our best option is one that already exists. It meets every design specification that we had high hopes to meet, and it is affordable. Our project was difficult in the sense that building something from scratch could never be as safe as something that is already on the market and has passed many safety regulations. Our plan is to order this product and proceed to analyze its features, and if anything seems below par, we will have the means to improve it. As of right now, we do not see the product's downsides. Everything we have read and seen about it tells us that there is not much to improve on.
Updated Final Design: After putting this product together and having it tested by one of the children, we found that a set of stairs would be an ideal addition. We were able to find a set of extremely soft but sturdy stairs made for the use of pets, which works weight-wise for very young children. Ms. "Smith" also requested that we constructed some sort of side barriers so that the children could not fall of the side of the stairs. We were able to order soft blocks that were high enough to place on each side of the stairs and ensure that the children could not fall off. There are attached to the sides of the stairs with velcro strips, chosen for easy access for the user to take apart if he/she chooses, but permanent enough that a young child could not deconstruct.
Description of selected design
1. Support Handle
2. Enclosure Door
3. Enclosure Netting (Fine Knit)
4. Lower Enclosure Netting
5. Springless
6. Interactive Sound Mat with ON/OFF switch
7. Indoor/Outdoor Use
8. Addition of Soft Stairs
9. Addition of Barriers
10. Portable
Detailed description of selected design
1. Support Handle: This feature allows for the use of small children. They are able to hold on to the 360 degree bar without the possibility of colliding with it and being injured for it is padded and is very safe.
2. Enclosure Door: This feature creates a safe environment where the child cannot reach the zipper from the inside. It can only be accessed by an adult from the outside.
3. Enclosure Netting: This fine knit netting allows the children to bounce into the side without getting their fingers caught in anything while keeping them within the parameters of the trampoline's safe zone. Also, there are NO gaps at all, meaning that not even a finger could get through.
4. Lower Enclosure Netting: This unique feature prevents the children from crawling underneath the trampoline, assuring it will not harm the children in any way.
5. Springless: Probably the most important feature, the fact that this trampoline design is springless is what sets this apart from the rest of child mini trampolines. We did our research and springless trampolines are very much safer than the generic design implementing springs.
6. Interactive Sound Mat with ON/OFF Switch: This fun feature is actually more useful than it may appear. These children need to know this trampoline is for fun, not a time-out enclosure! They are very weary around strange objects, and this noise activation as they bounce is just what they need to feel more comfortable.
7. Indoor/Outdoor Use: The materials are all UV ray protected and can last in almost any weather environment. Our client wants to be able to take it outdoors when it's nice, and that is very doable because it's not only weather resistant, but it's portable and can be broken down into parts.
8. Addition of Stairs: Soft stairs for the use of the children to learn how to climb and be independent while also remaining safe.
9. Addition of Stair Barriers: Soft barriers to ensure that the children cannot fall off of the stairs.
10. Portable: Again, this certain model is designed to be taken apart and put back together to put into storage or to move to a different destination.
Analsyis
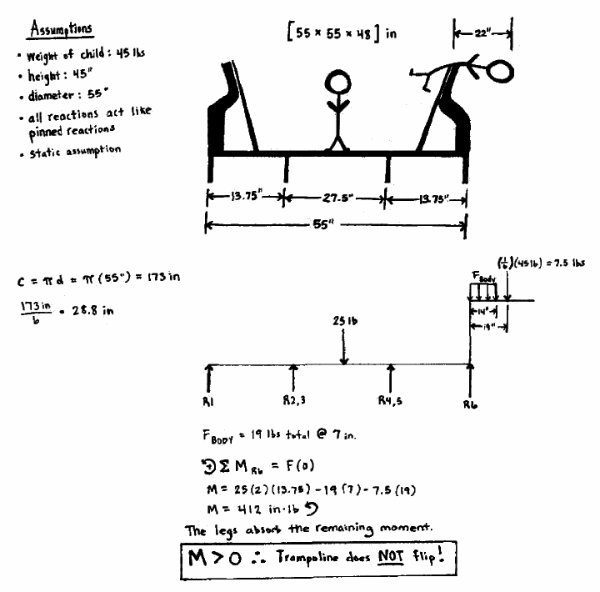
Engineering analysis 1
We analyzed the effect of a 45 lb child trying to jump out of said trampoline enclosure using static equations. The conclusion was that the child would NOT cause the trampoline to tip over.
Engineering analysis 2
We assumed that the elastic bands acted similarly to springs in the aspect of calculating the force distributed to each of the 6 feet of the trampoline and to each of the 32 elastic bands.

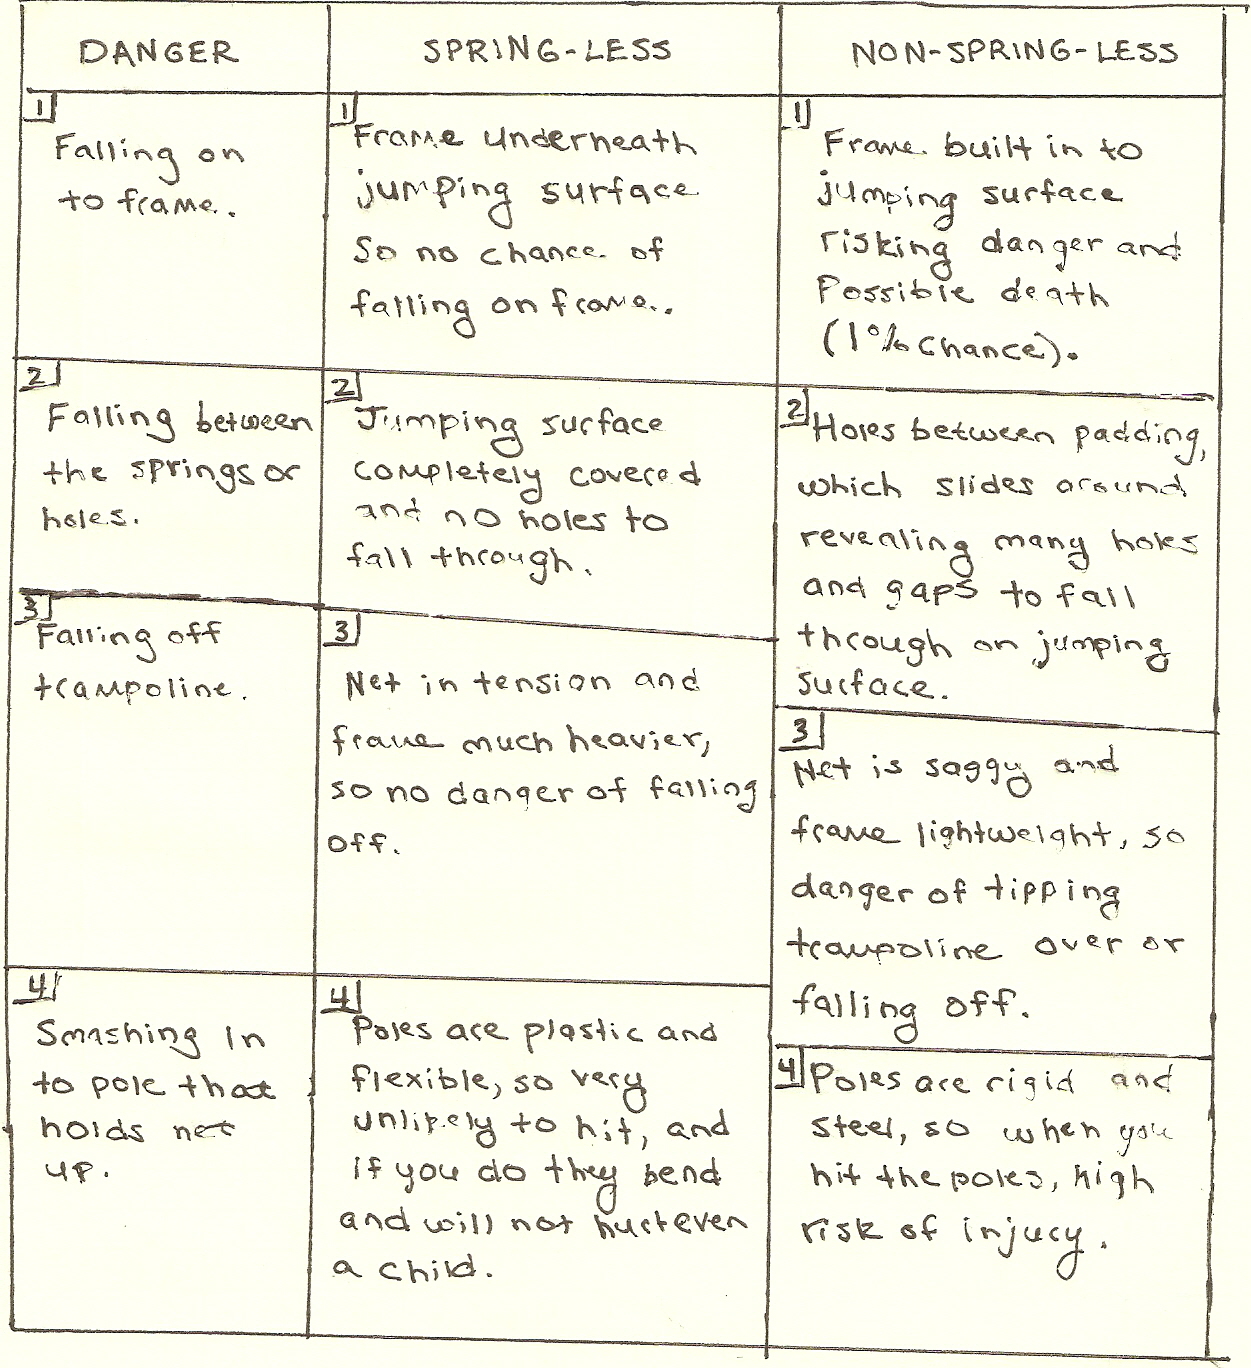
Engineering analysis 3
For the third analysis, we are comparing the dangers of a spring-less trampoline and a non-spring-less trampoline via comparison table. As seen from the qualitative information gathered from each type of trampoline, we have concluded that the spring-less trampoline is much more safe.
CAD Drawings
Below is an Exploded Drawing and Parts List, along with a general CAD drawing.


 - GENERAL CAD DRAWING
Note: The exploded drawing and parts lists are direct images from the Skywalker Bounce and Learn owners manual.
Bill of Materials
- Bill of Materials
| Item | Individual Price | Quantity | Item Total | |||
|---|---|---|---|---|---|---|
| Skywalker Bounce-N-Learn Trampoline, 55in | $79 | 2 | $158 | |||
| Foam Barriers (blocks), 20in | $53 | 4 | $212 | |||
| Foam Tubes (cover outer rim) | $2 | 5 | $10 | |||
| Velcro Strip Rolls | $16 | 2 | $32 | |||
| Stairs | $70 | 2 | $140 | |||
| Grand Total: | $552 |
Assembly Instructions
1. Lay two frames on the ground. Insert one end of frame into the end of the other frame. Repeat this step until six frame sections are connected.
Note: Make sure the frame is turned so the big diameter tube is facing the ground.
2. Attach the mat and frame by the first Elastic with ball. After attaching the first Elastic with ball, count exactly 5 strap loops in a clockwise direction, attach a second Elastic with ball to the strap loop and frame at this point. Count 5 strap loops in a clockwise direction and attach a third Elastic with ball. Count 5 strap loops in a clockwise direction and attach a fourth Elastic with ball. Count 6 strap loops in a clockwise direction and attach a fifth Elastic with ball. Count 6 strap loops in a clockwise direction and attach a sixth Elastic with ball. Continue to attach the remaining Elastic with ball between previously attached Elastic, until all Elastics are attached.
Note: If the mat is not in the middle of the frame, spend some time adjusting the first elastic ball by pulling the third elastic ball.
3. Tighten the six legs onto the six mounts on the frame. Repeat this process to assemble the rest of the legs to the frame by the same manner.
4. Lay the pad with net on the frame. Adjust the position of the pad so that the slits are directly above the legs.
Note: Make sure to align the strap in the middle of the enclosure door so that the bars are not going to be in the way.
5. Insert the curved tube into the foam. Insert the bottom of curved tube with foam into the T-joint of the frame. Repeat this step to assemble five more curved tubes.
6. Insert rail into the long foam. Insert the small) end of a rail into the big end of another tube by small tube of the curved tube. Repeat this assembly steps until 6 rails will be completed.
7. Hold the pole cap close to a curved tube with foam. Insert the pole cap though one strap ring on the top of the
8. Tie one end of the string to the curved tube, and pull the string through net edge and trampoline.
9. Attach the sound box to the wiring underneath the jumping surface. Be sure to insert the 2 AA batteries before use.
Note: This is an edited version of the Skywalker Bounce and Learn's assembly instructions.
Fabrication Process
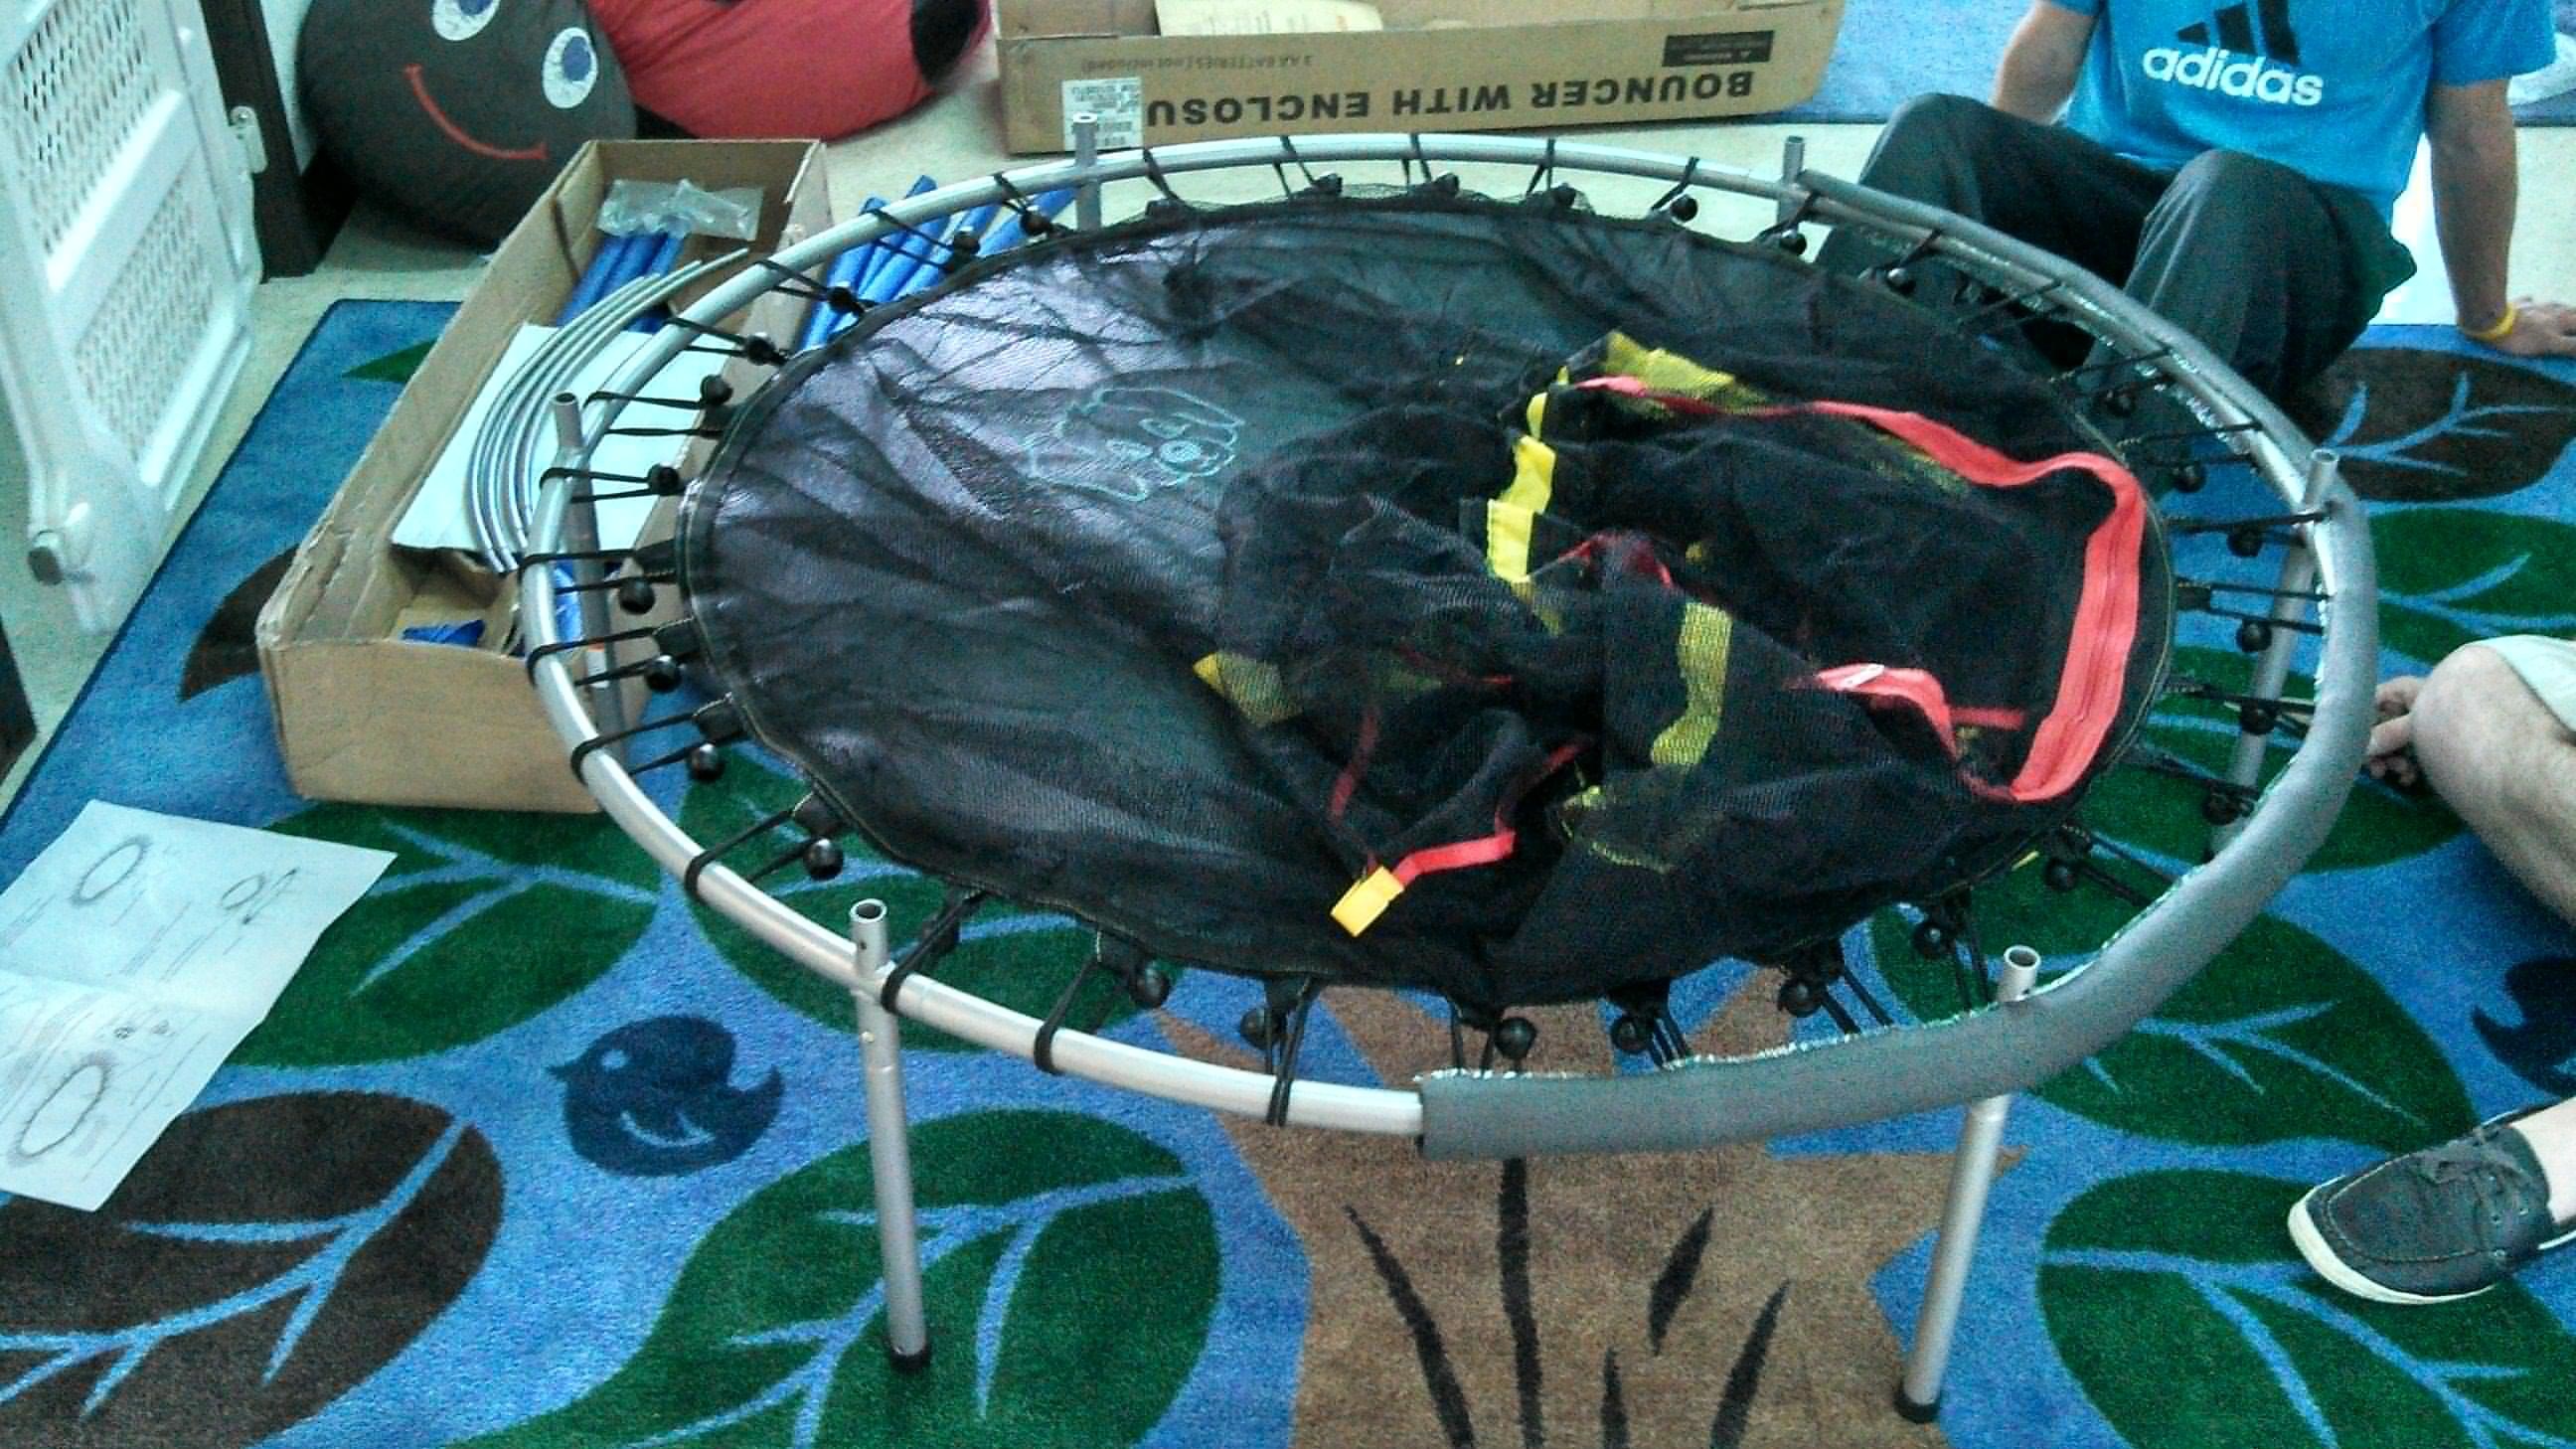
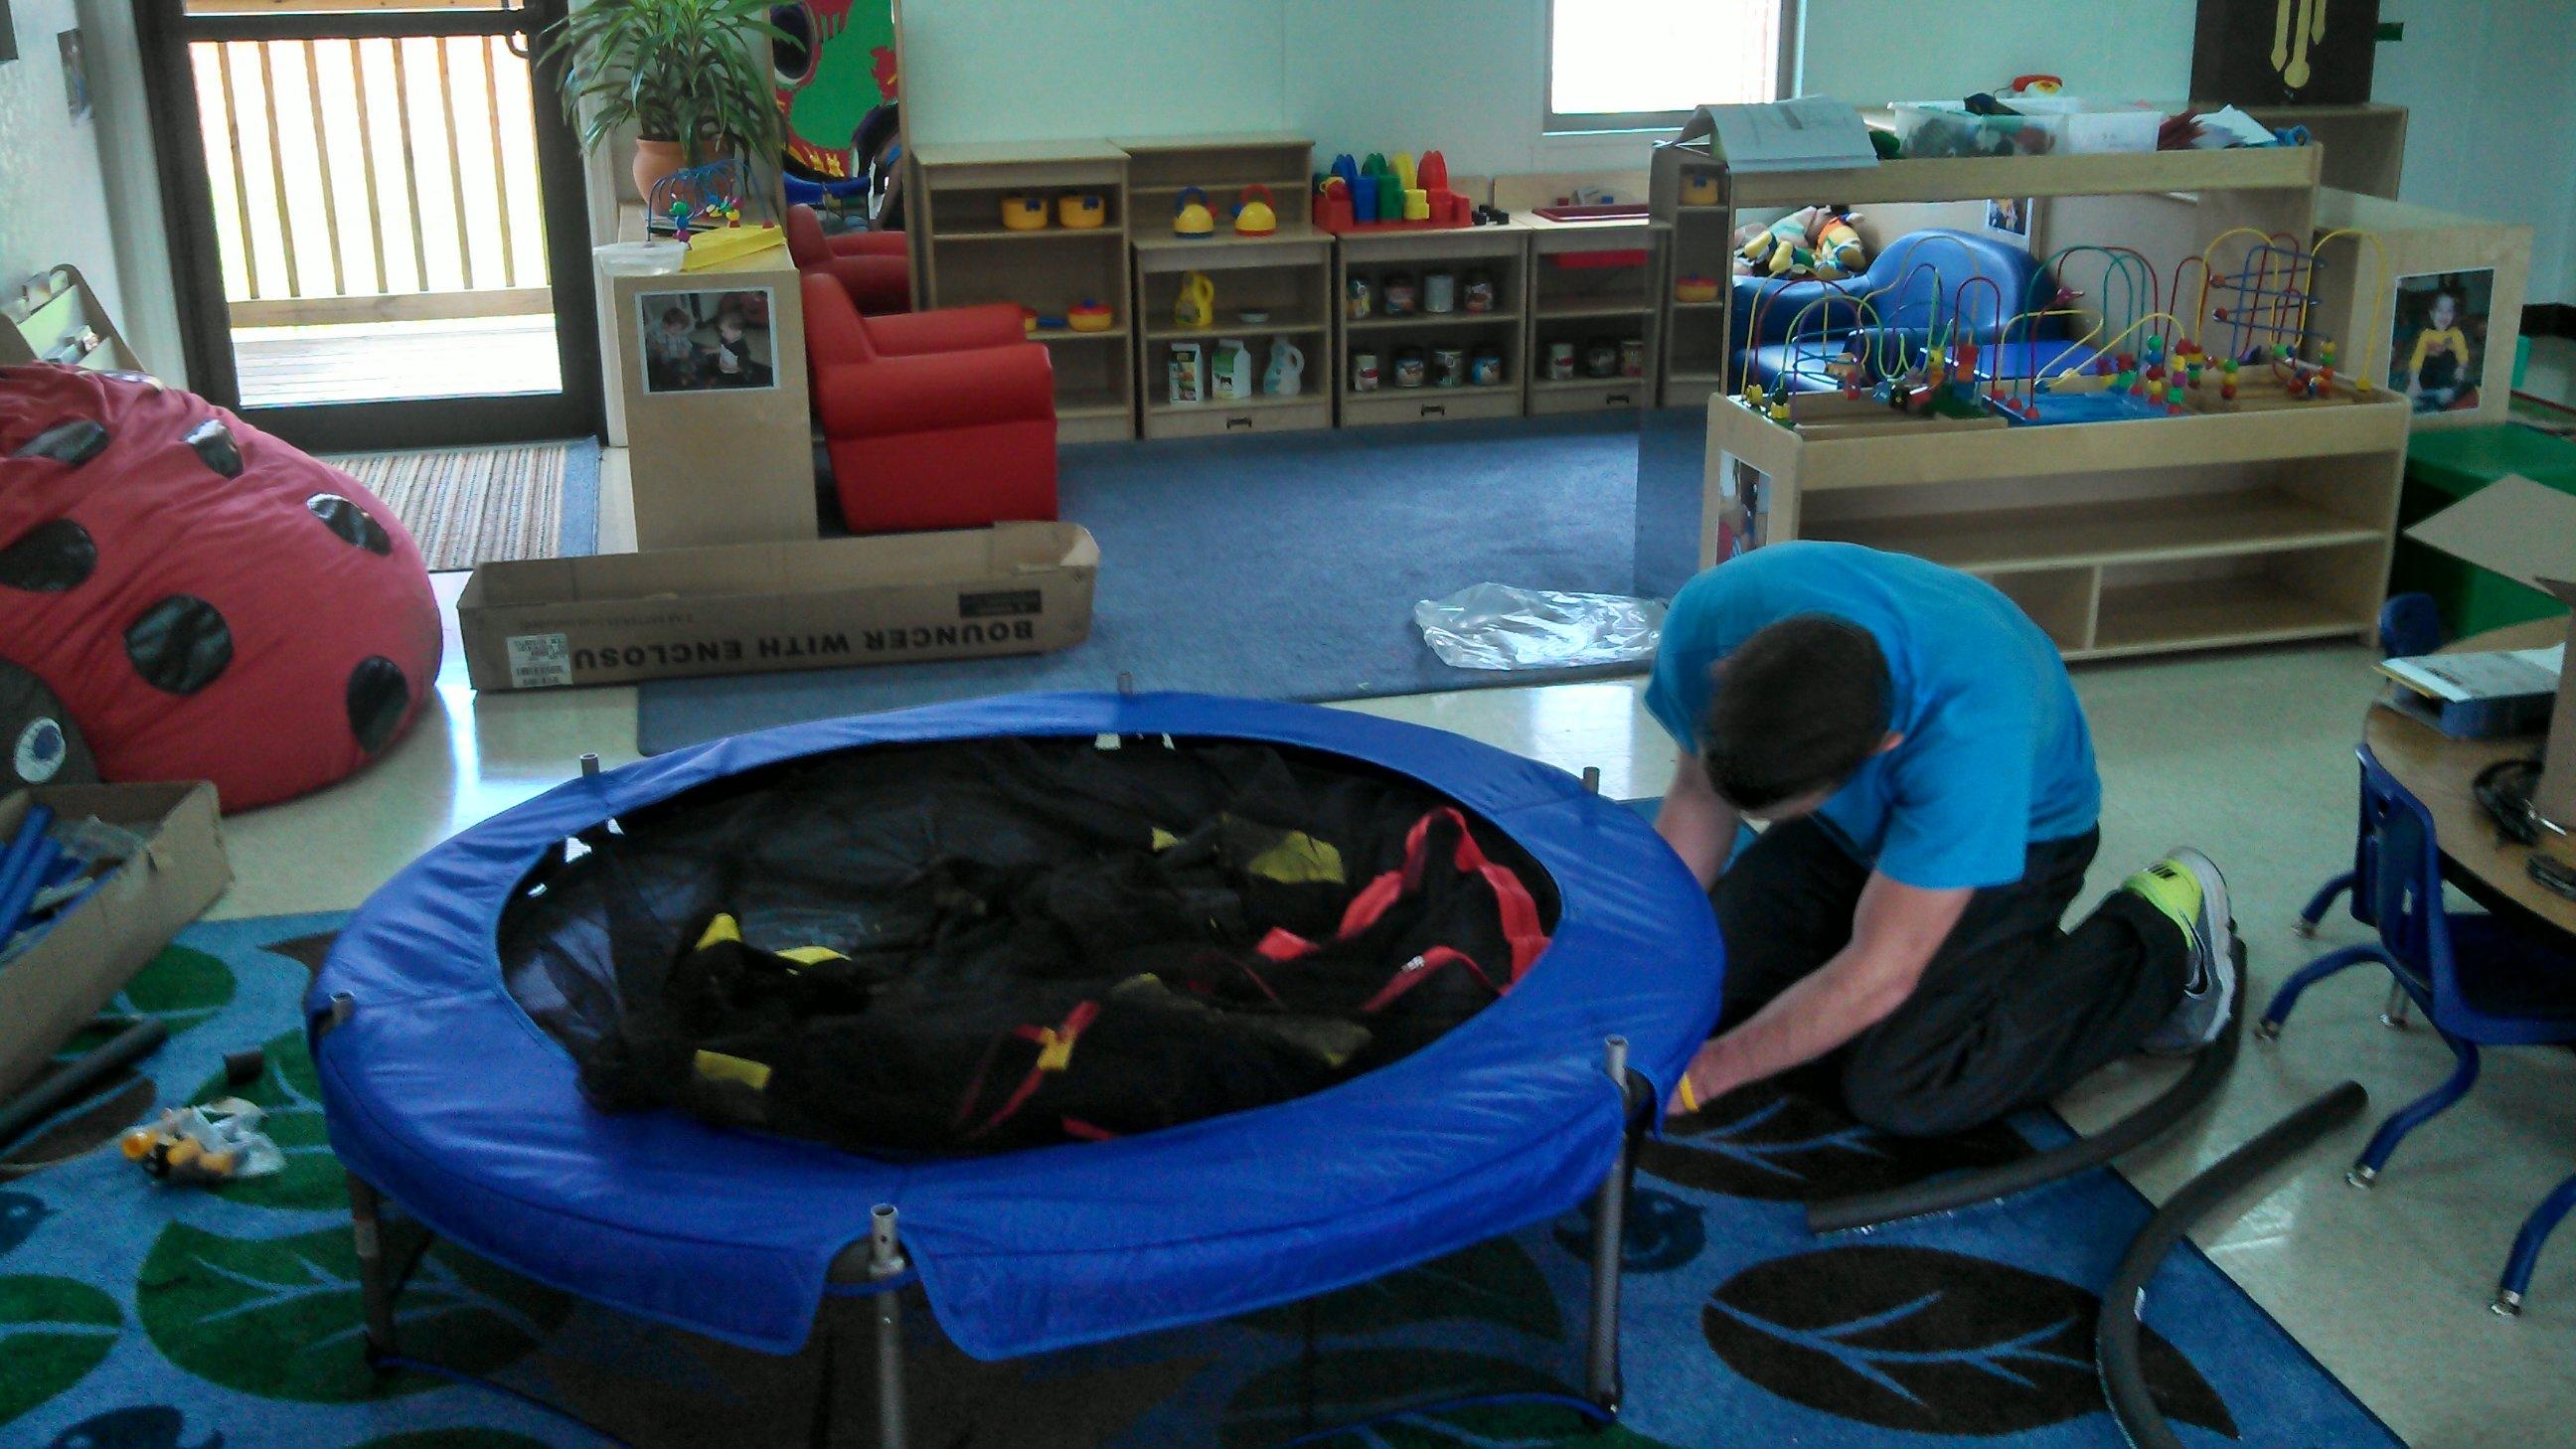
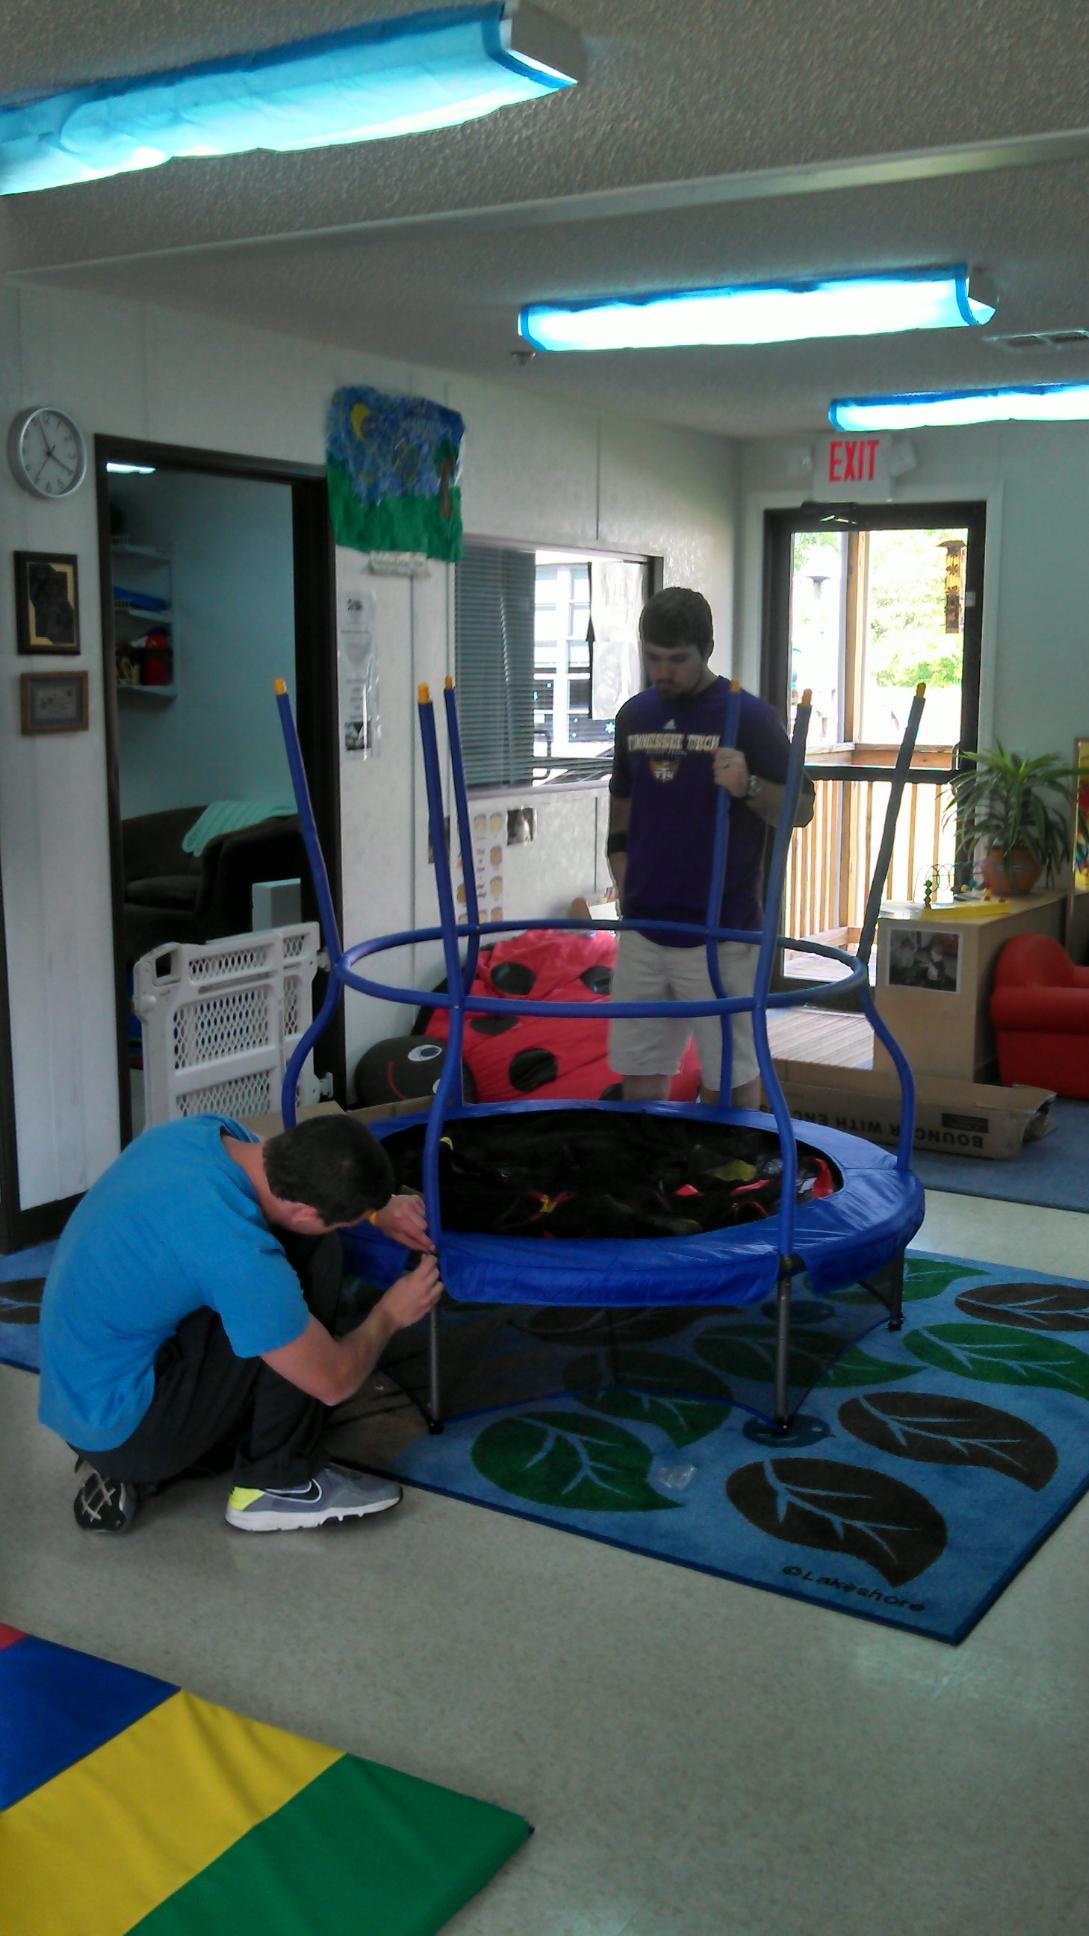
Completed design
Insert pictures of the final product
Summary and Conclusions
For a project so heavily weighted on safety issues, we found that our best option was to find what was already on the market and alter it to meet our family's specific needs, which included the addition of stairs and stair barriers. We and our customer are 100% confident in the safety and usefulness of the project that we undertook.